practical operation tutorial: trigger a real smart socket on the internet
Video tutorial: https://www.youtube.com/watch?v=aDzJzsjnjIw
Remotely controlling third-party devices is a very cool feature of IAMMETER-cloud.
For example, you can switch on the smart socket when the reading of solar generation on IAMMETER-cloud is larger than a preset value, to help you improve the self-consumption rate of your solar PV system.
In order to better introduce this feature, we have installed an open-source smart socket in our office and set it public on the Internet. This tutorial will teach you to control this real smart socket plug (pre-flashed with the Tasmota open-source firmware) online.
Control the smart socket directly
Before you control the smart socket from IAMMETER-cloud, you can try to control the smart socket directly to confirm the connectivity firstly.
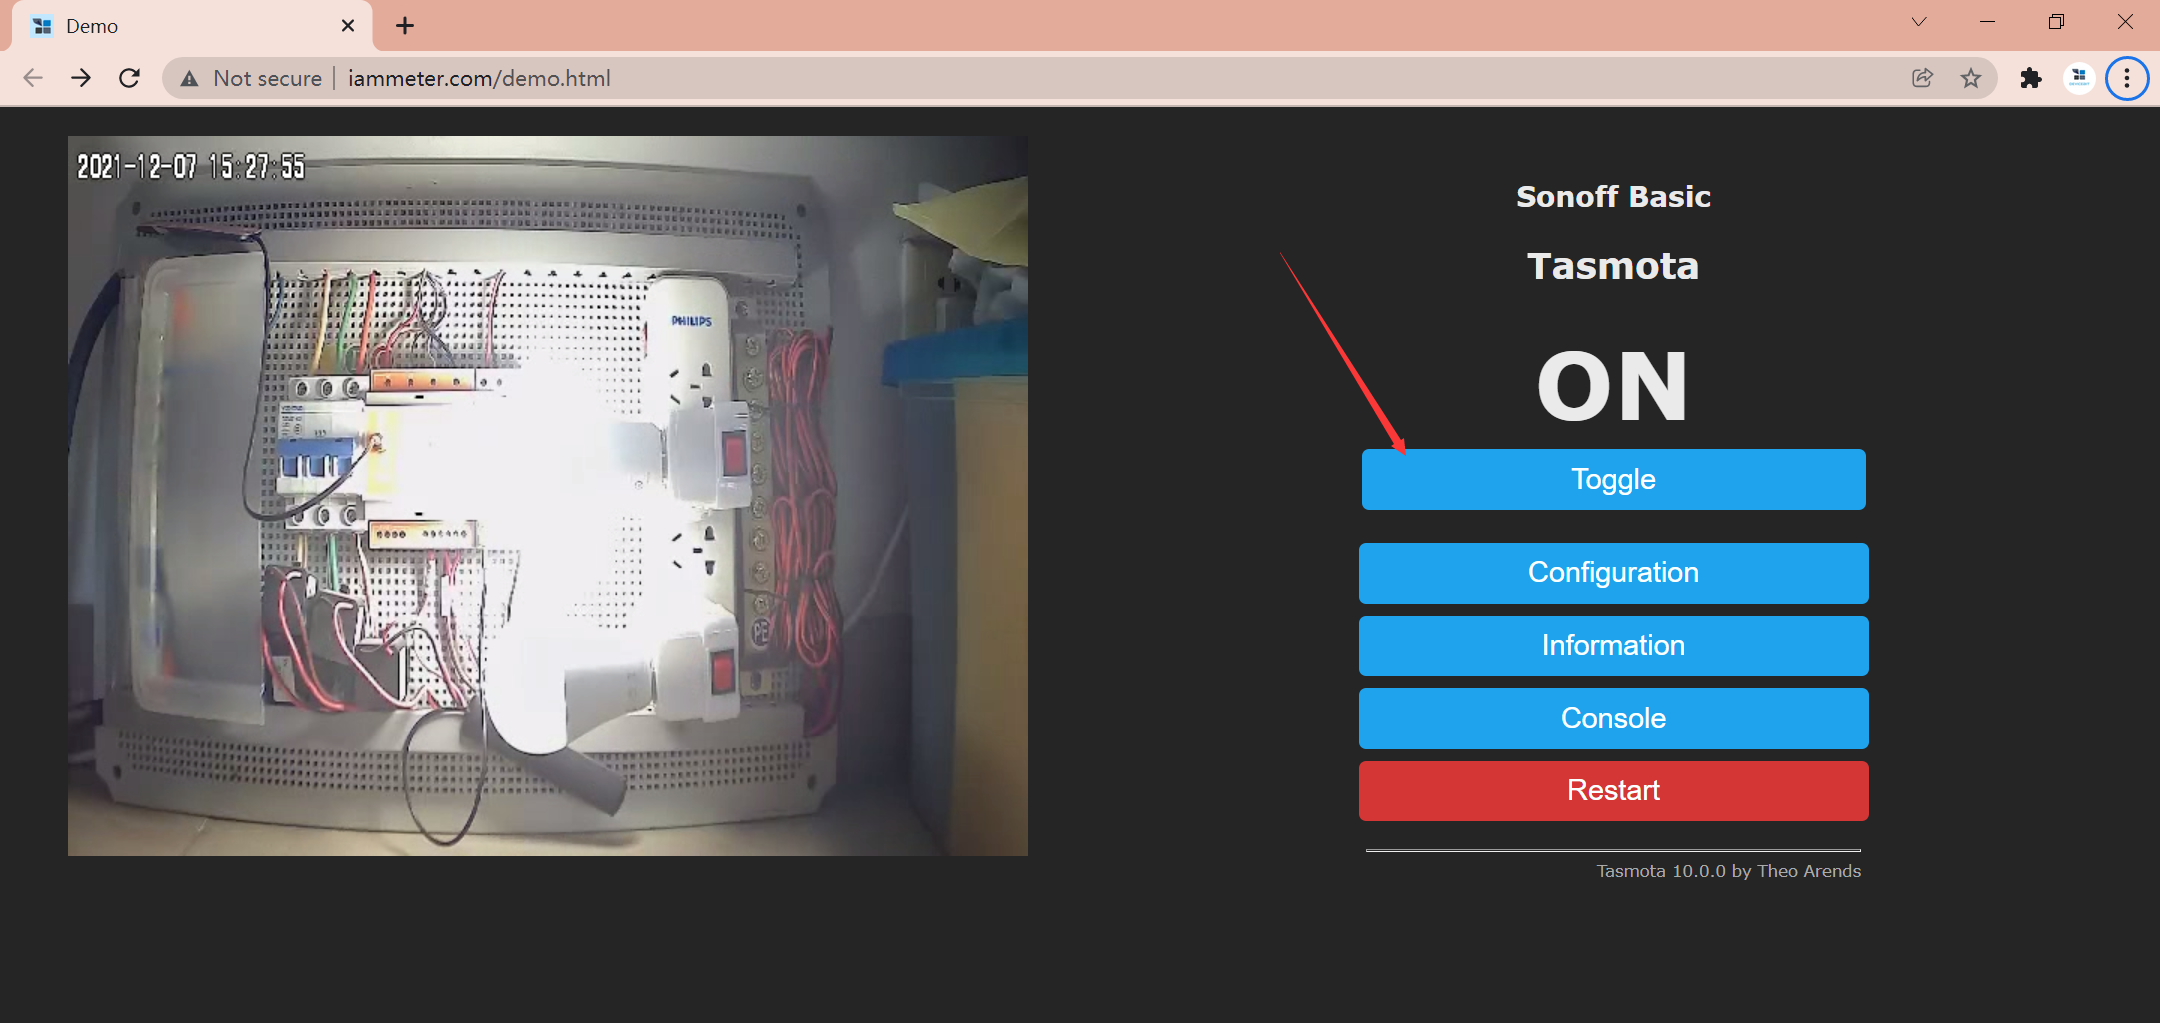
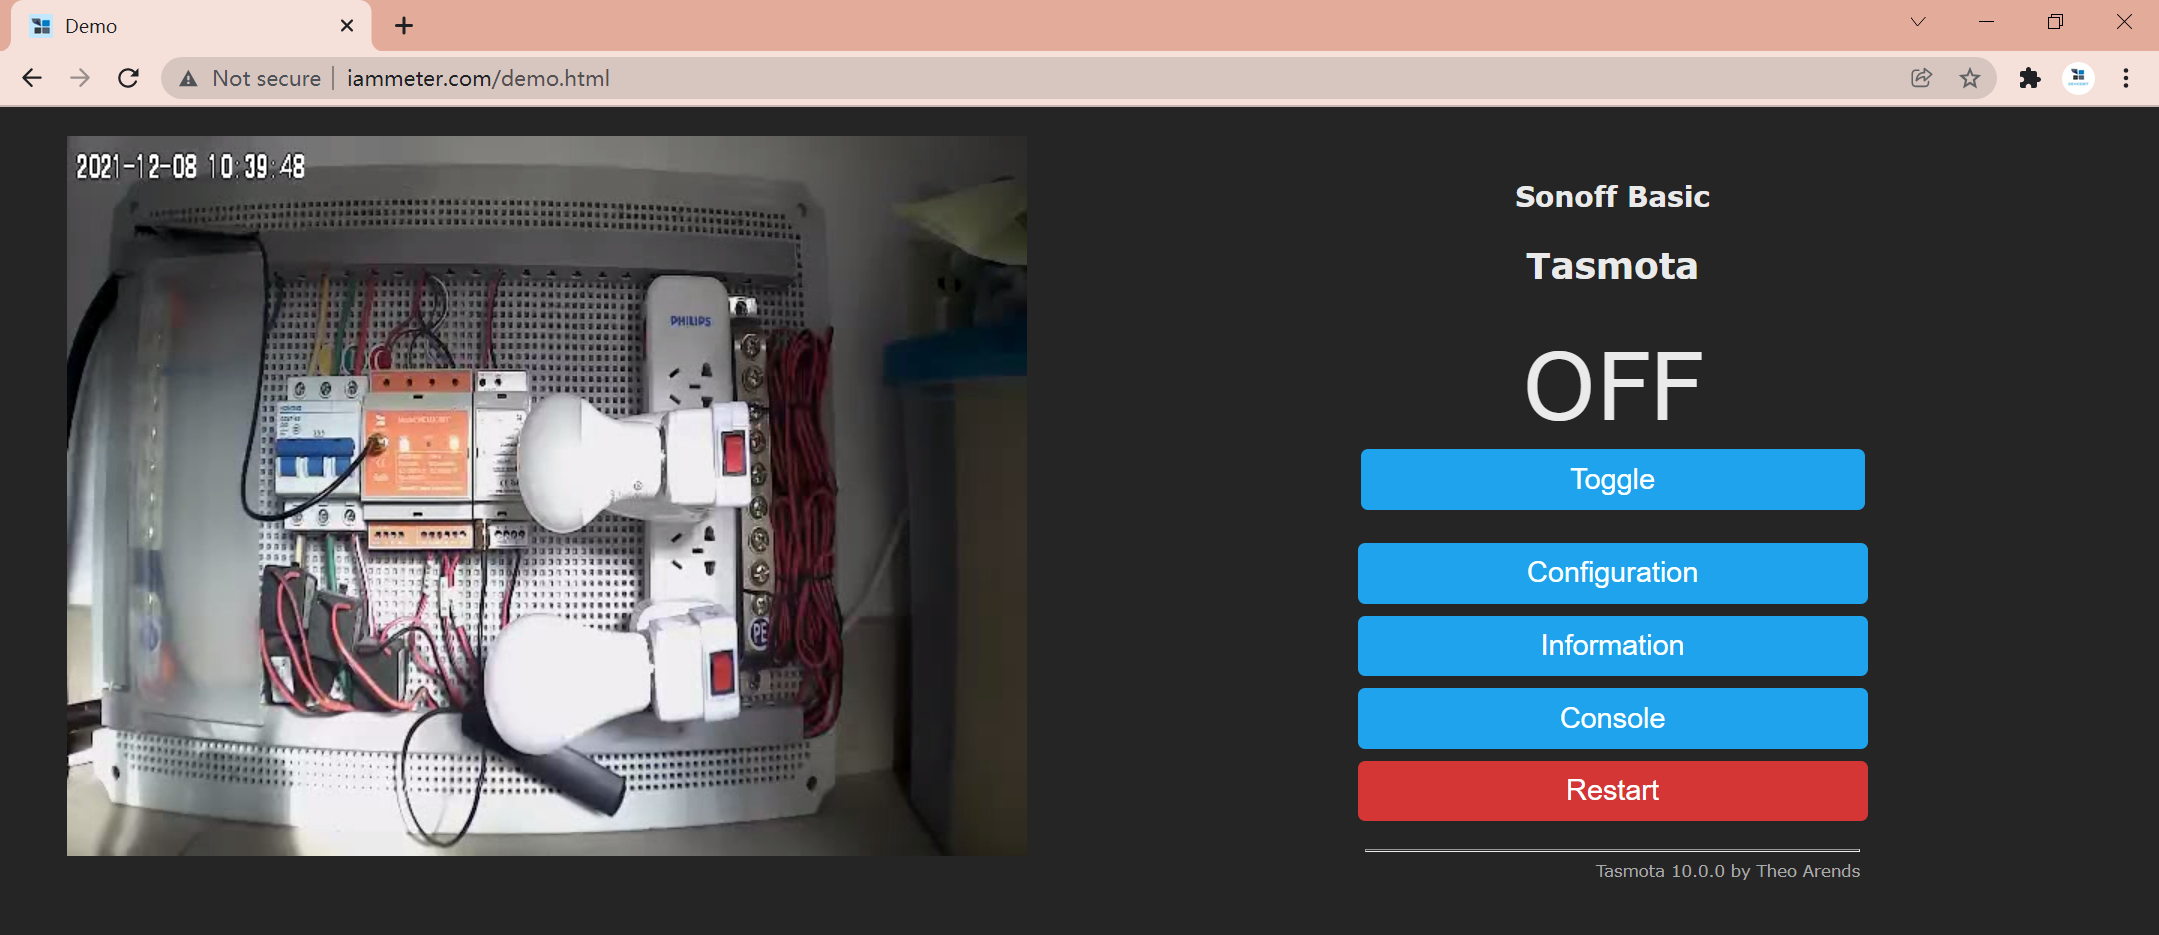
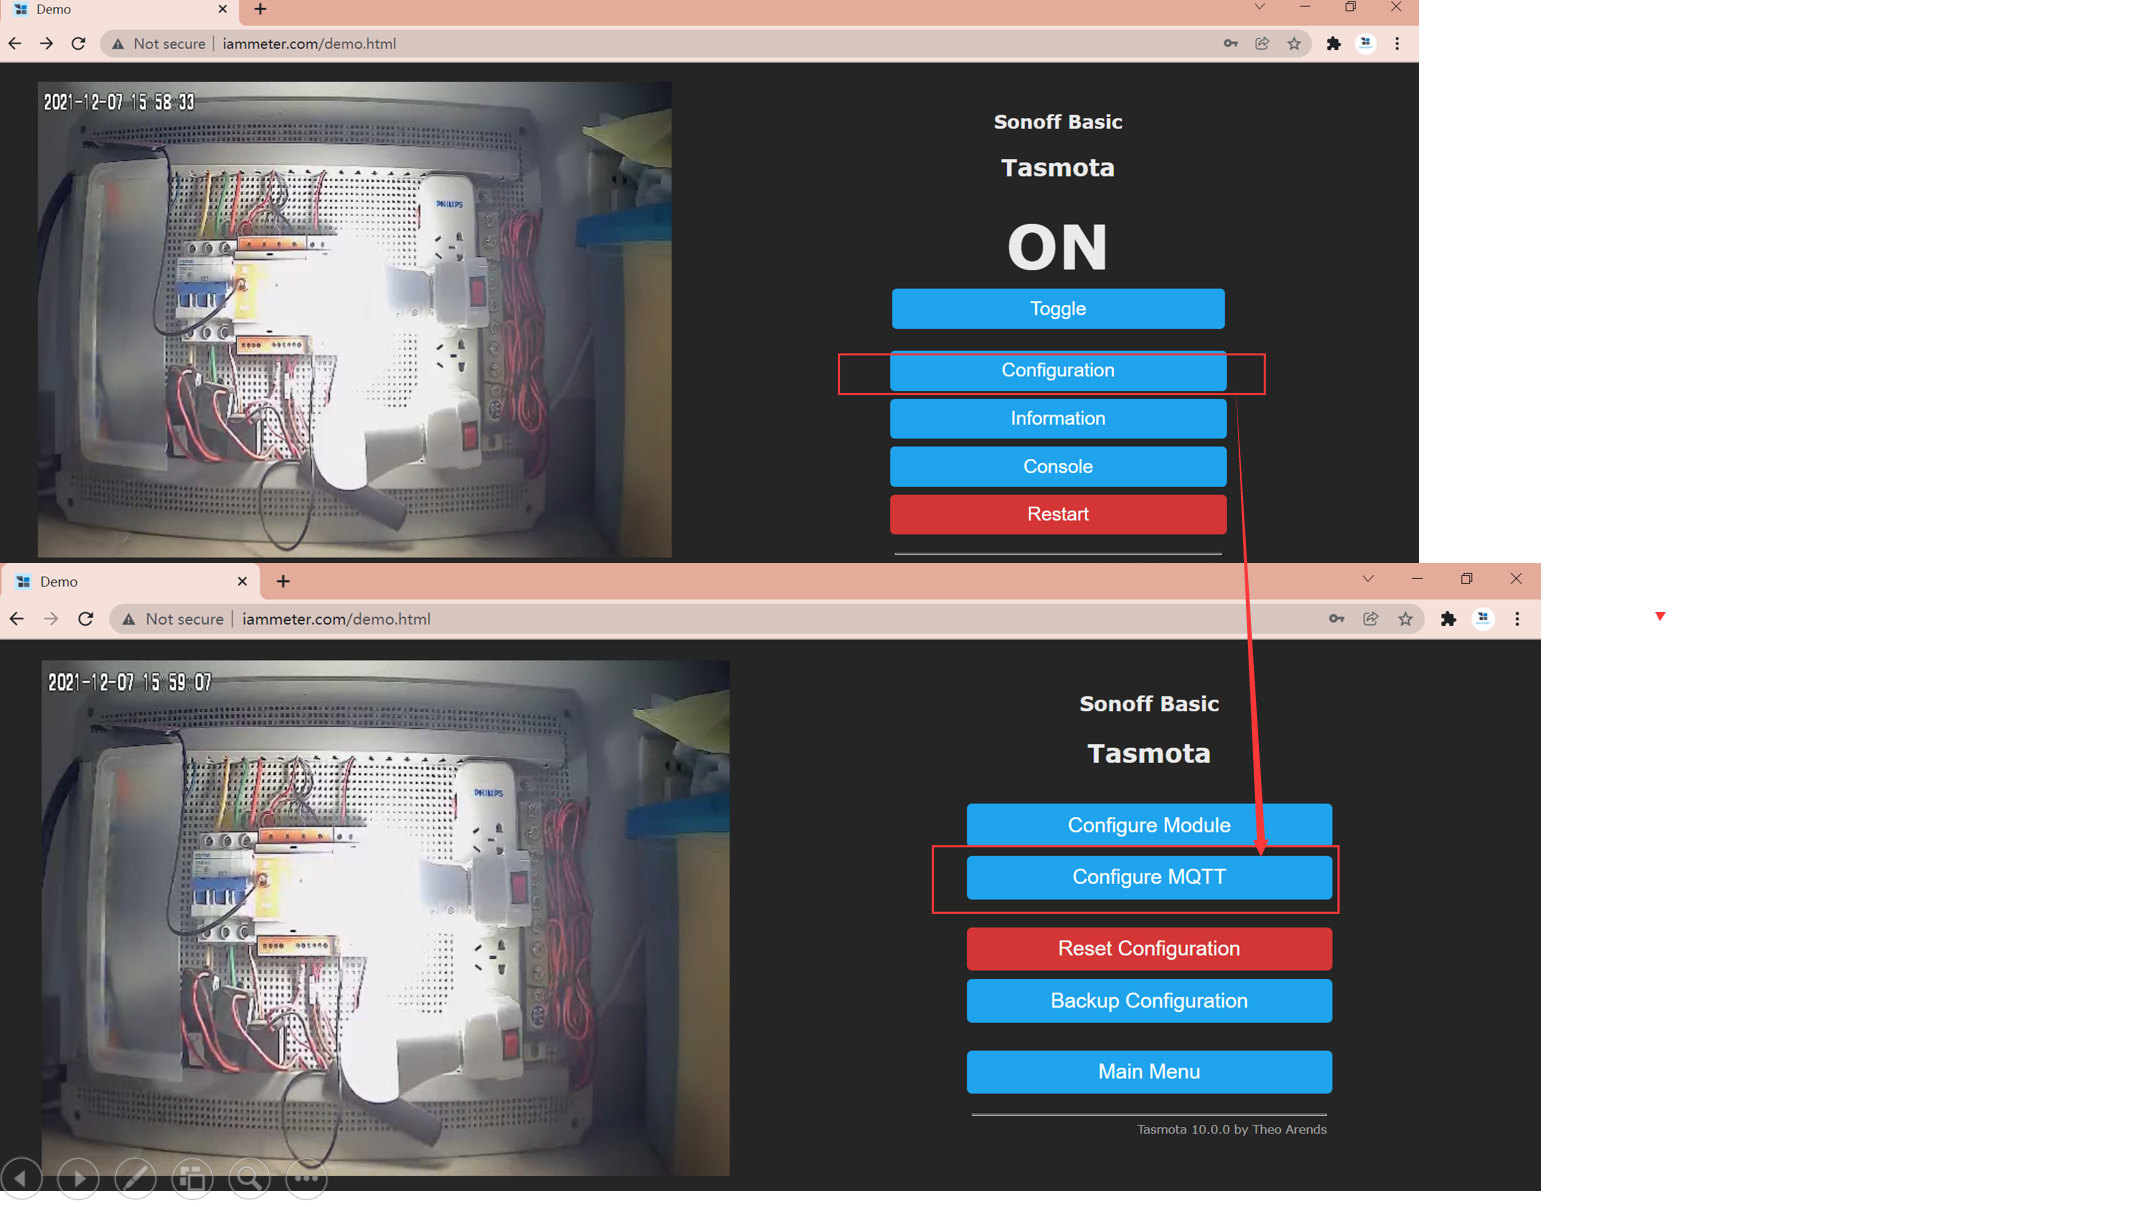
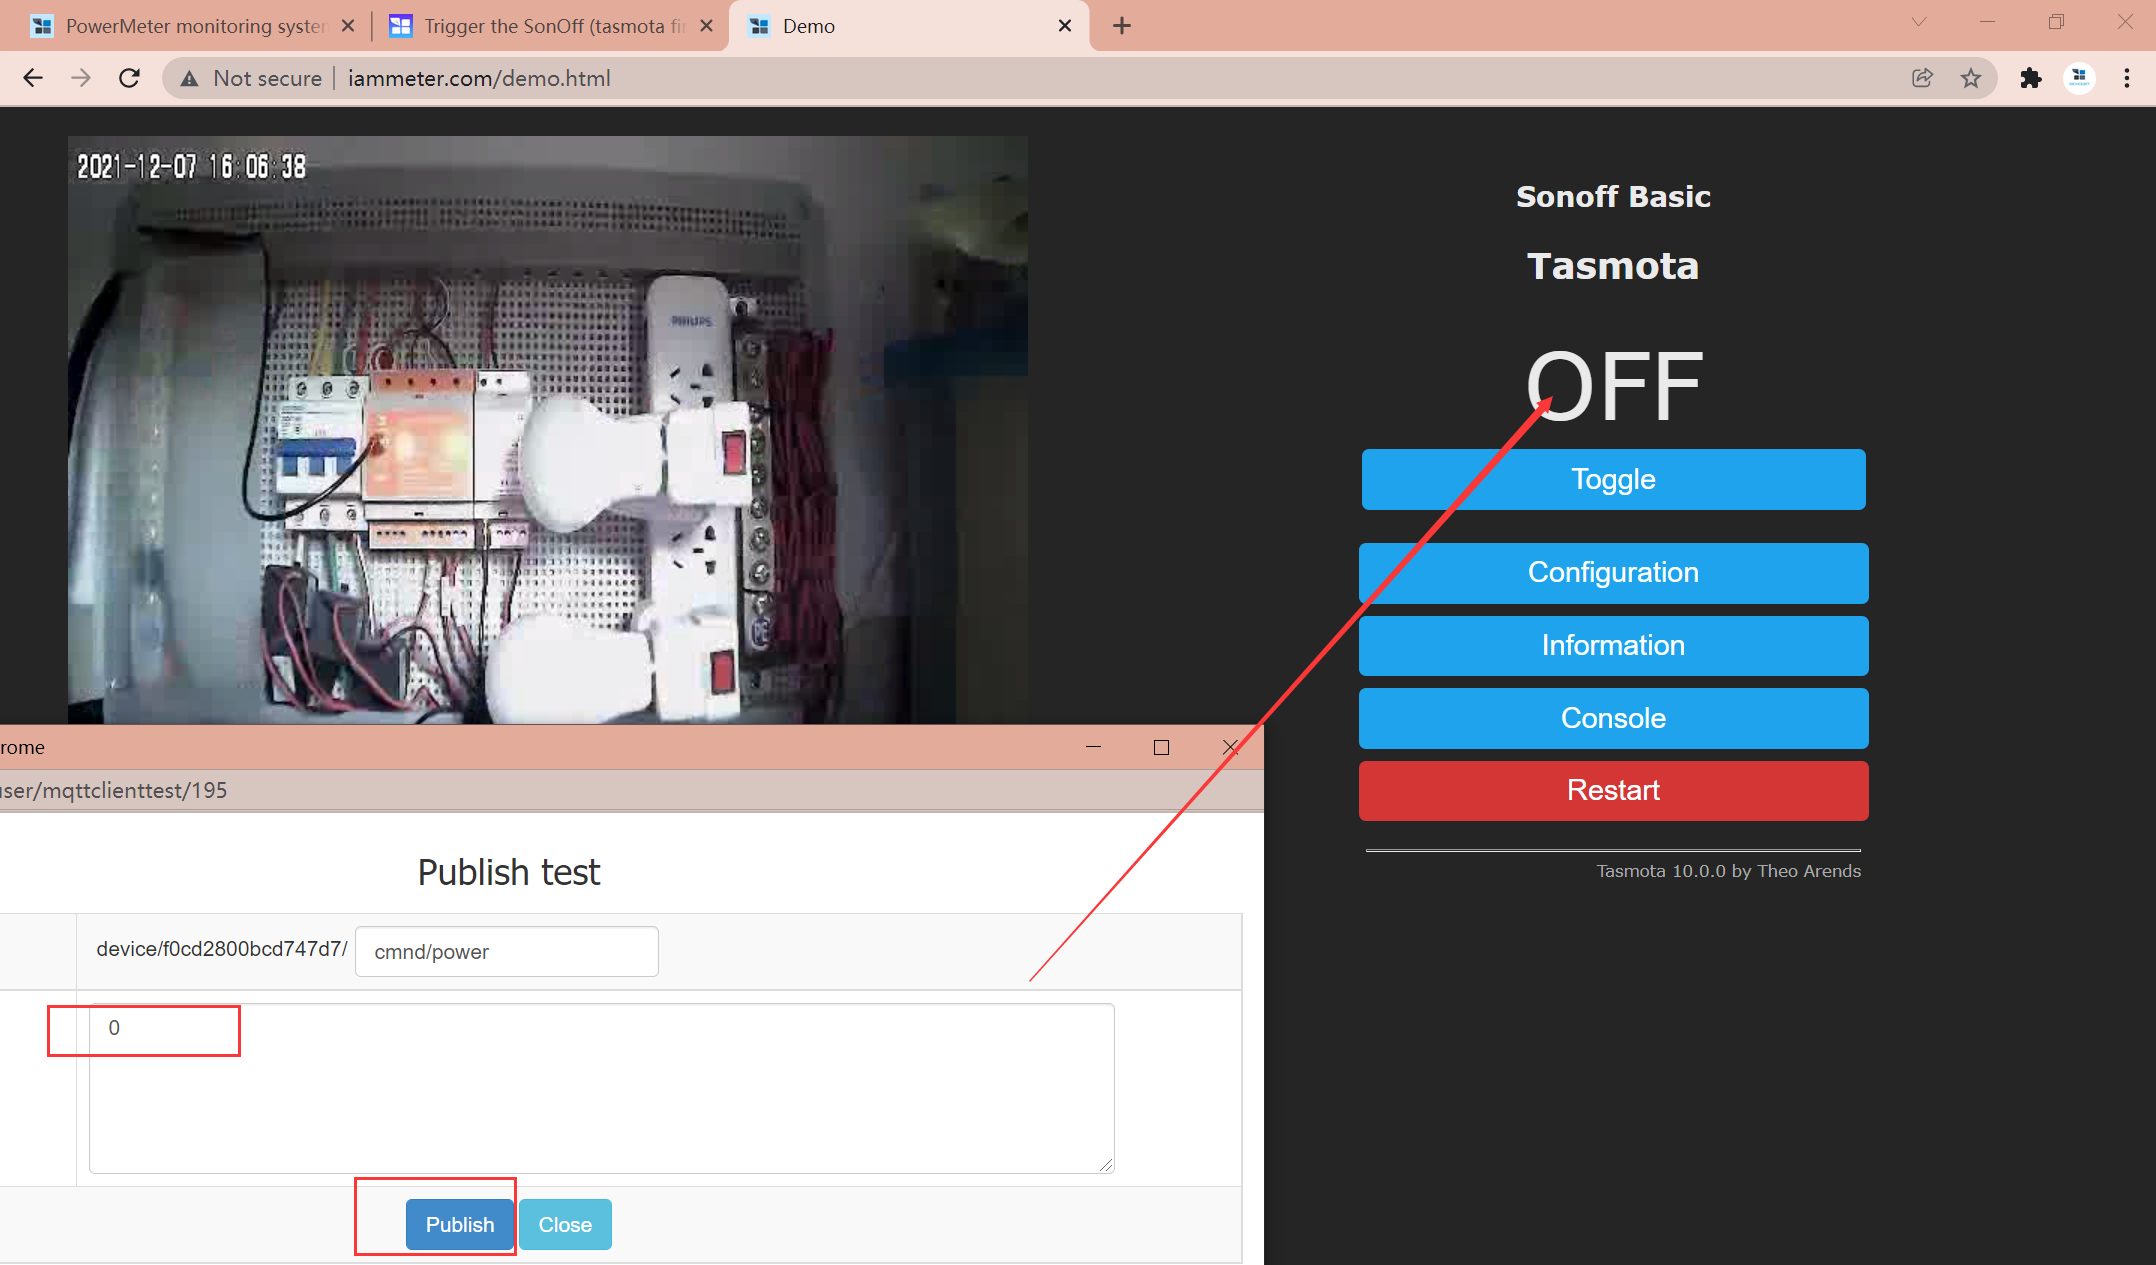
1. Visit http://www.iammeter.com/demo.html (it is http url ,not https)
2. Click the toggle, then the socket can be switched On/Off online
Please note:
- The video frame takes about 10 seconds to be refreshed completely.
- The bulb will be switched On/Off (there will be a 7-10 seconds latency in the video, and you can confirm the latency by comparing the timestamp).
Control the smart socket from IAMMETER-cloud
After confirming the connectivity, let's start to control this smart socket from IAMMETER-cloud.
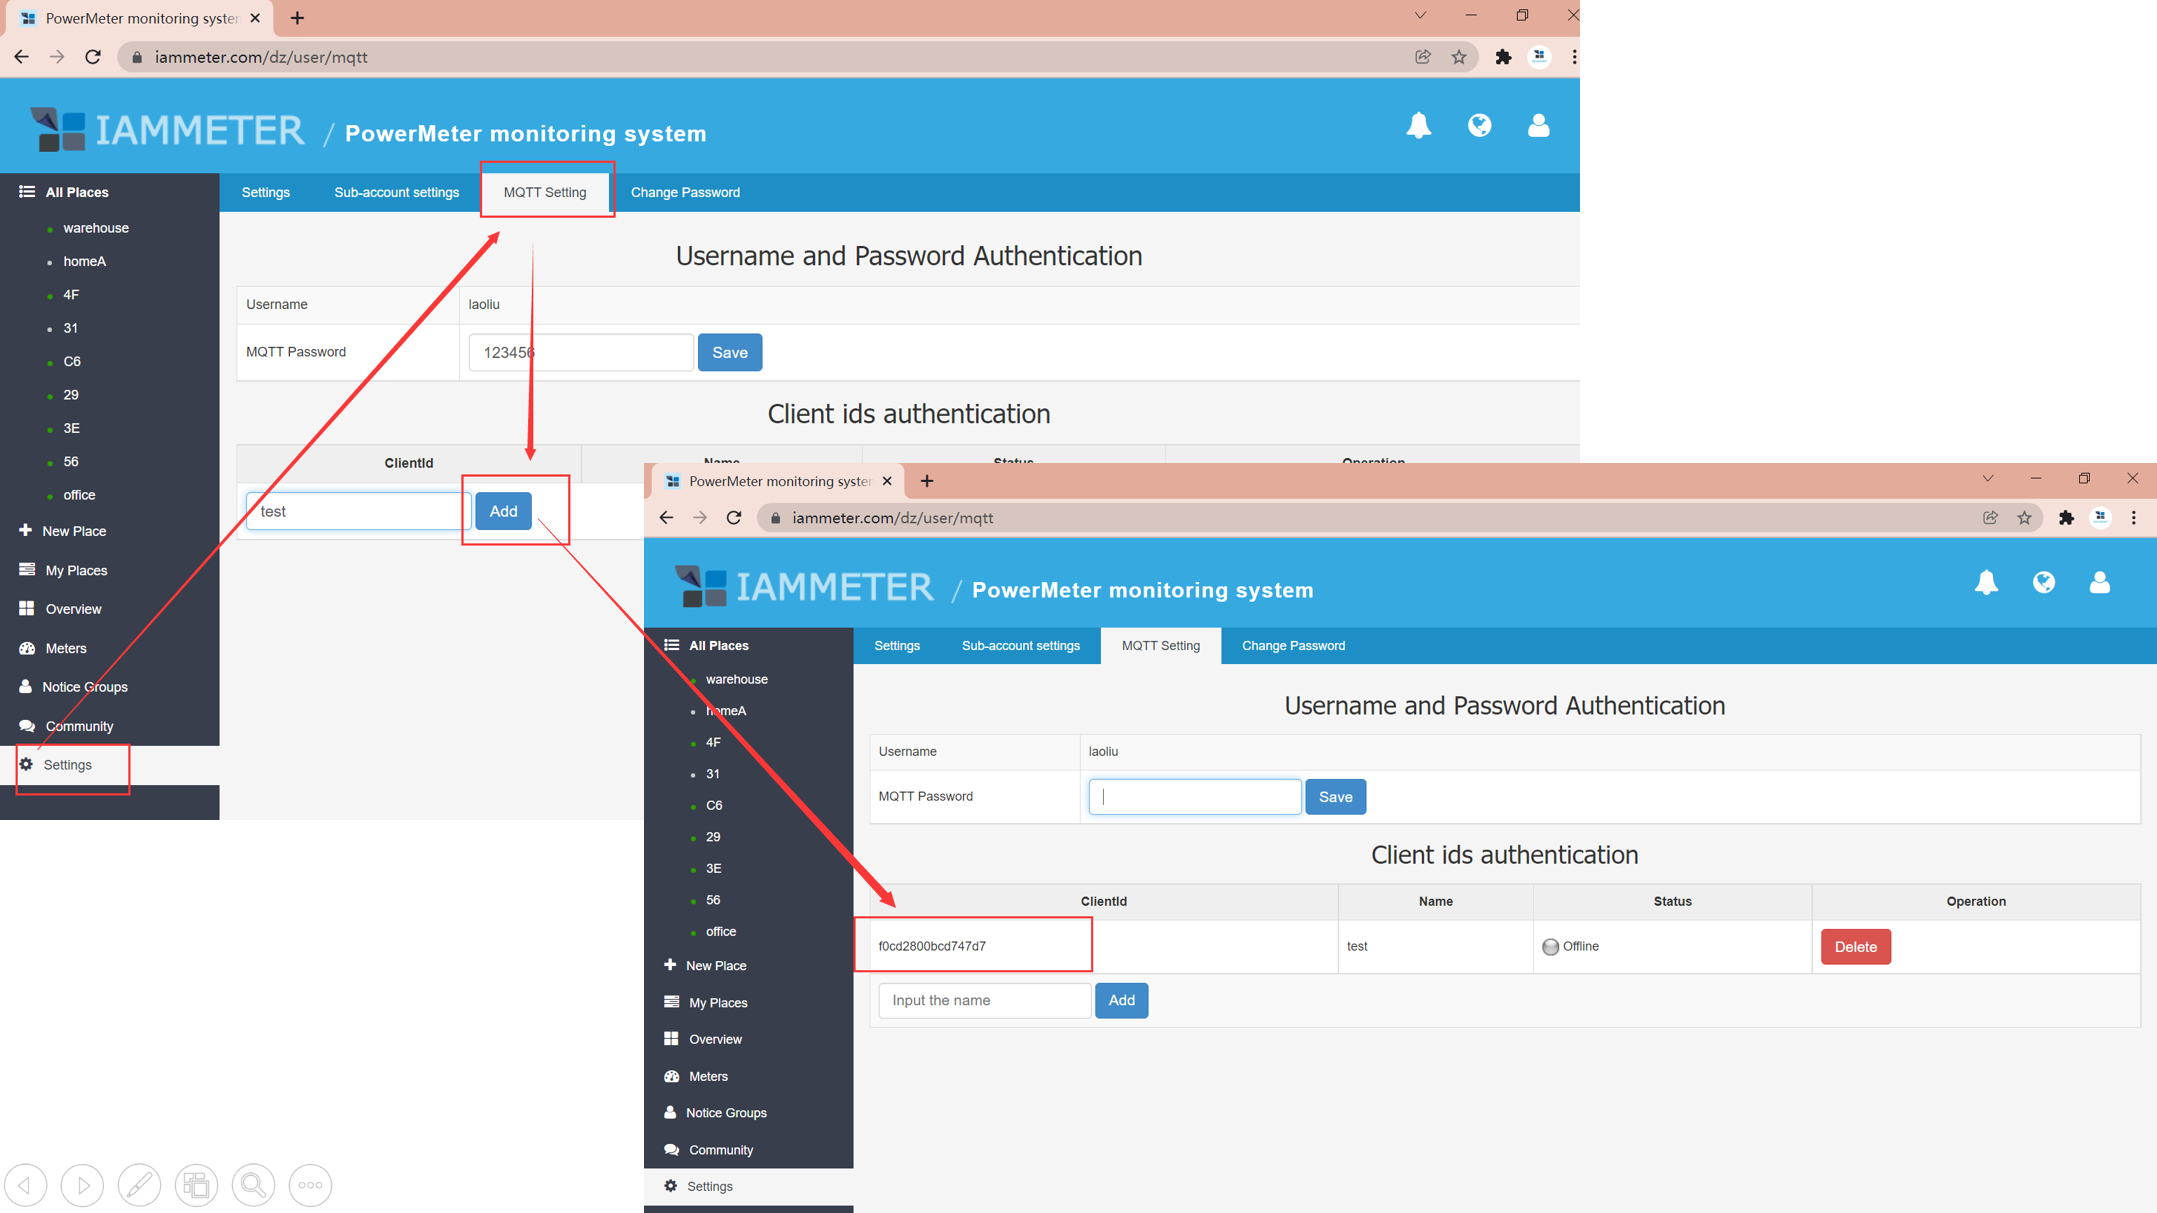
Create a Mqtt clinetID from IAMMETER-Cloud
Set "MQTT password" and click save.
(This is the password for MQTT connection, which has nothing to do with the password of login. Please do not use your login password here).
input the name of ClinetID and click add.
The "Username","MQTT Password" and "Clientid" will be used when you configure the smart socket later.
Configure the smart socket plug by your MQTT information
- Configuration->Configure MQTT
- Fill the MQTT paramters on IAMMETER-cloud to set the MQTT configuration of the smart socket plug.
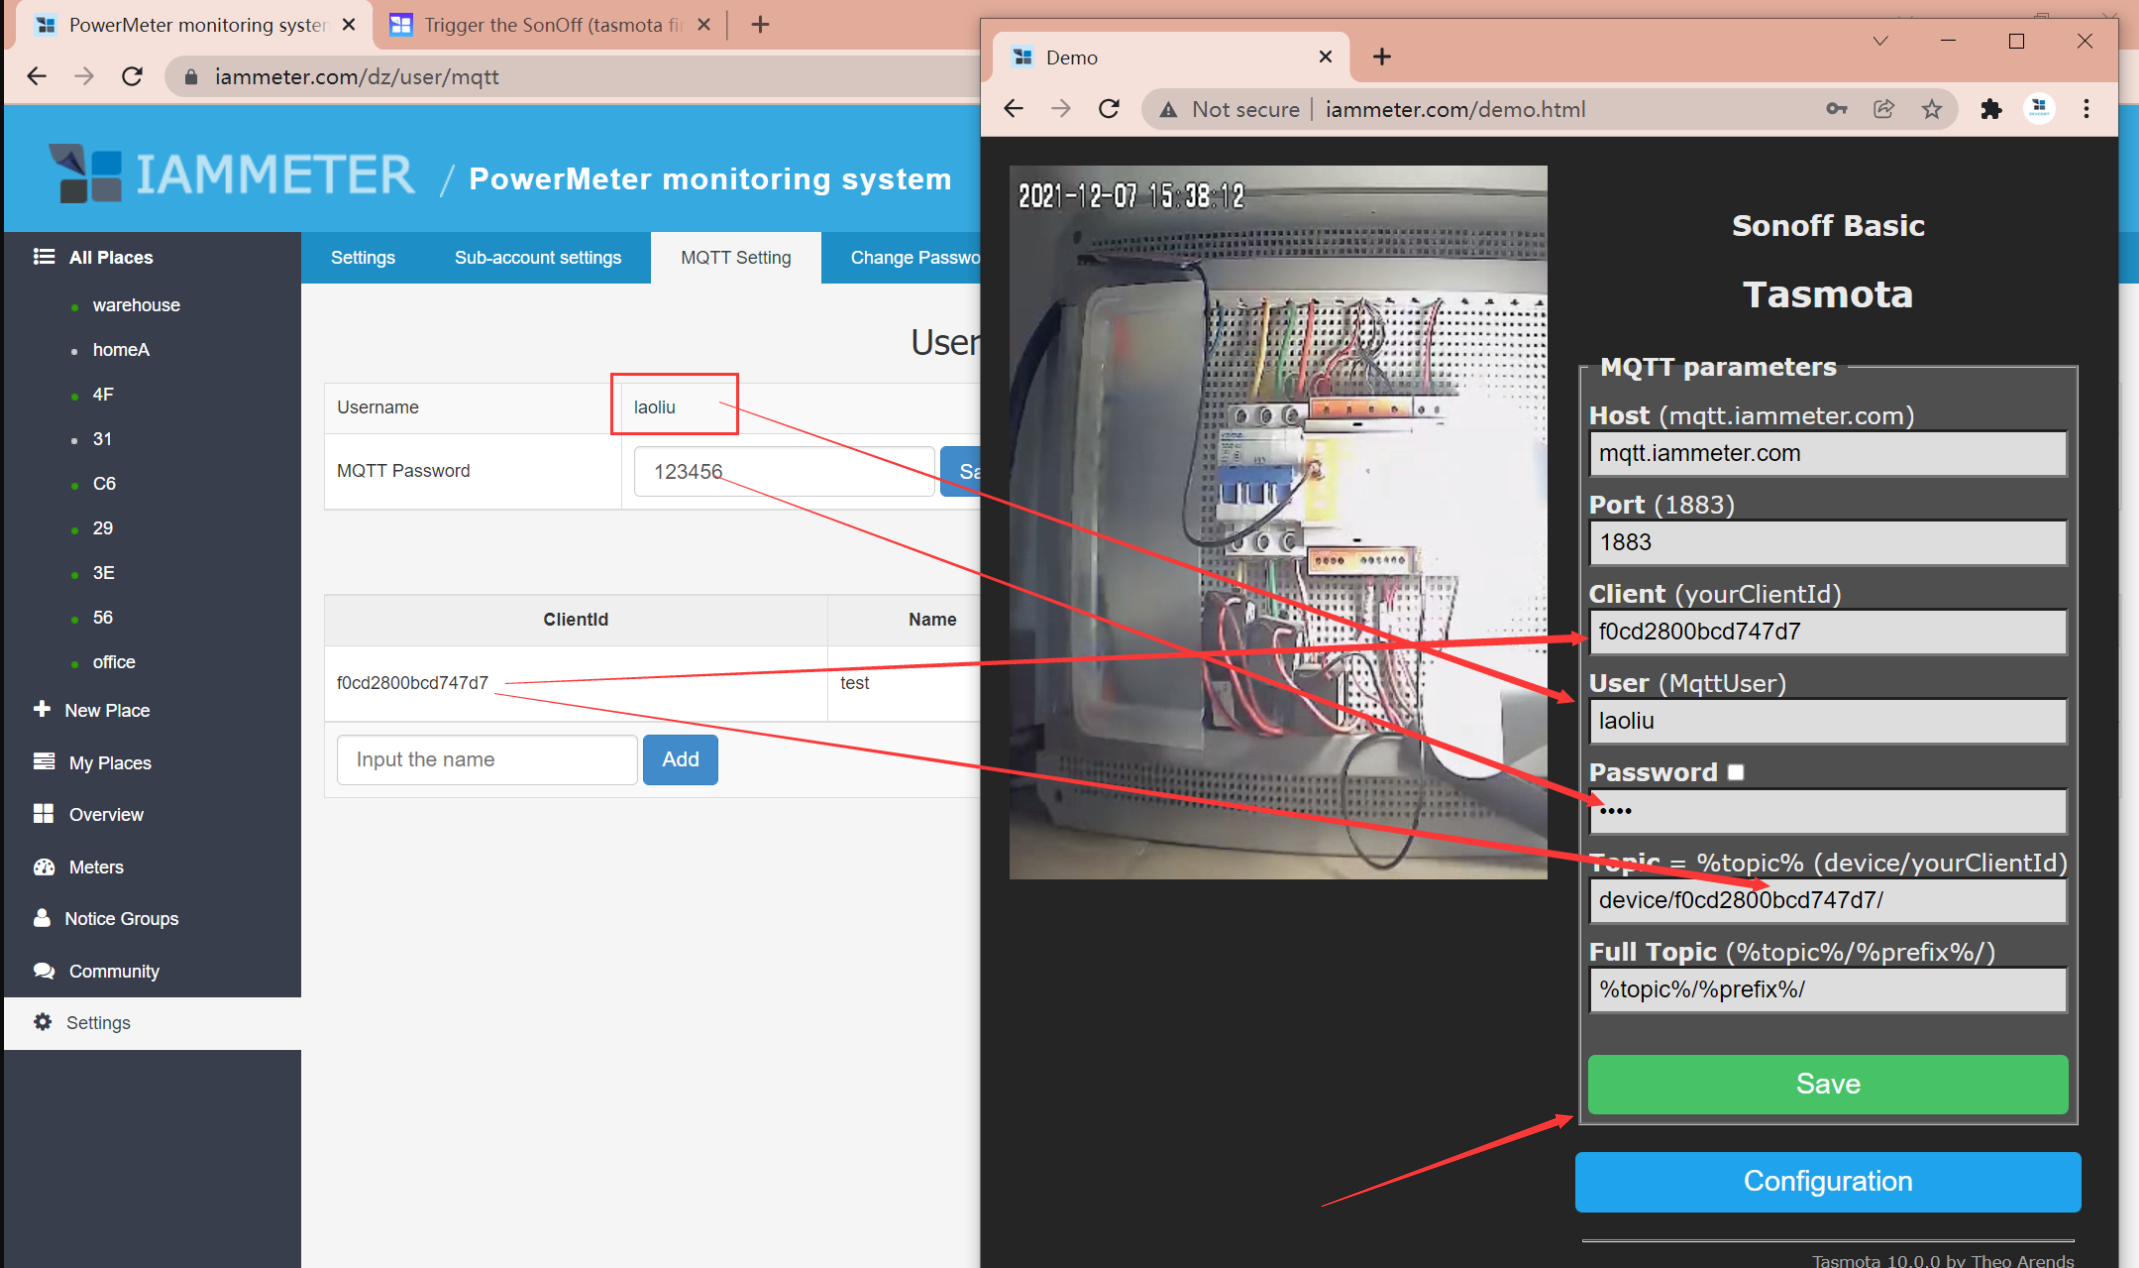
- click "save"
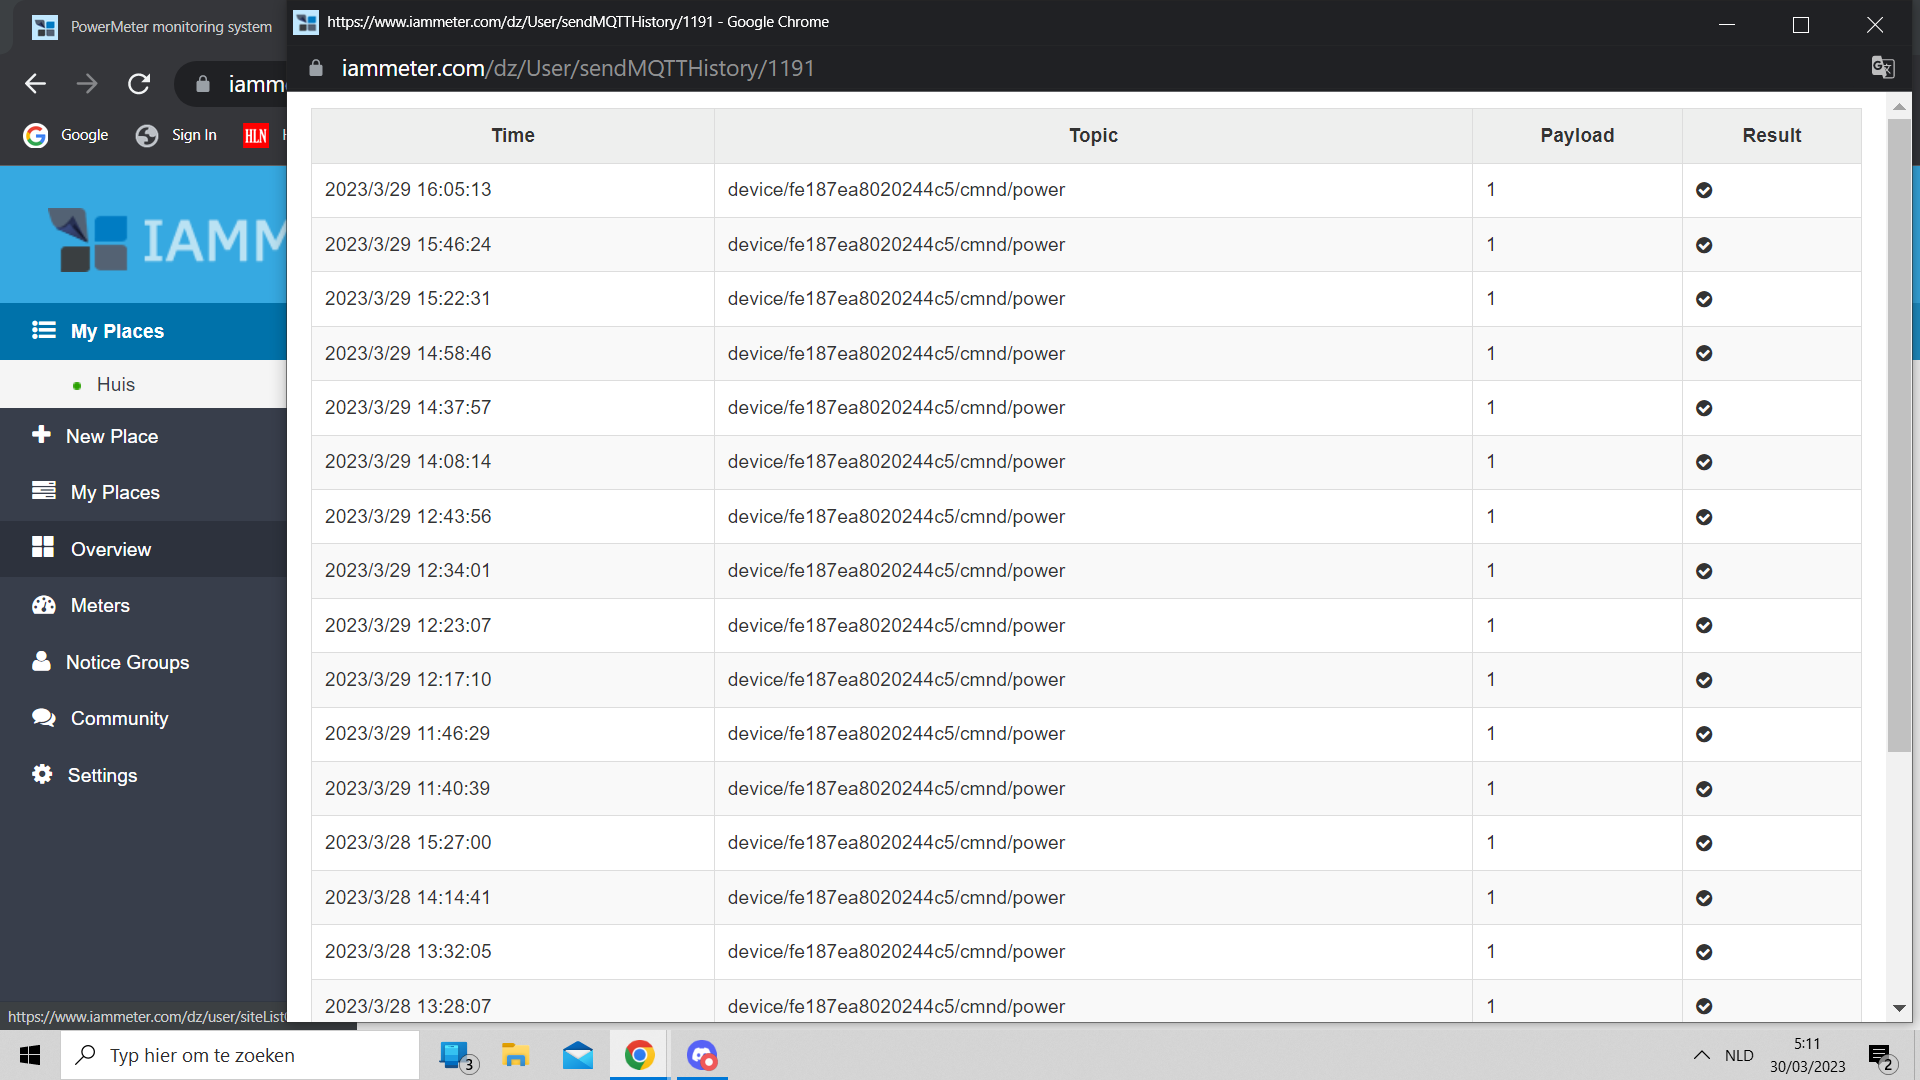
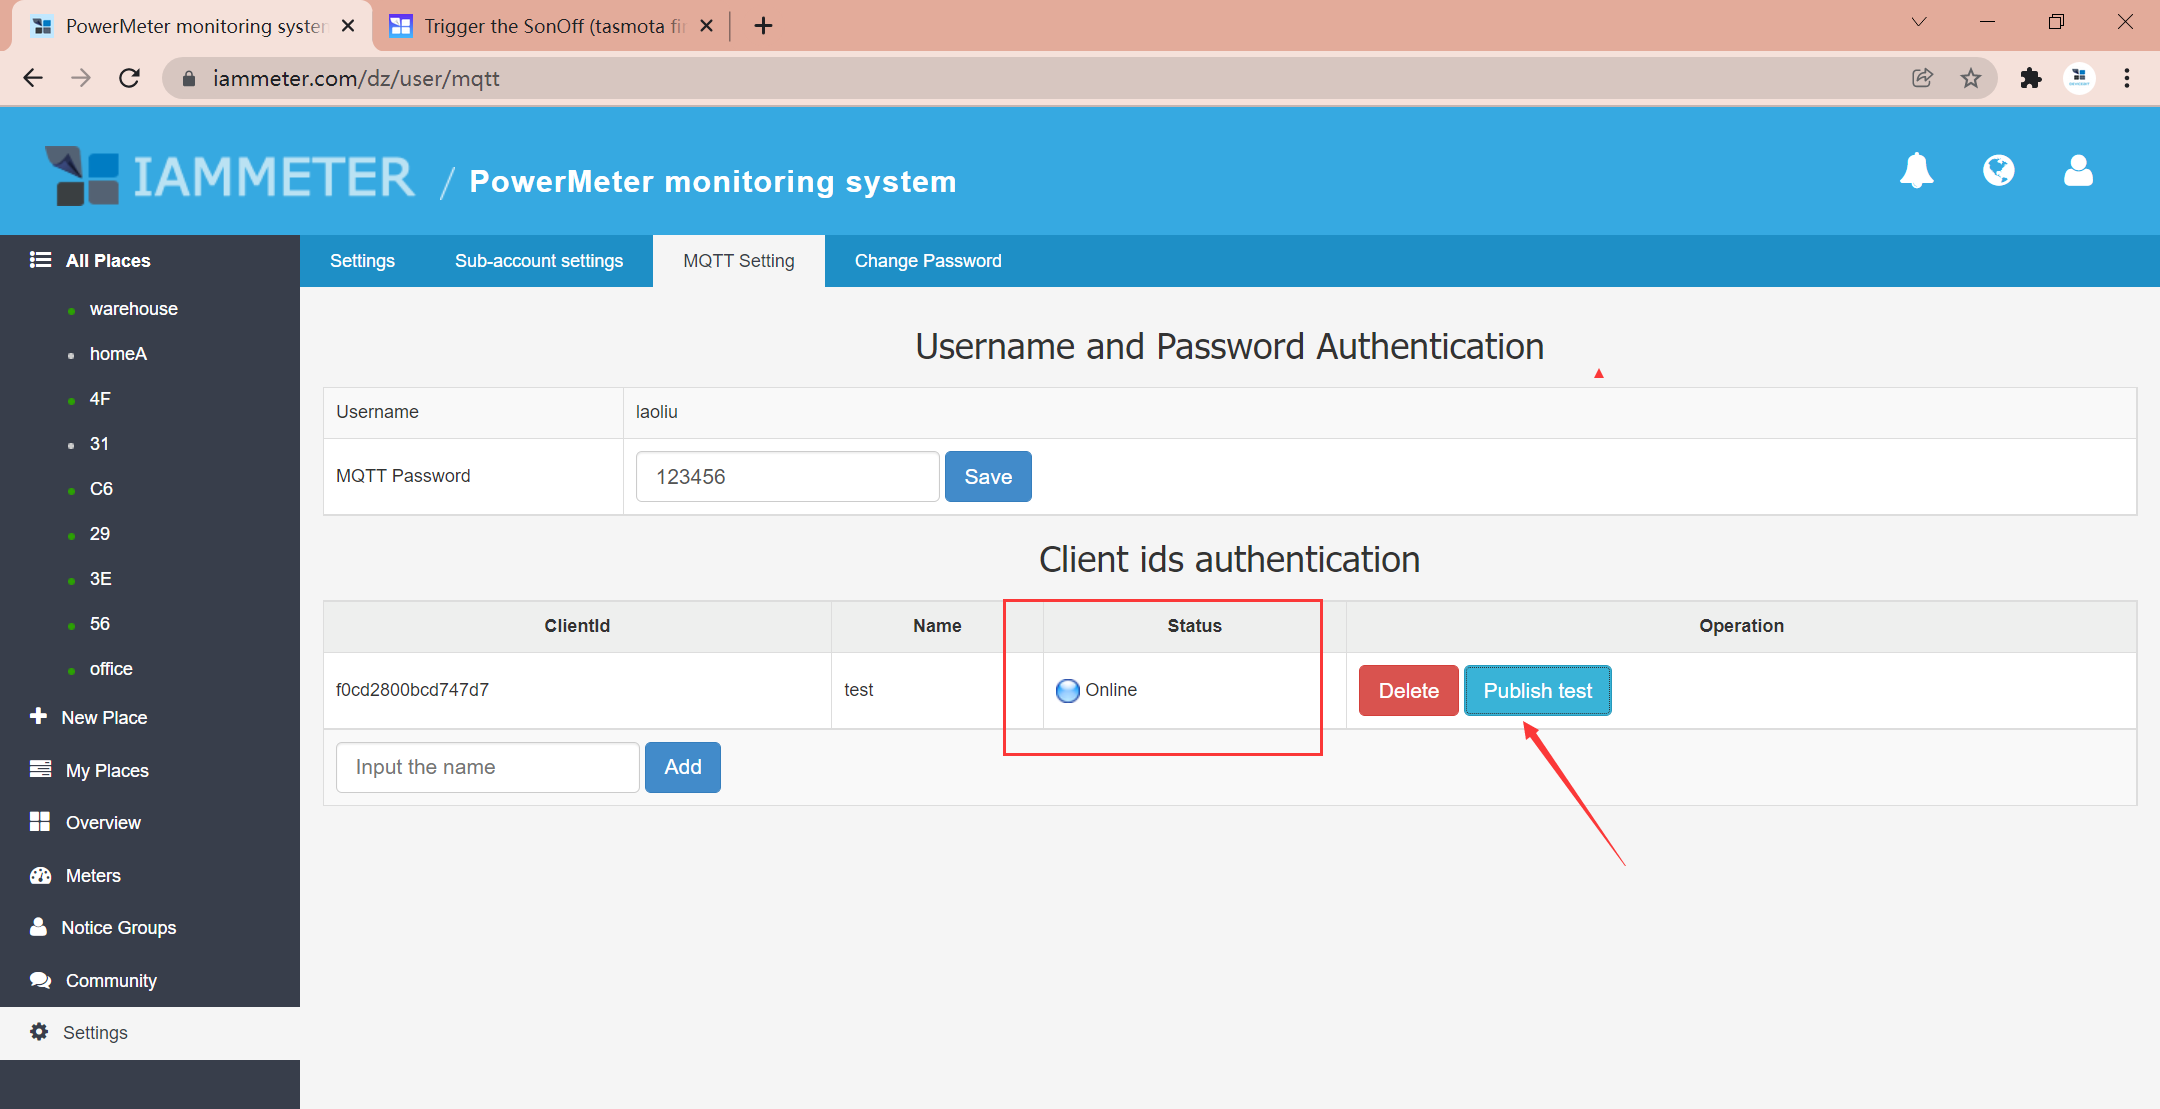
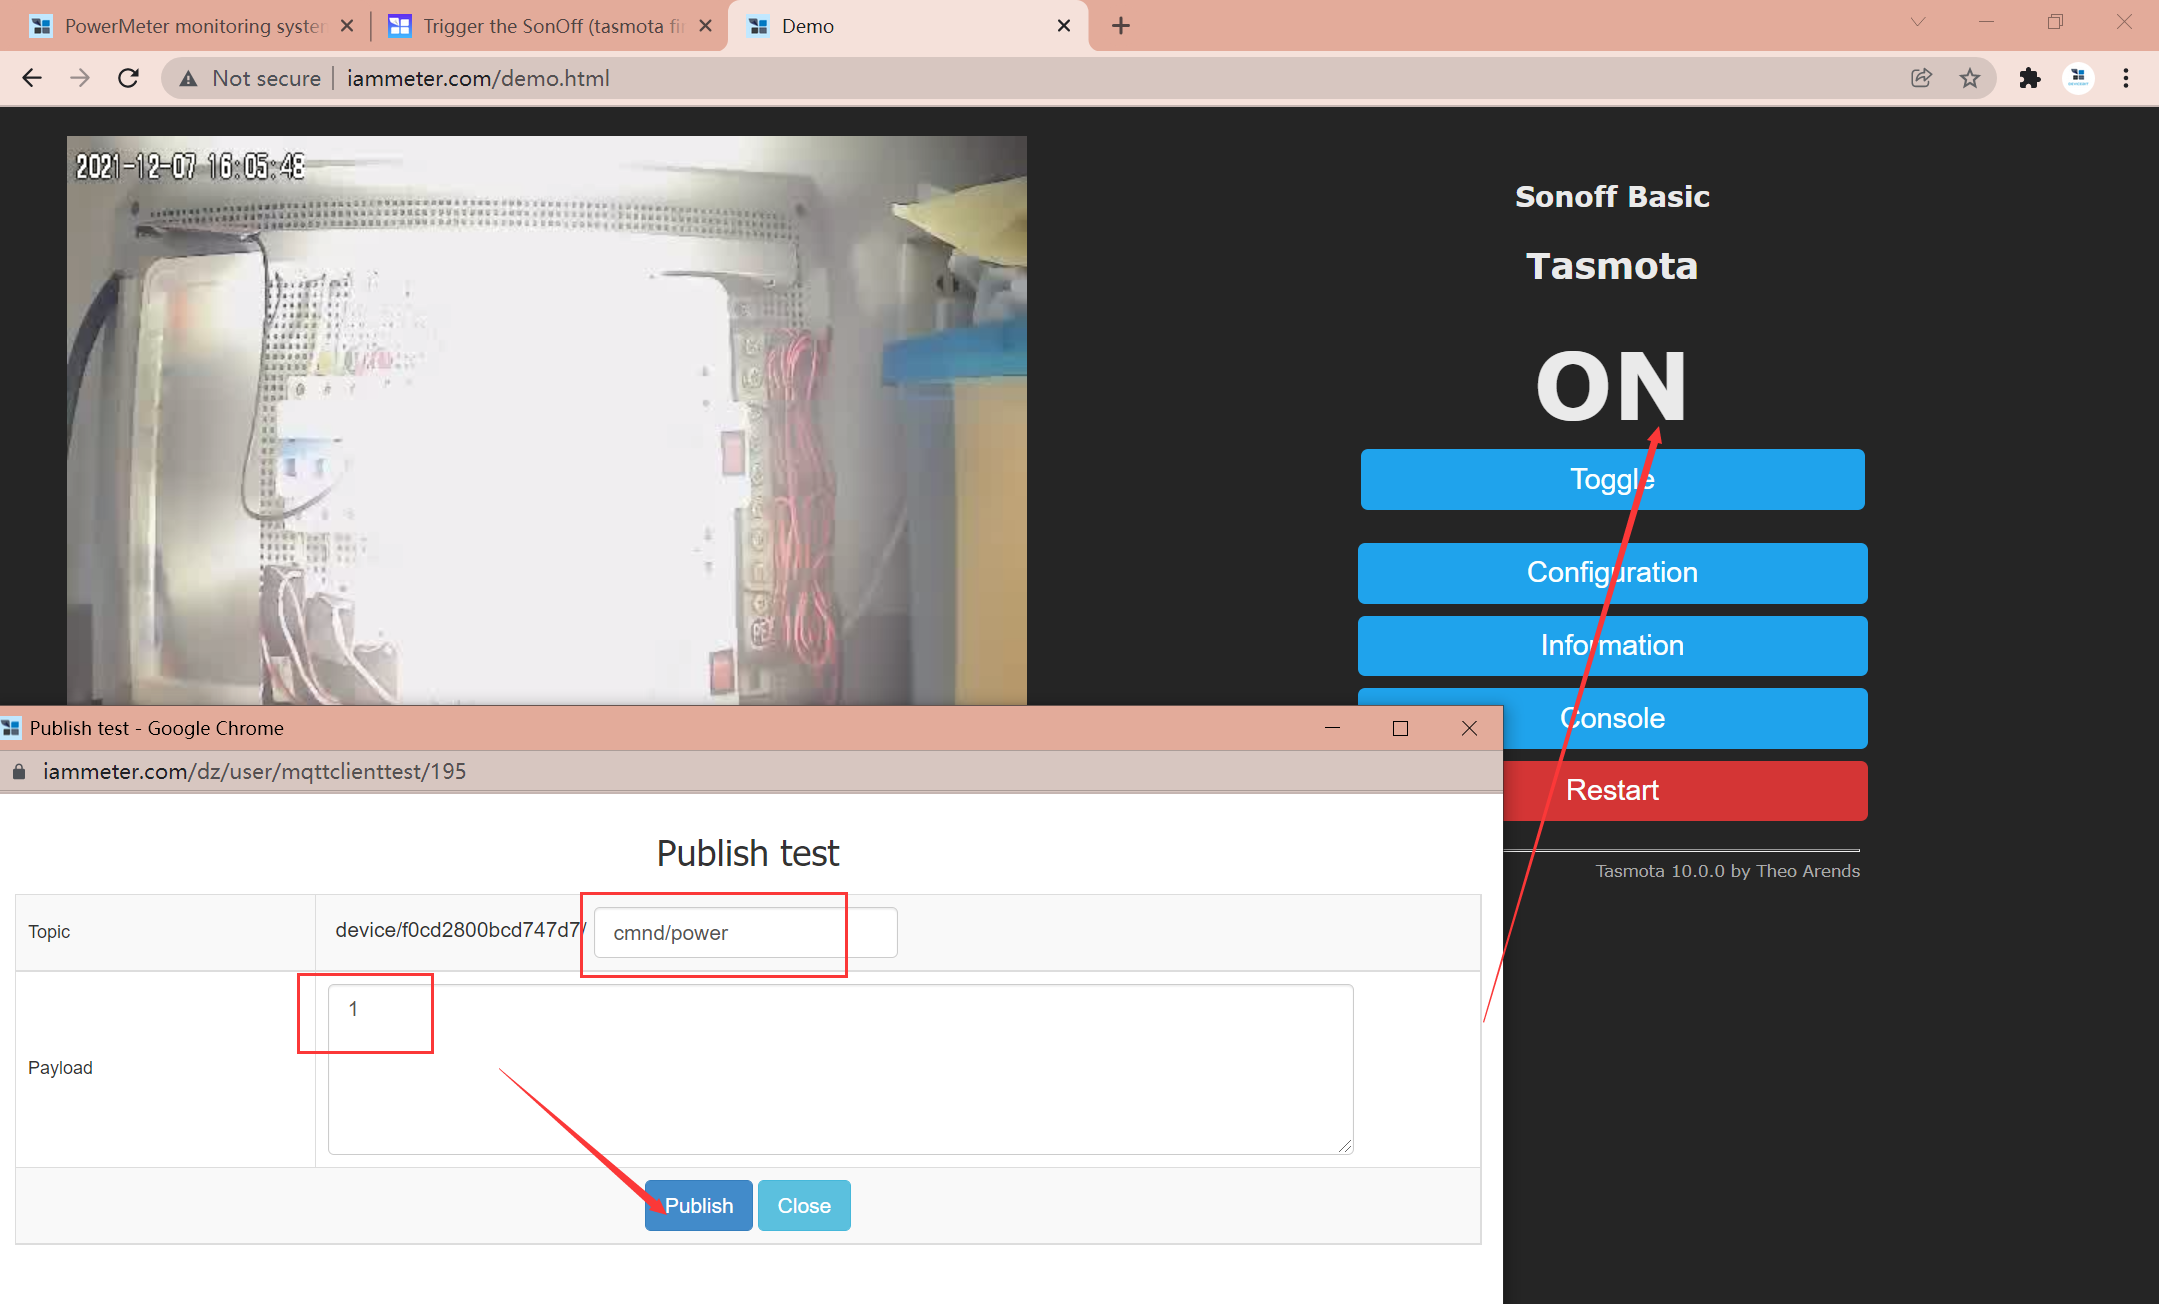
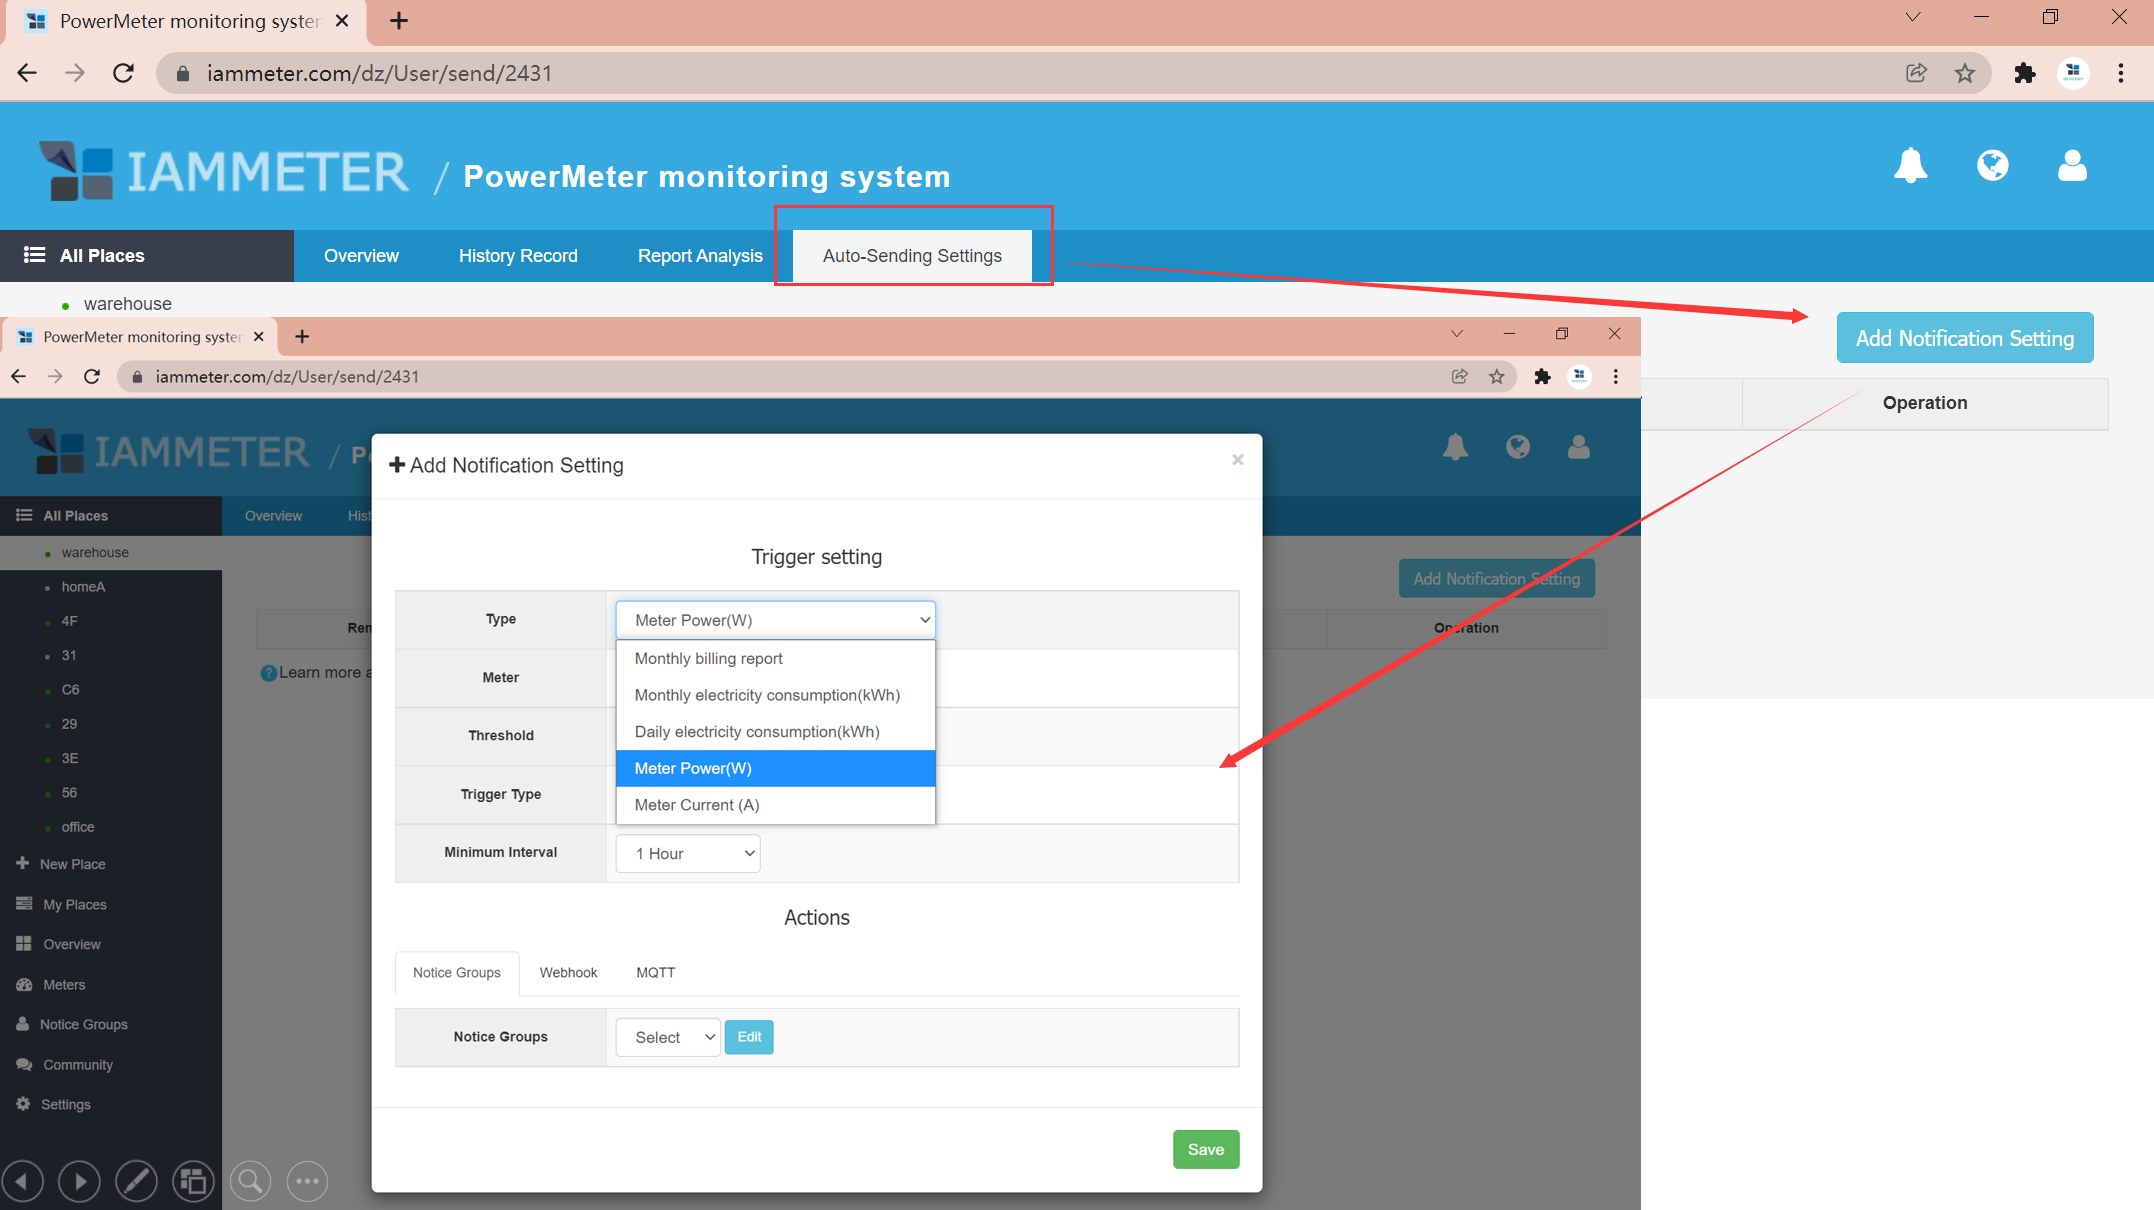
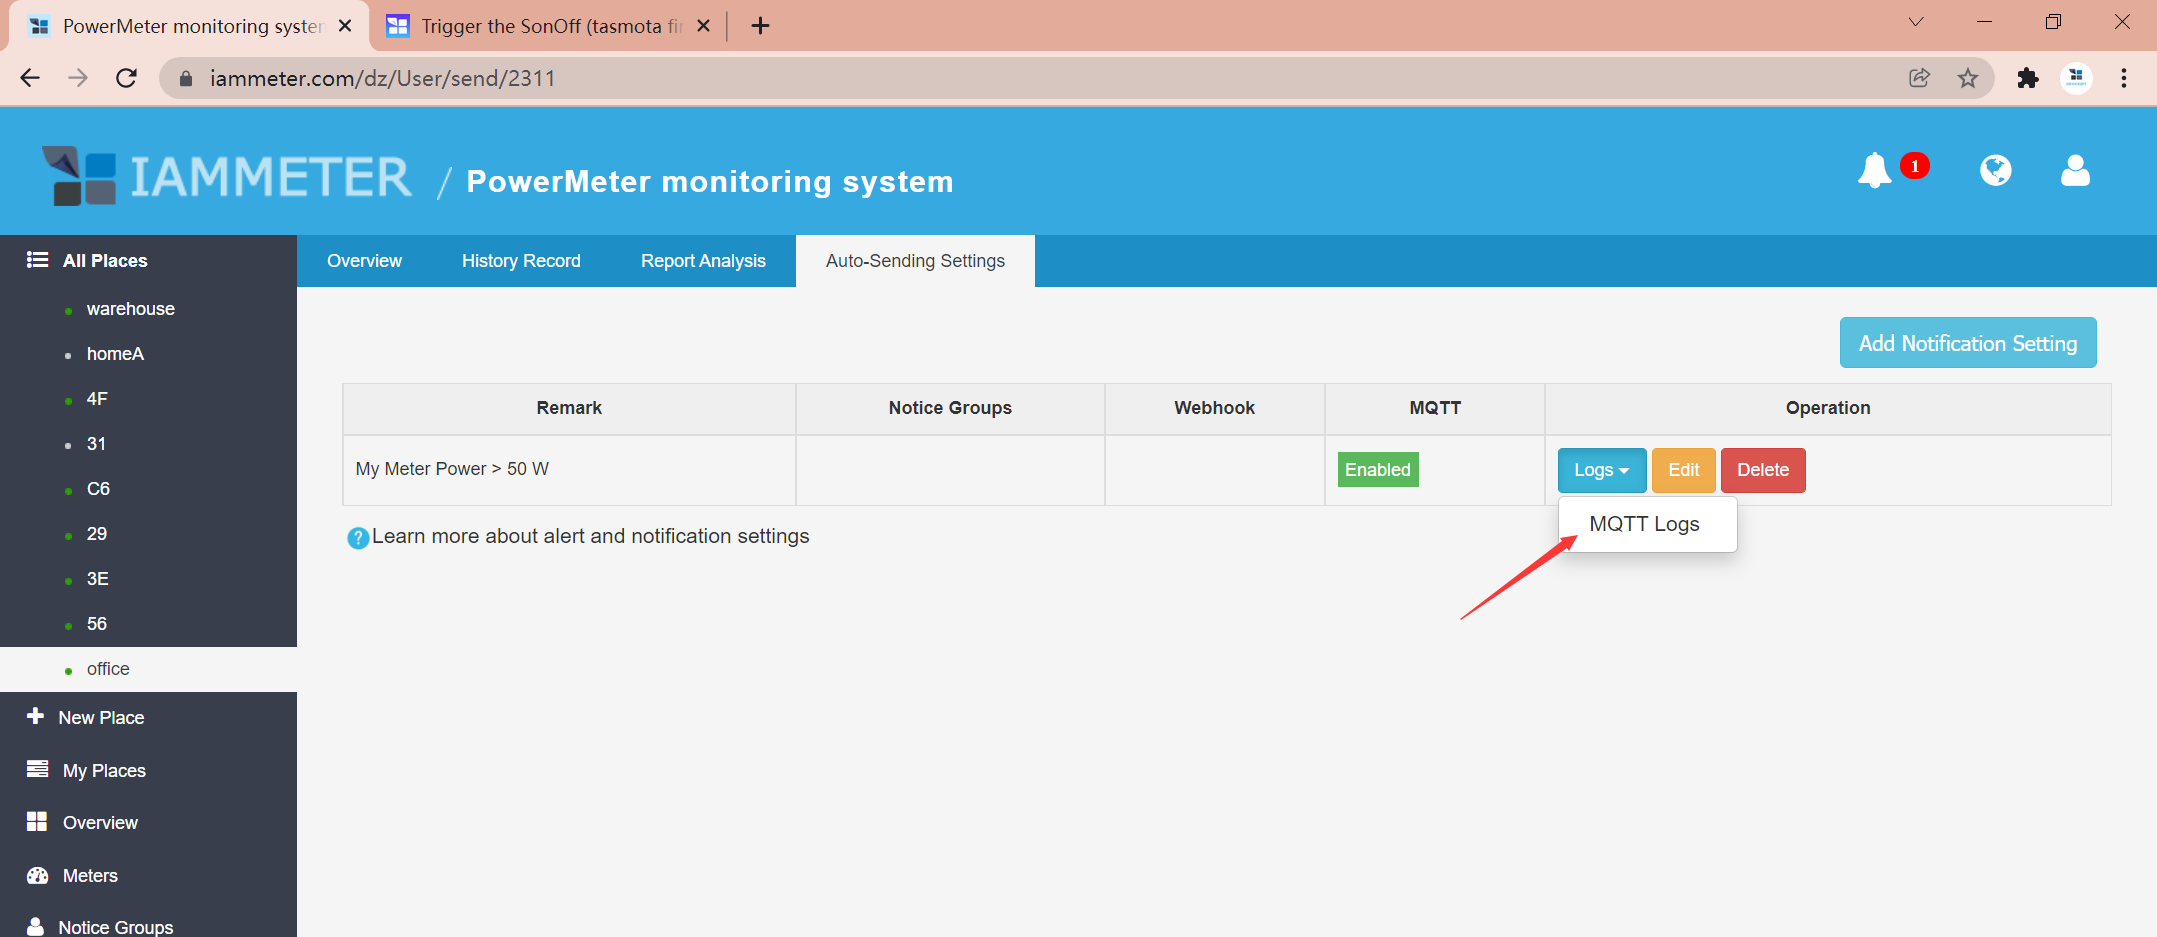
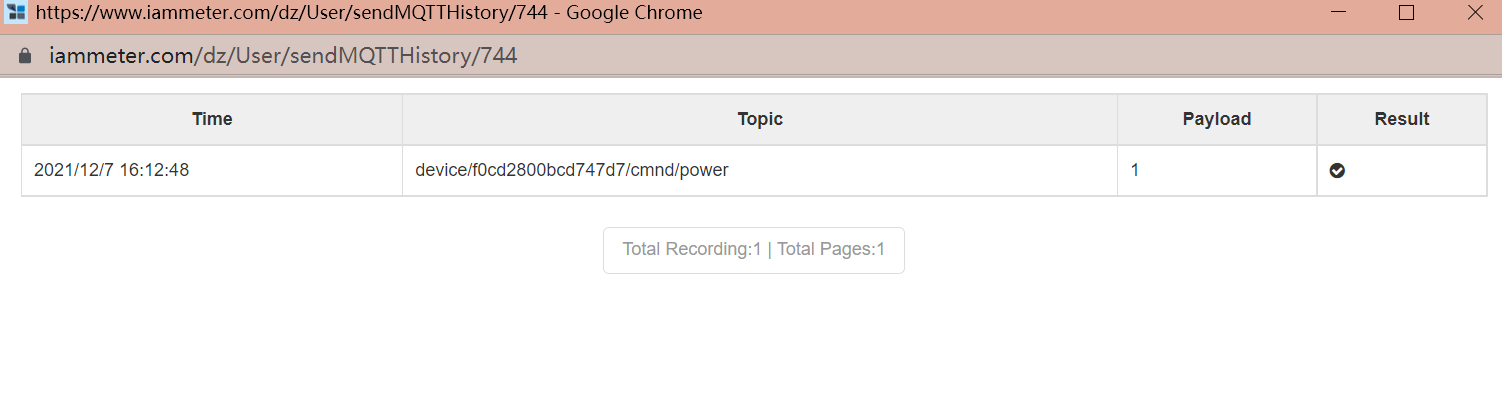
Publish the command to the smart socket from IAMMETER-cloud
Then, the status will be "Online".
- click "Publish test"
- Topic :cmnd/power
- Payload: 1 or 0
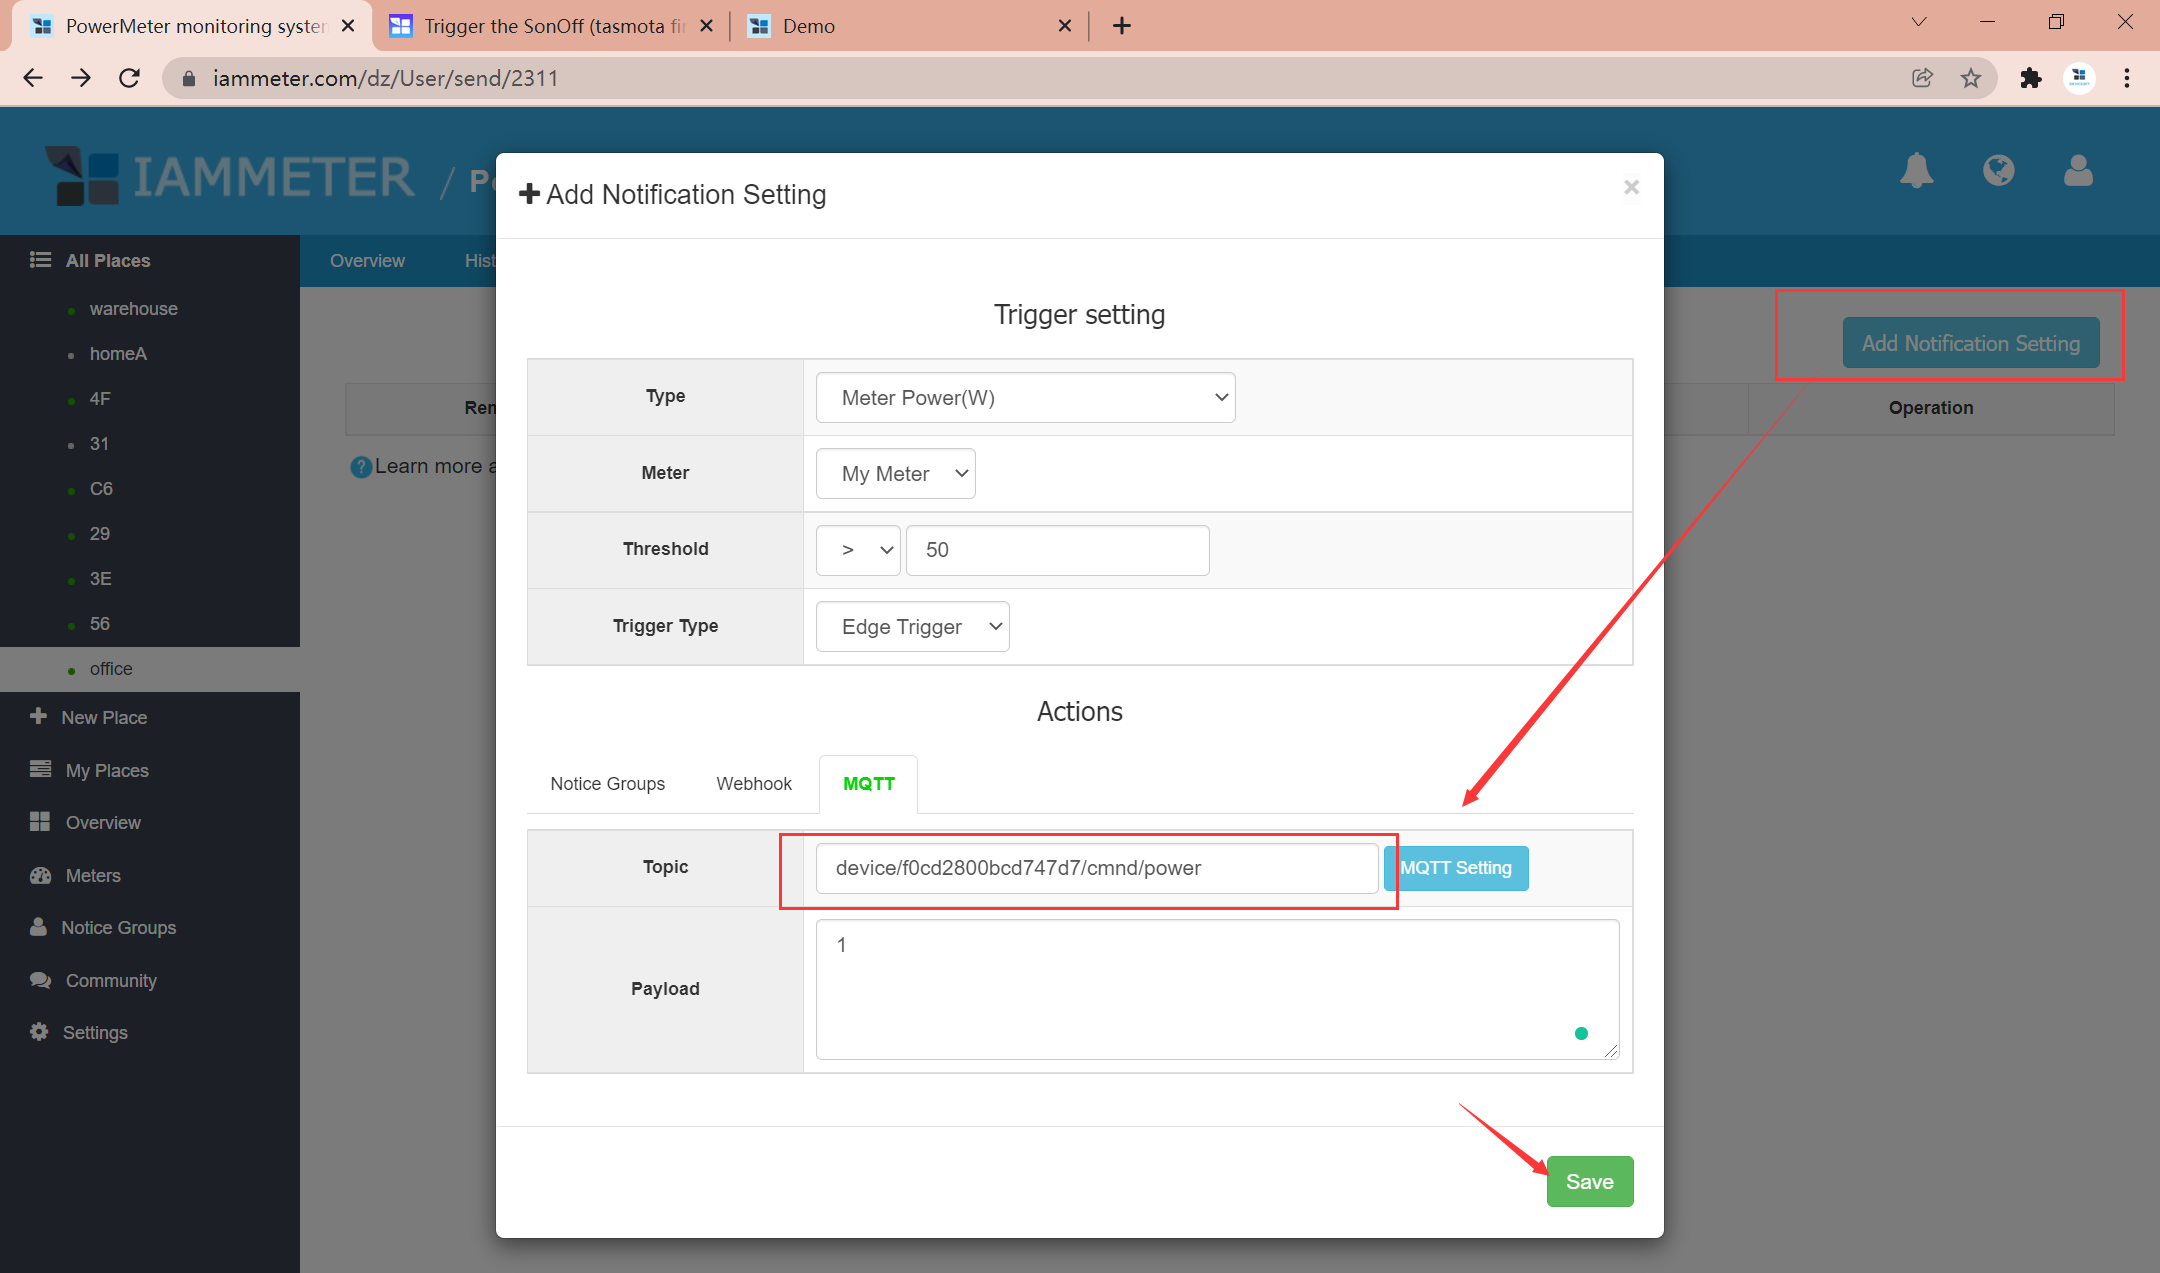
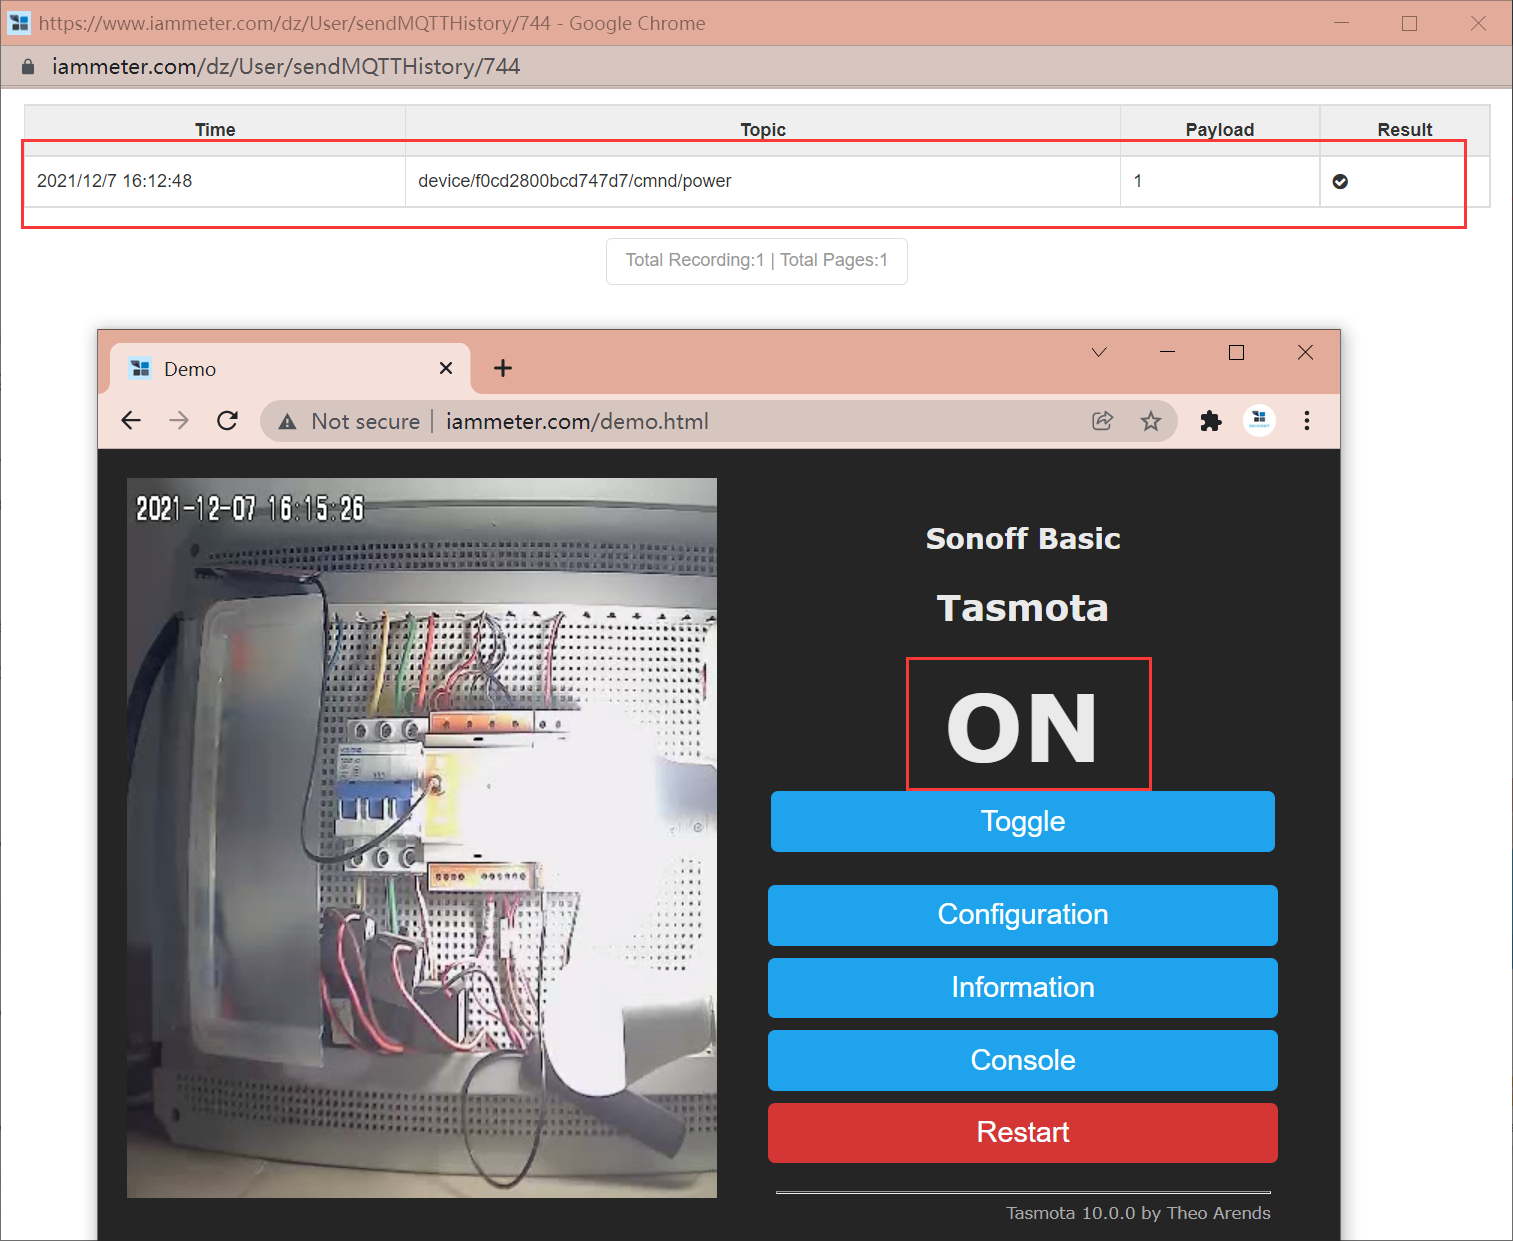
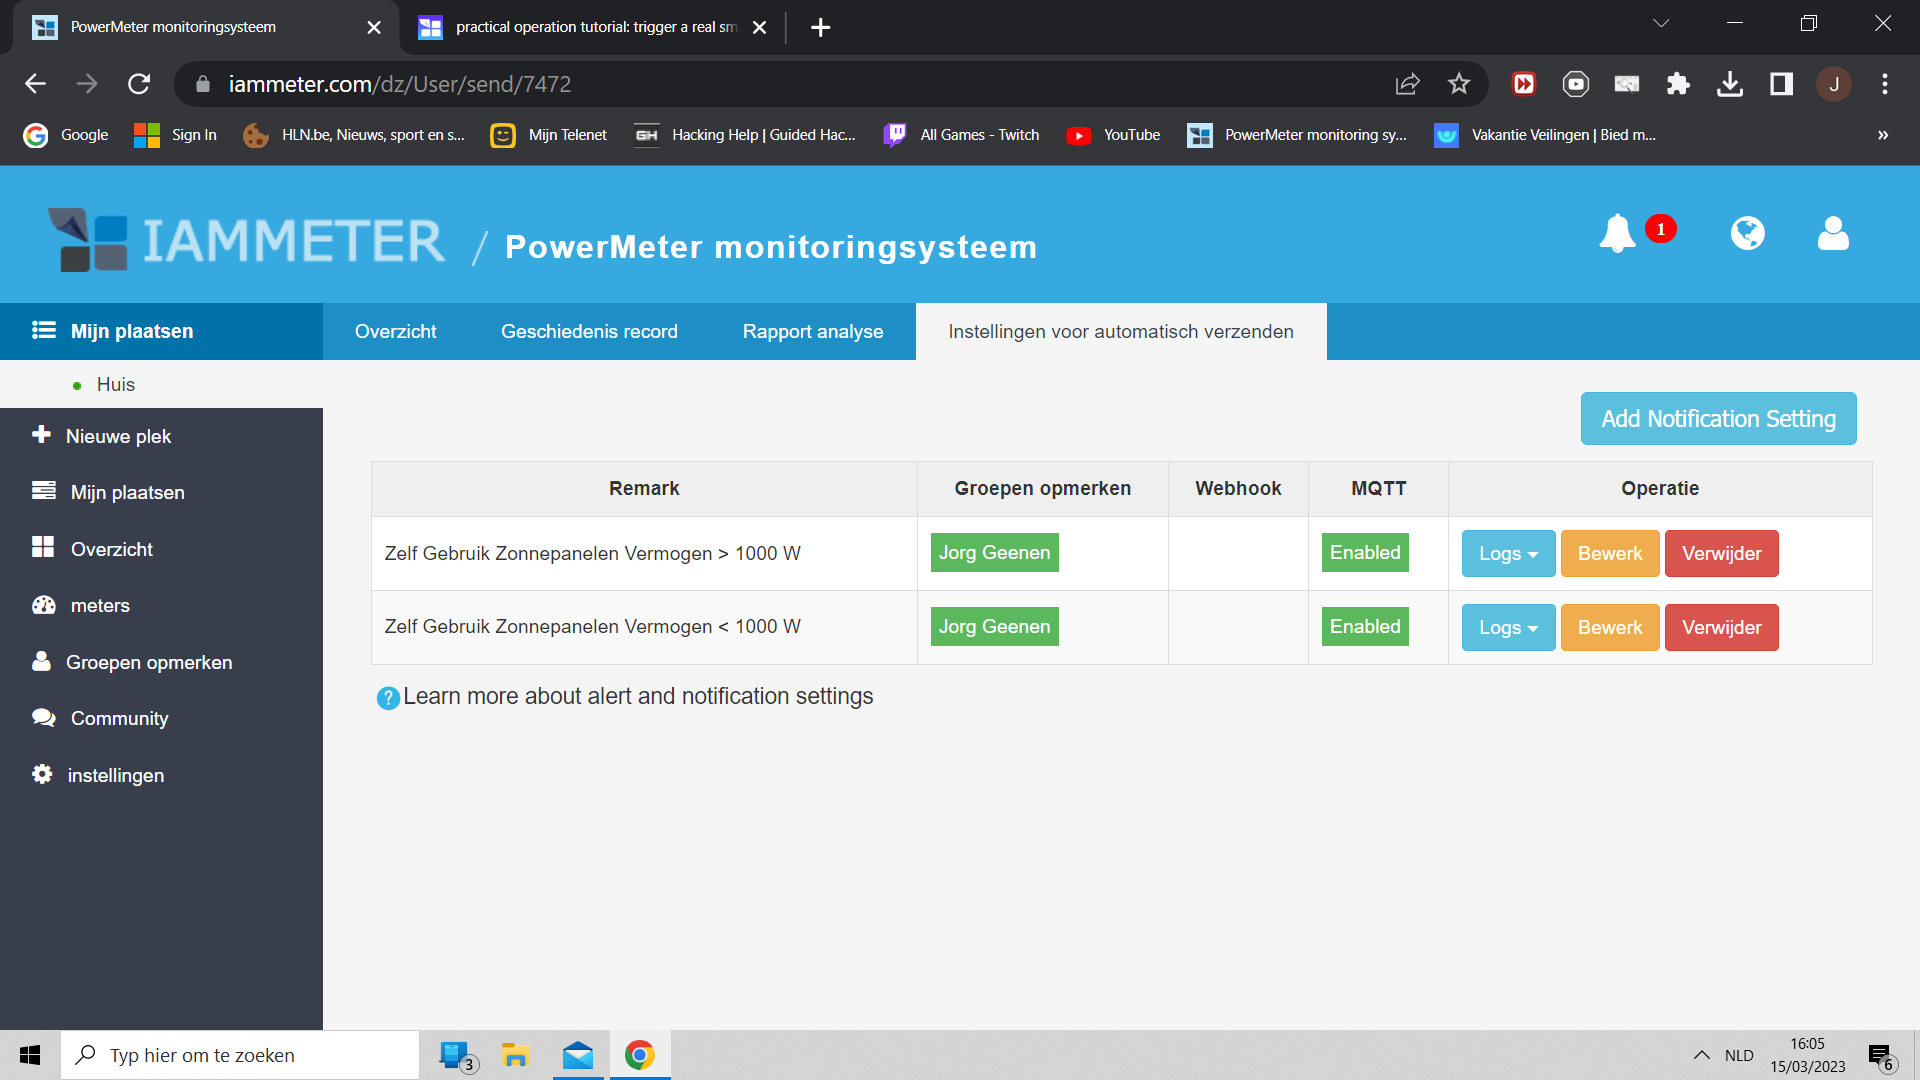
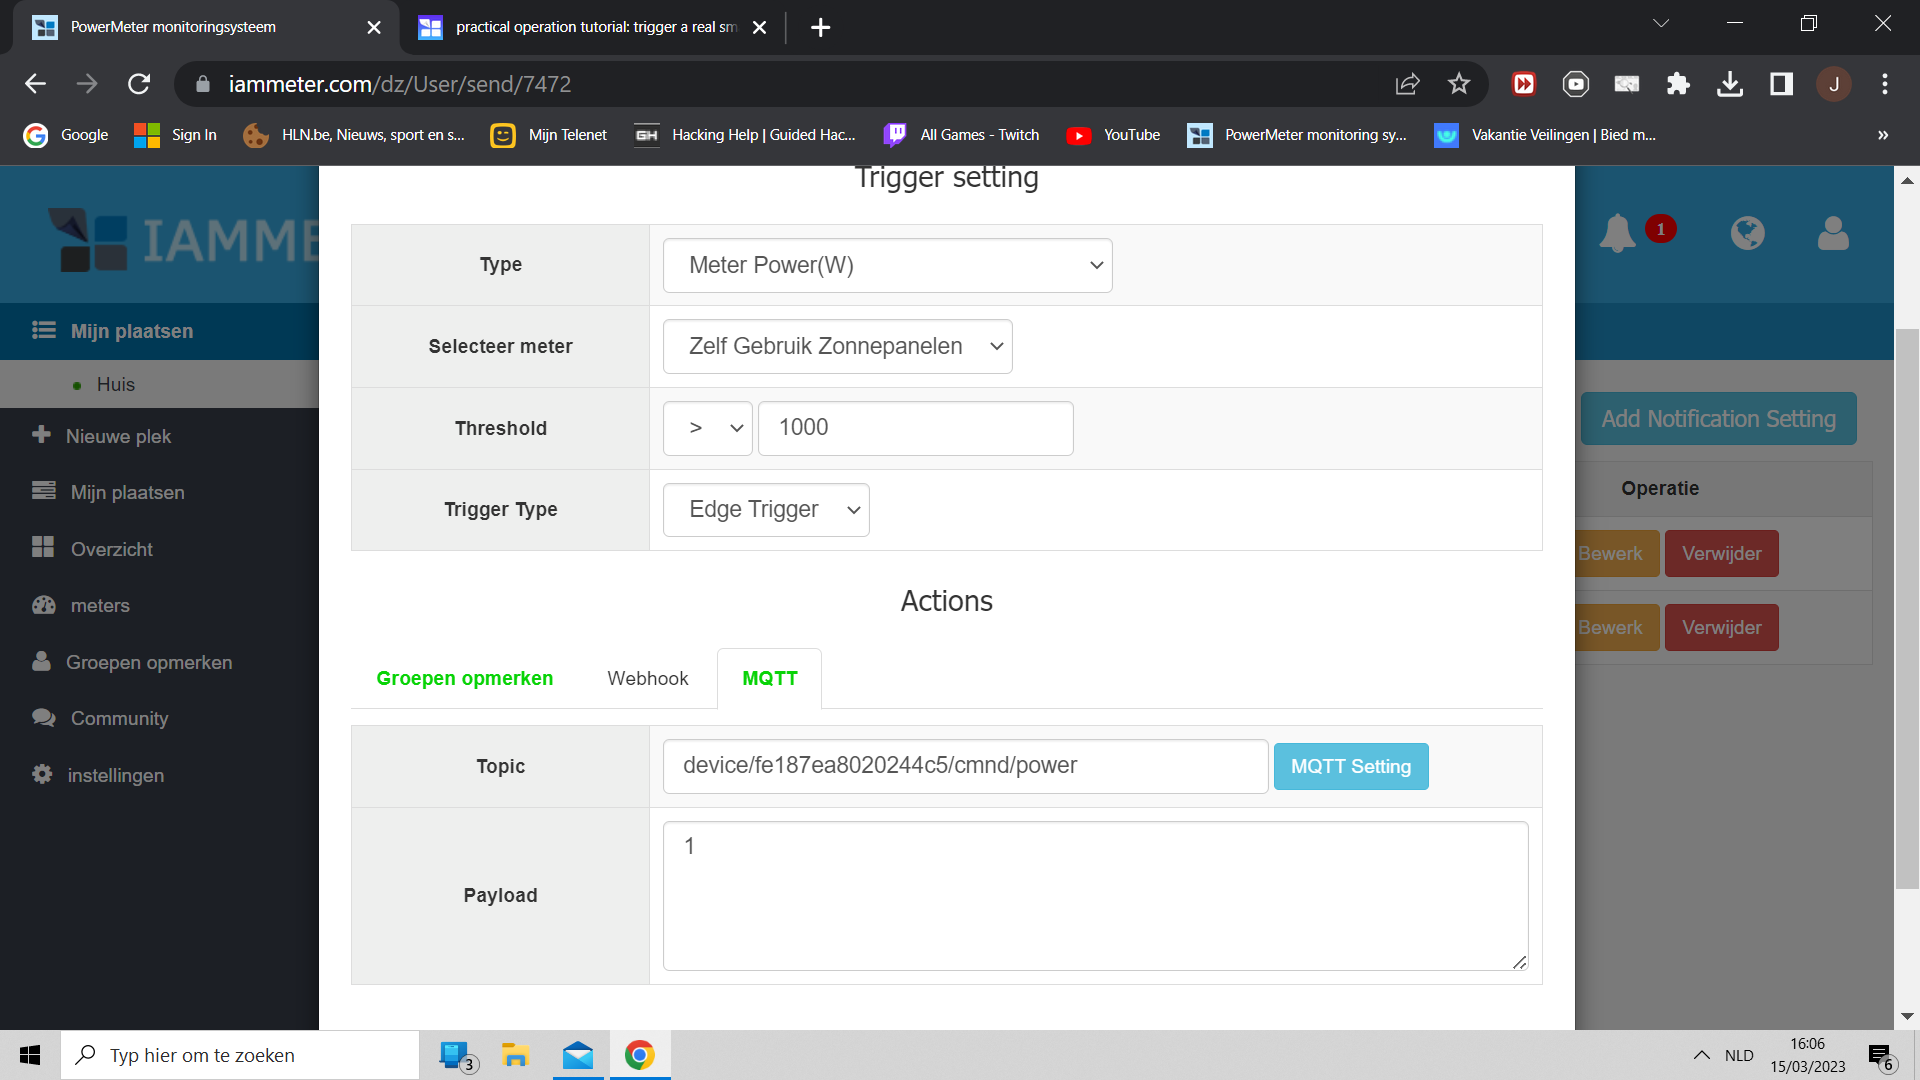
Control the smart socket by the preset triggering conditions automatically
Now ,we can do the final test, to control the smart socket plug automatically by preset triggering conditions.
How to get the same smart socket plug in this tutorial
Smart socket products are not our products. The smart socket in this tutorial is SonOFF products which is preflahed with the Tasmota firmware. How to get it ,please refer to
https://imeter.club/topic/43#how-to-get-the-sonoff-product-with-tasmota-firmware
Reference
Trigger the SonOff (tasmota firmware ) from IAMMETER
How to subscribe MQTT topic from IAMMETER
Special Note
- Because there is only one smart socket , if two customers manipulate it at the same time, the later configuration will overwrite the previous one. we recommend to clear your MQTT information after you have finished the testing, then the next user will know that there is no one is using this smart socket now.
- When you do this testing, please use a simple MQTT password. After you have finished this testing, please change the MQTT password and delete the ClientID in your account.
The complete tutorial about how to use the auto-send function in IAMMETER.
buna ziua
am procedat asa pentru a conecta o priza MQTT si nu raspunde la comezile automate din IAMMETER,raspunde numai din tasmota on sau of
nu stiu ce gresesc
daca ma poate ajuta cineva
vreau sa conectez o priza mqtt cind este cuten mai mult de la panouri
Please post a new topic for your problem ,as details as possible, thanks
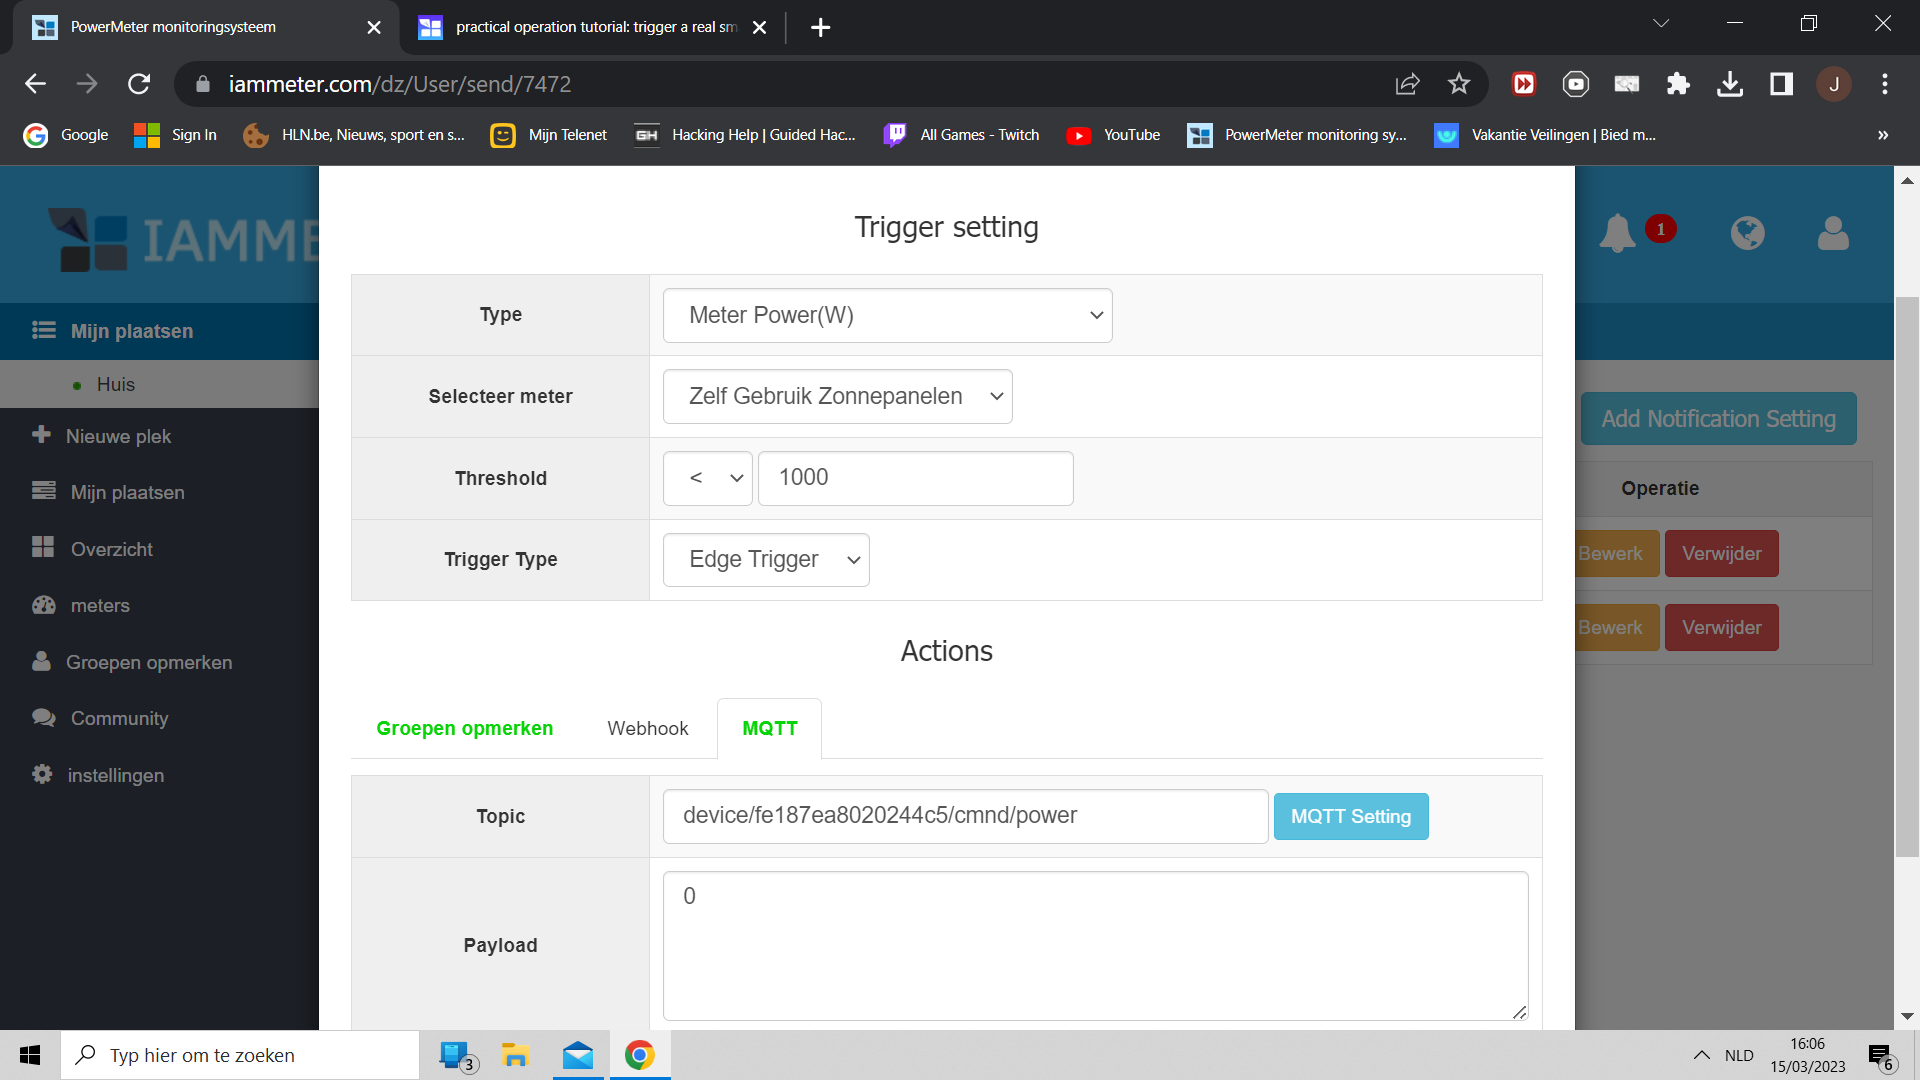
I have 2 meters, 1 over the cable flowing from the inverter power towards the main electricity board, and my second meter hangs over the cable flowing from the street electricity towards my electricity board , i have a tasmota socket, i did the followong on your tutorial on the solar meter i set > 400 (my small electricity fire is in the socket) this starts when the power is more then 400watt from the solarpanels, but now i want to shut it out when im using power from the street so when its -1 but it doesnt shutdown with negative numbers
please give me a snapshot of your specific setting about this trigger.

Can you show me a screenshot of the historical data at the point in time you think it should trigger?
I should remind you of a check logic: If the trigger type is edge trigger, not every match will be triggered, it just be triggered when the previous data does not match. You can check this.
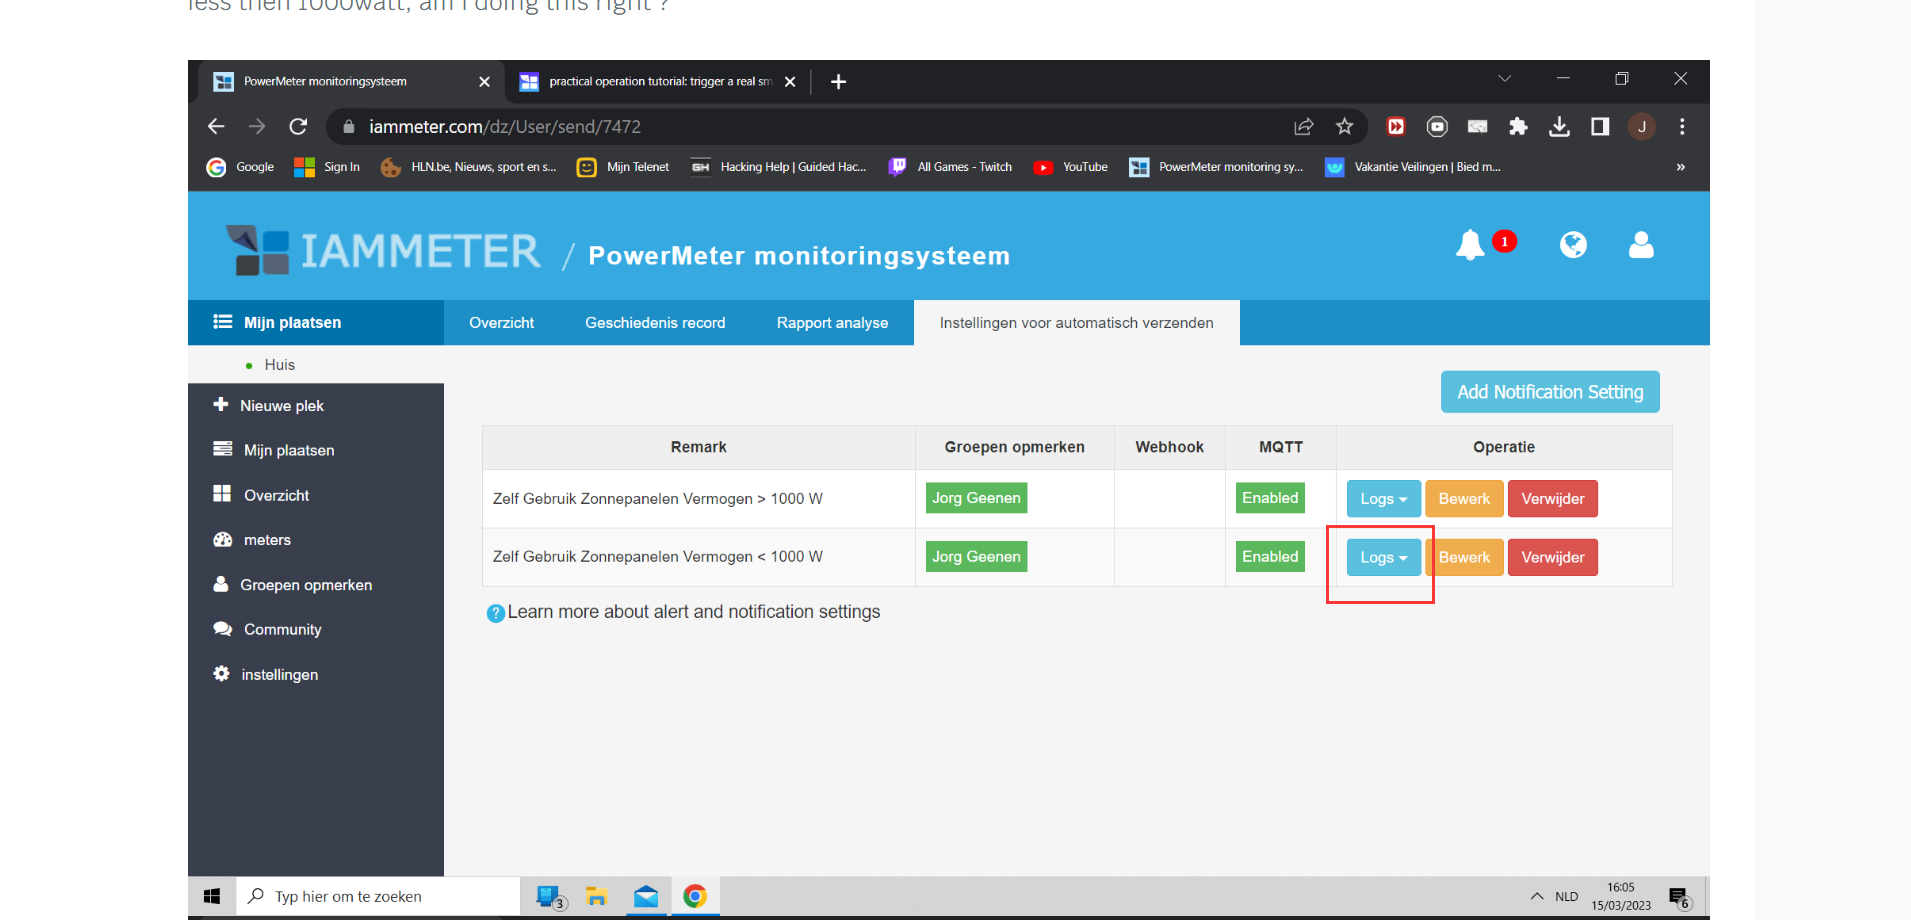
Do you mean the trigger operation is recorded in the log but the smart socket is not operated in real, yes?
no no, the socket reacts, and is working... but i want the socket to jump on if the power is more then 1000watt.
if the power is less then 1000watt then the socket has to jump off. is this possible ?
Hi:
Of course, it can do this (This is the main feature we want to provide in the trigger )
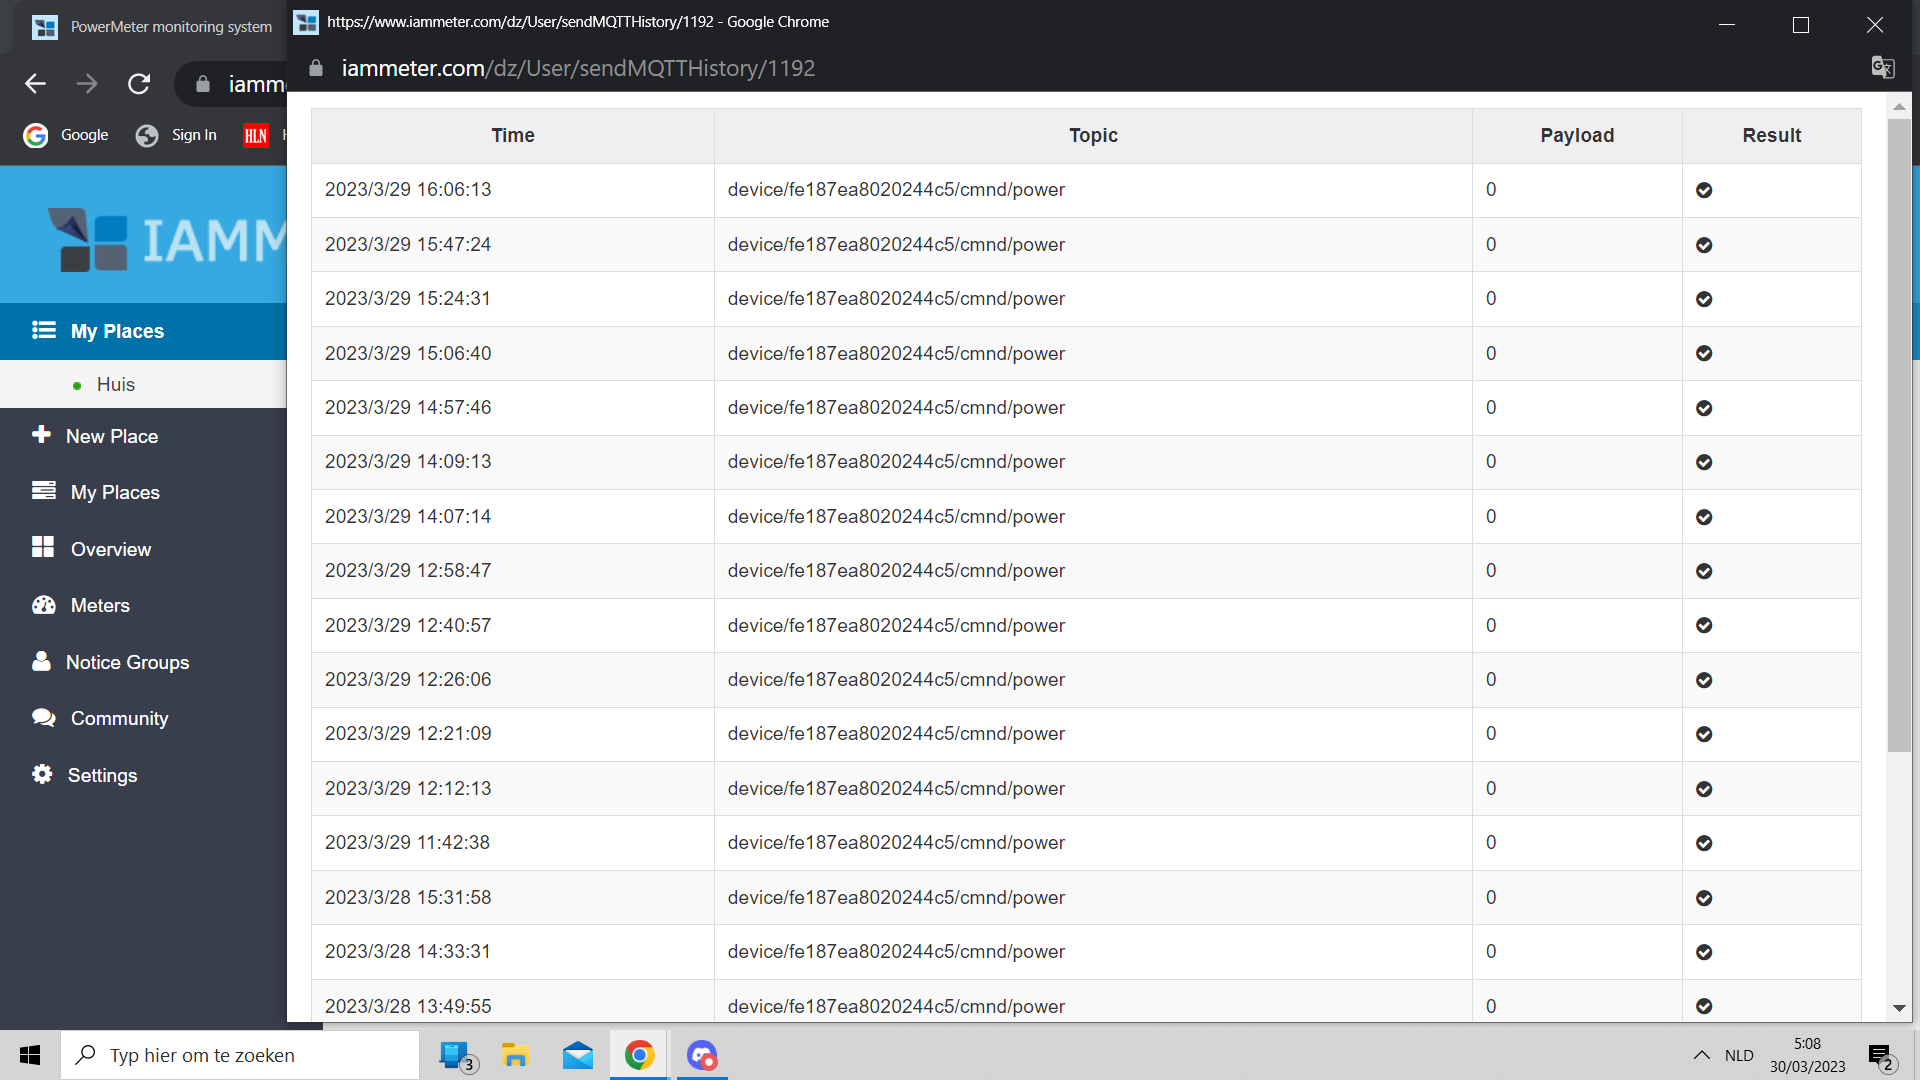
I see the log is normal, it published the power on command like this, do you mean the real smart socket did not operate by this command?