Using Home Assistant as a bridge to transmit inverter data to IAMMETER
Retrieve the data of Goodwe's inverter through Home Assistant.
Upload the data obtained in step 1 to the virtual meter in IAMMETER
Premise
Using Home Assistant as a bridge to transmit inverter data to IAMMETER.
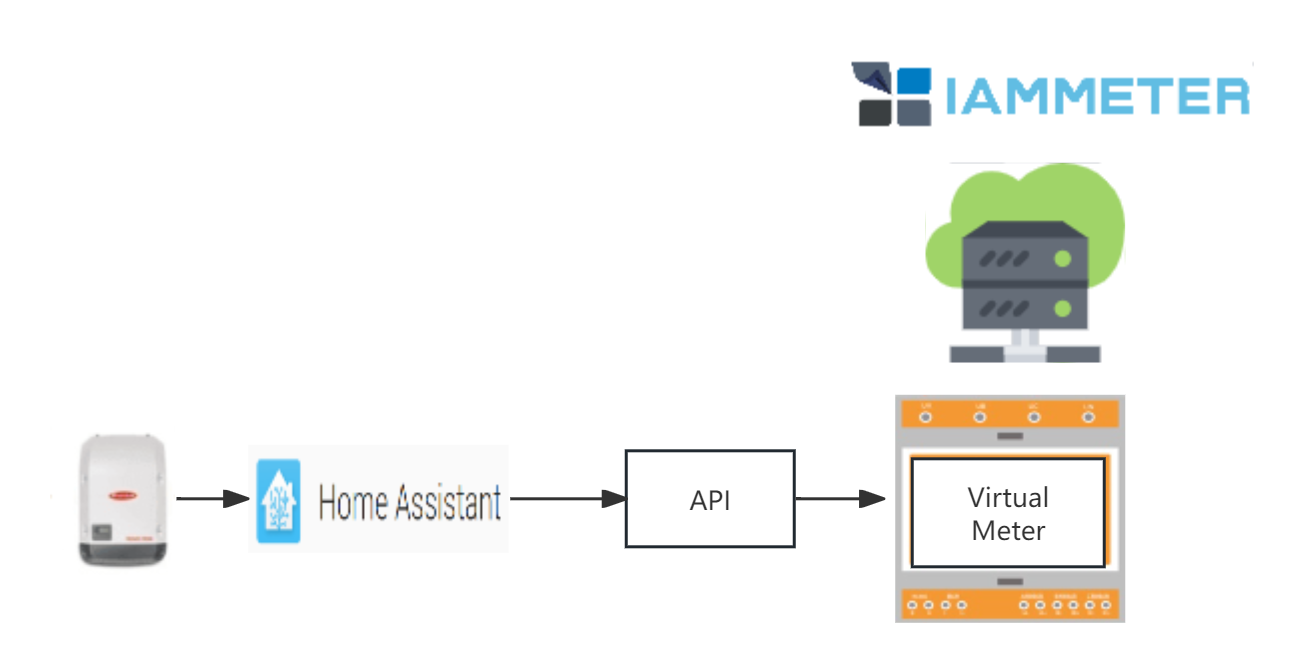
You may have a question: since you've already integrated with Home Assistant, why push the data to IAMMETER? The majority of Home Assistant users are tech enthusiasts who prefer to keep data as local as possible rather than in the cloud. IAMMETER focuses on energy management, providing a wealth of reports and analytical tools for energy consumption. This document is just an idea, an attempt to explore more ways to utilize IAMMETER.
This tutorial outlines a method for bridging the data from Goodwe's inverter to IAMMETER using Home Assistant. It comprises three steps:
Retrieve the data of Goodwe's inverter through Home Assistant.
Apply for a virtual meter from IAMMETER-cloud.
Upload the data obtained in step 1 to the virtual meter in IAMMETER.
Retrieve the data of Goodwe's inverter through Home Assistant.
Sensor Definition in Home assistant
we use this integration to request the data from goodwe`s inverter.
| Goodwe | Index |
|---|---|
| "pv_power","ppv" | 1 |
| "house_consumption", | 2 |
| "active_power", | 3 |
| "battery_soc", | 4 |
| "e_day", | 5 |
| "e_total", | 6 |
| "meter_e_total_exp", | 7 |
| "meter_e_total_imp", | 8 |
| "e_bat_charge_total", | 9 |
| "e_bat_discharge_total", | 10 |
Map 7-parameters to the virtual meter of IAMMETER
The virtual meter provides a 3-phase electricity meter data interface.
When monitoring a solar PV system in IAMMETER, we need to obtain these 7-parameters:
solar inverter output power
total Kwh generation of the inverter
grid power
total grid consumption(Kwh)
total grid exported energy(Kwh)
total battery charging (Kwh)
total battery discharging (Kwh)
We need to map these sensors in HA to the three-phase data interface (seven parameters) of the virtual meter.
The correspondence is as follows (The correspondence is as follows (The numbers in the table are the index values of the GoodWe sensor listed in the above table).
| phase A (Inverter) | phase B (Grid) | phase C (AC storage) | |
|---|---|---|---|
| power | 1 | 3 | battery power |
| Forward Kwh | 6 | 8 | 9 |
| Reverse Kwh | 7 | 10 |
The battery power is not listed in the sensor, but it can be calculated using this formula.
| sensor | value | index | ||
|---|---|---|---|---|
| house_consumption | 5kw | 2 | ||
| pv_power | 10kw | 1 | ||
| active_power | 3kw | 3 | exporting | |
| battery power | 10-5-3=2kw | {1}-{2}-{3} | charging |
Apply for a virtual meter from IAMMETER-cloud
Regarding the virtual meter
The virtual meter is our latest attempt, and users can use this to integrate other energy monitoring devices (smart meters, inverters) into IAMMETER-cloud.
You need to have an account of IAMMETER firstly, Regarding the Virtual meter of IAMMETER
Apply for a virtual meter
 change the Data Source to "PushApi" and save

Save.

A 'trial SN' has appeared; this is the SN of the virtual meter.

Add the virtual meter into IAMMETER
click "New Place"
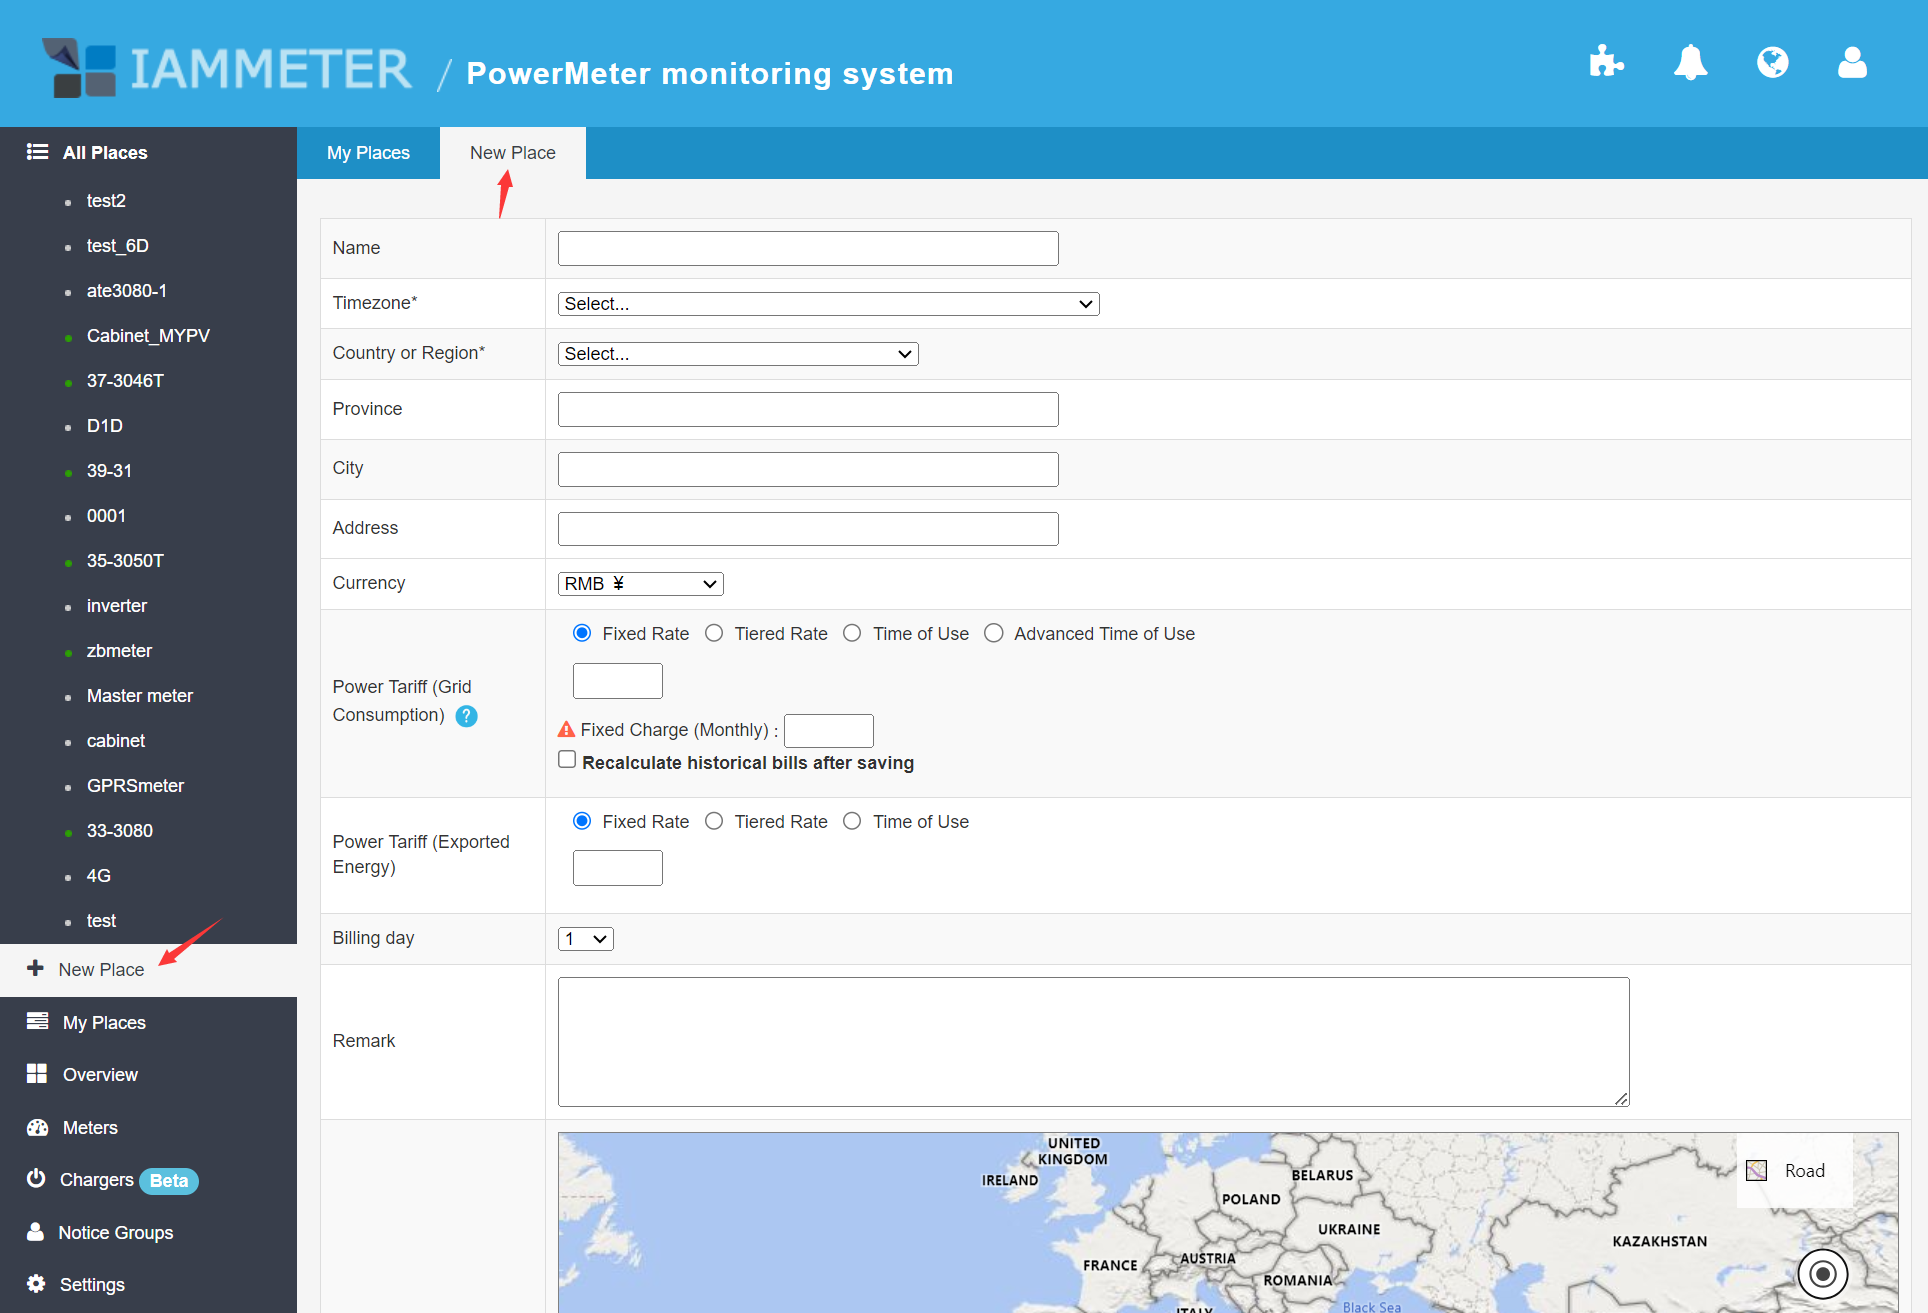 Input the "trail SN" ,and click "save"
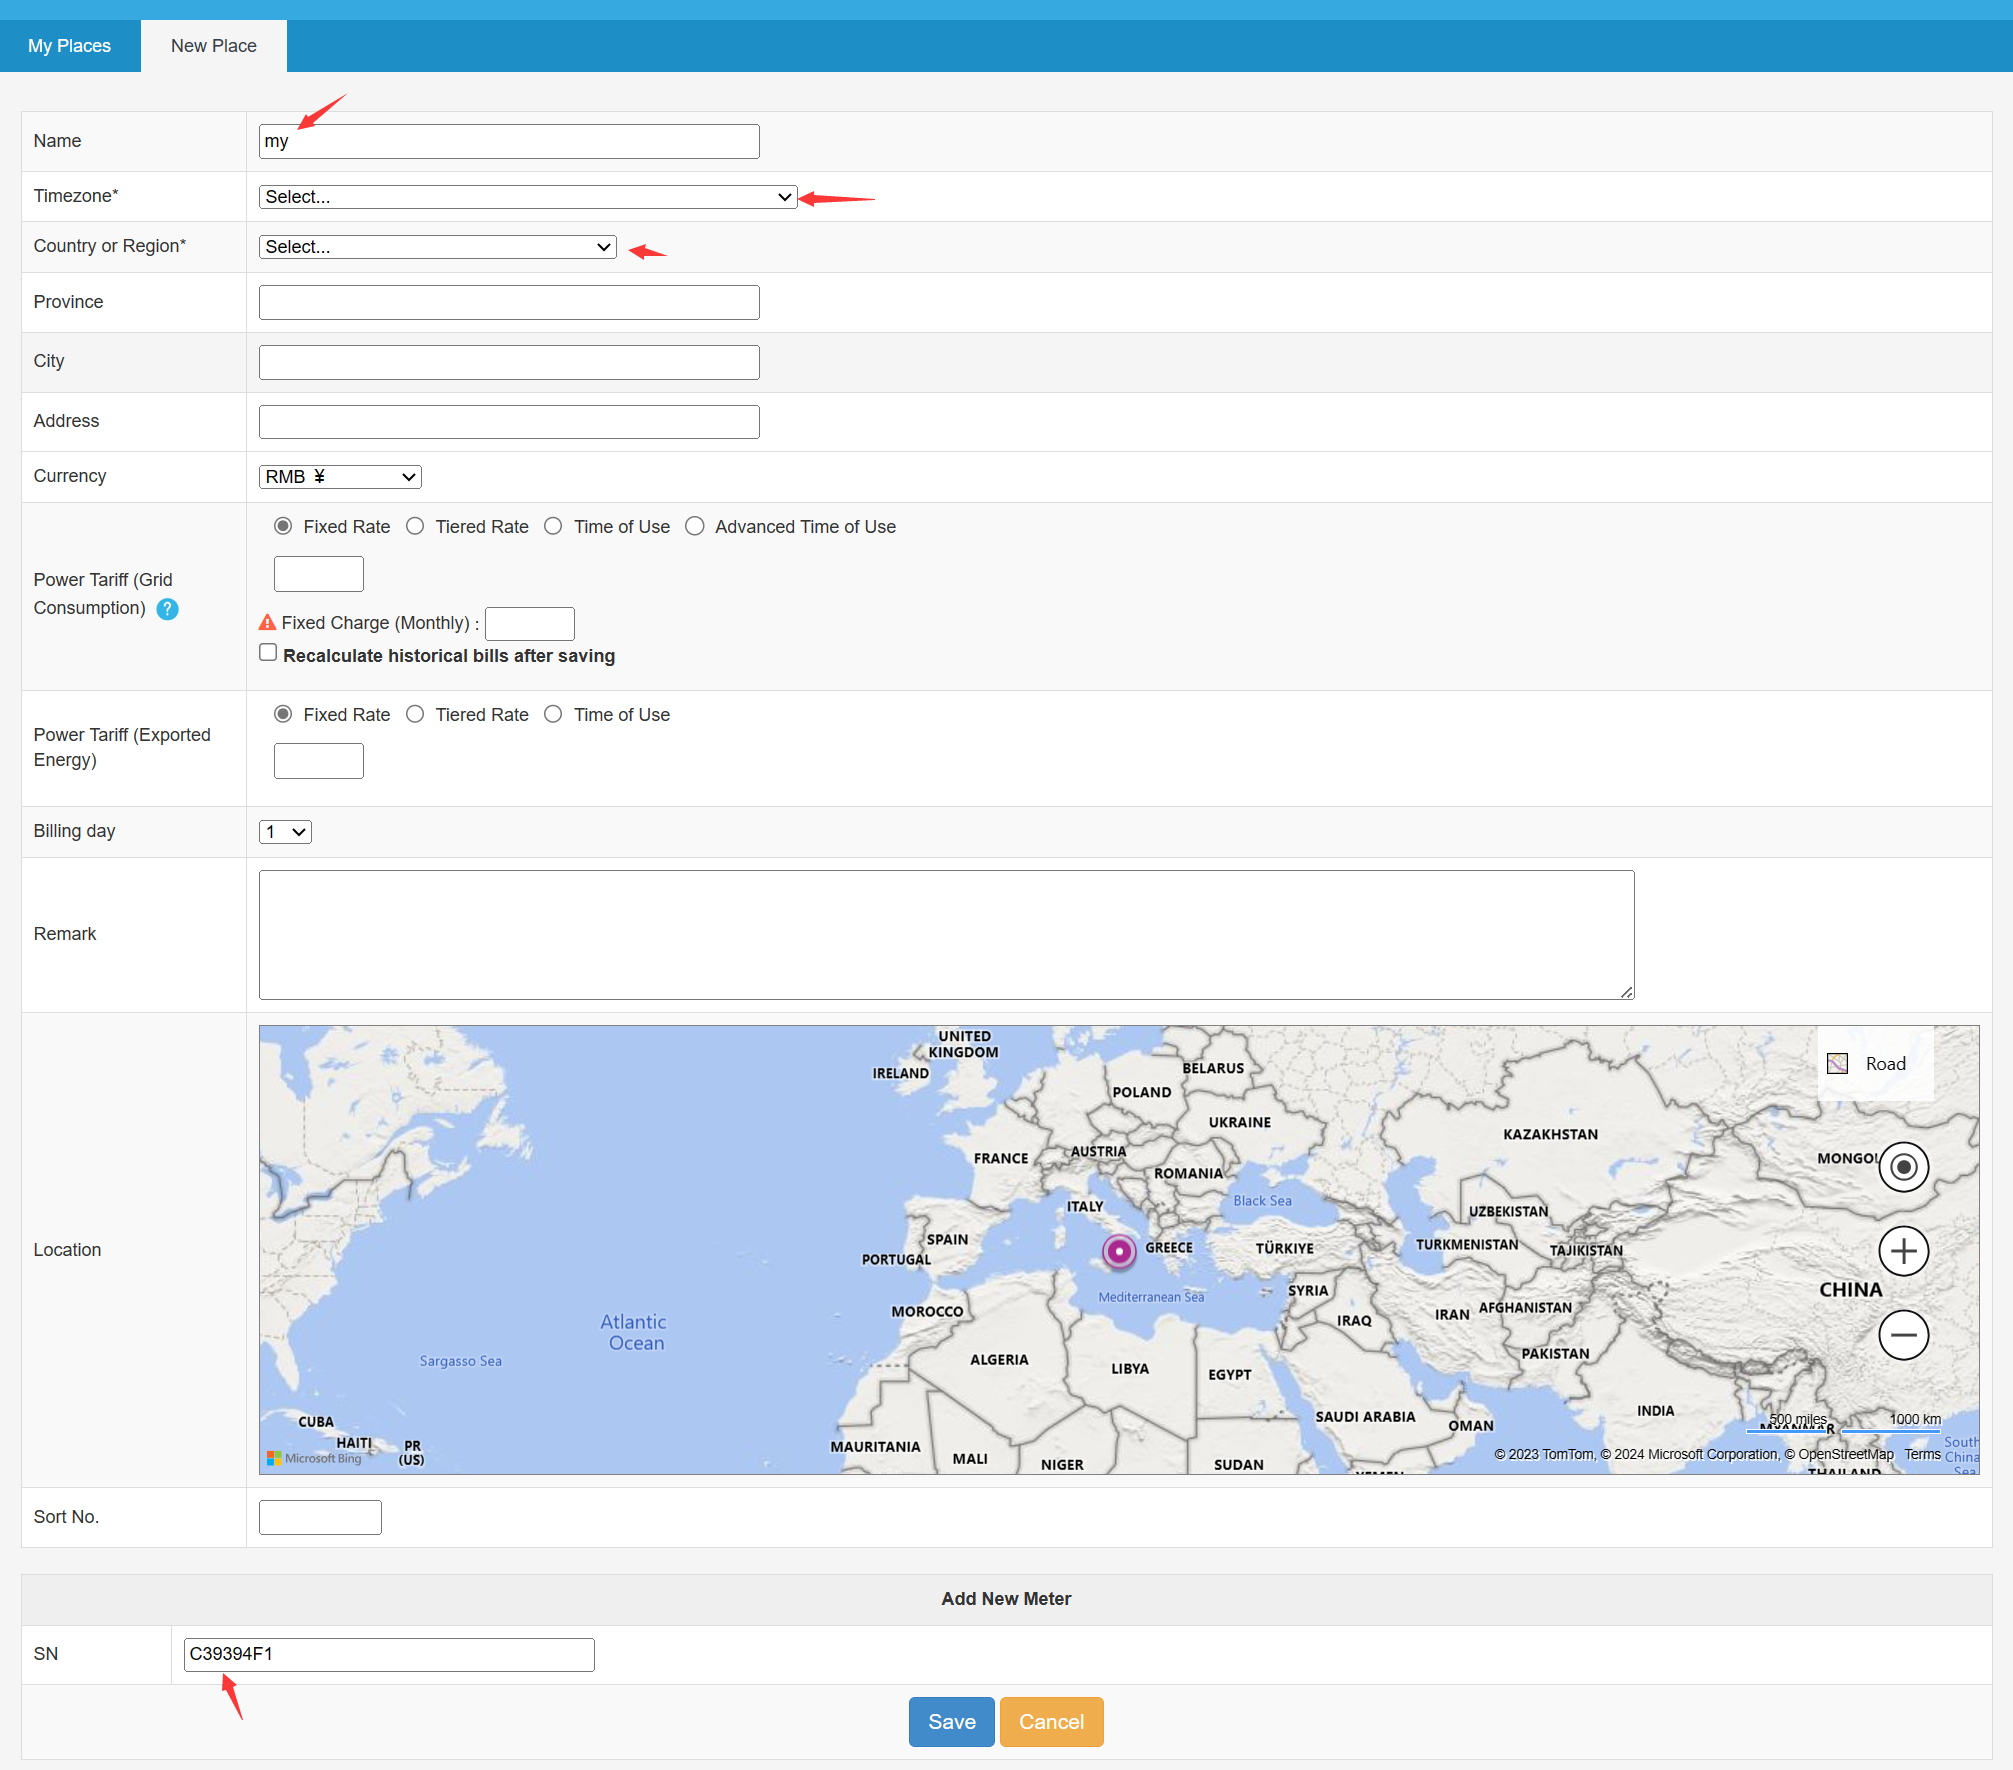 click Meters -> my -> Edit
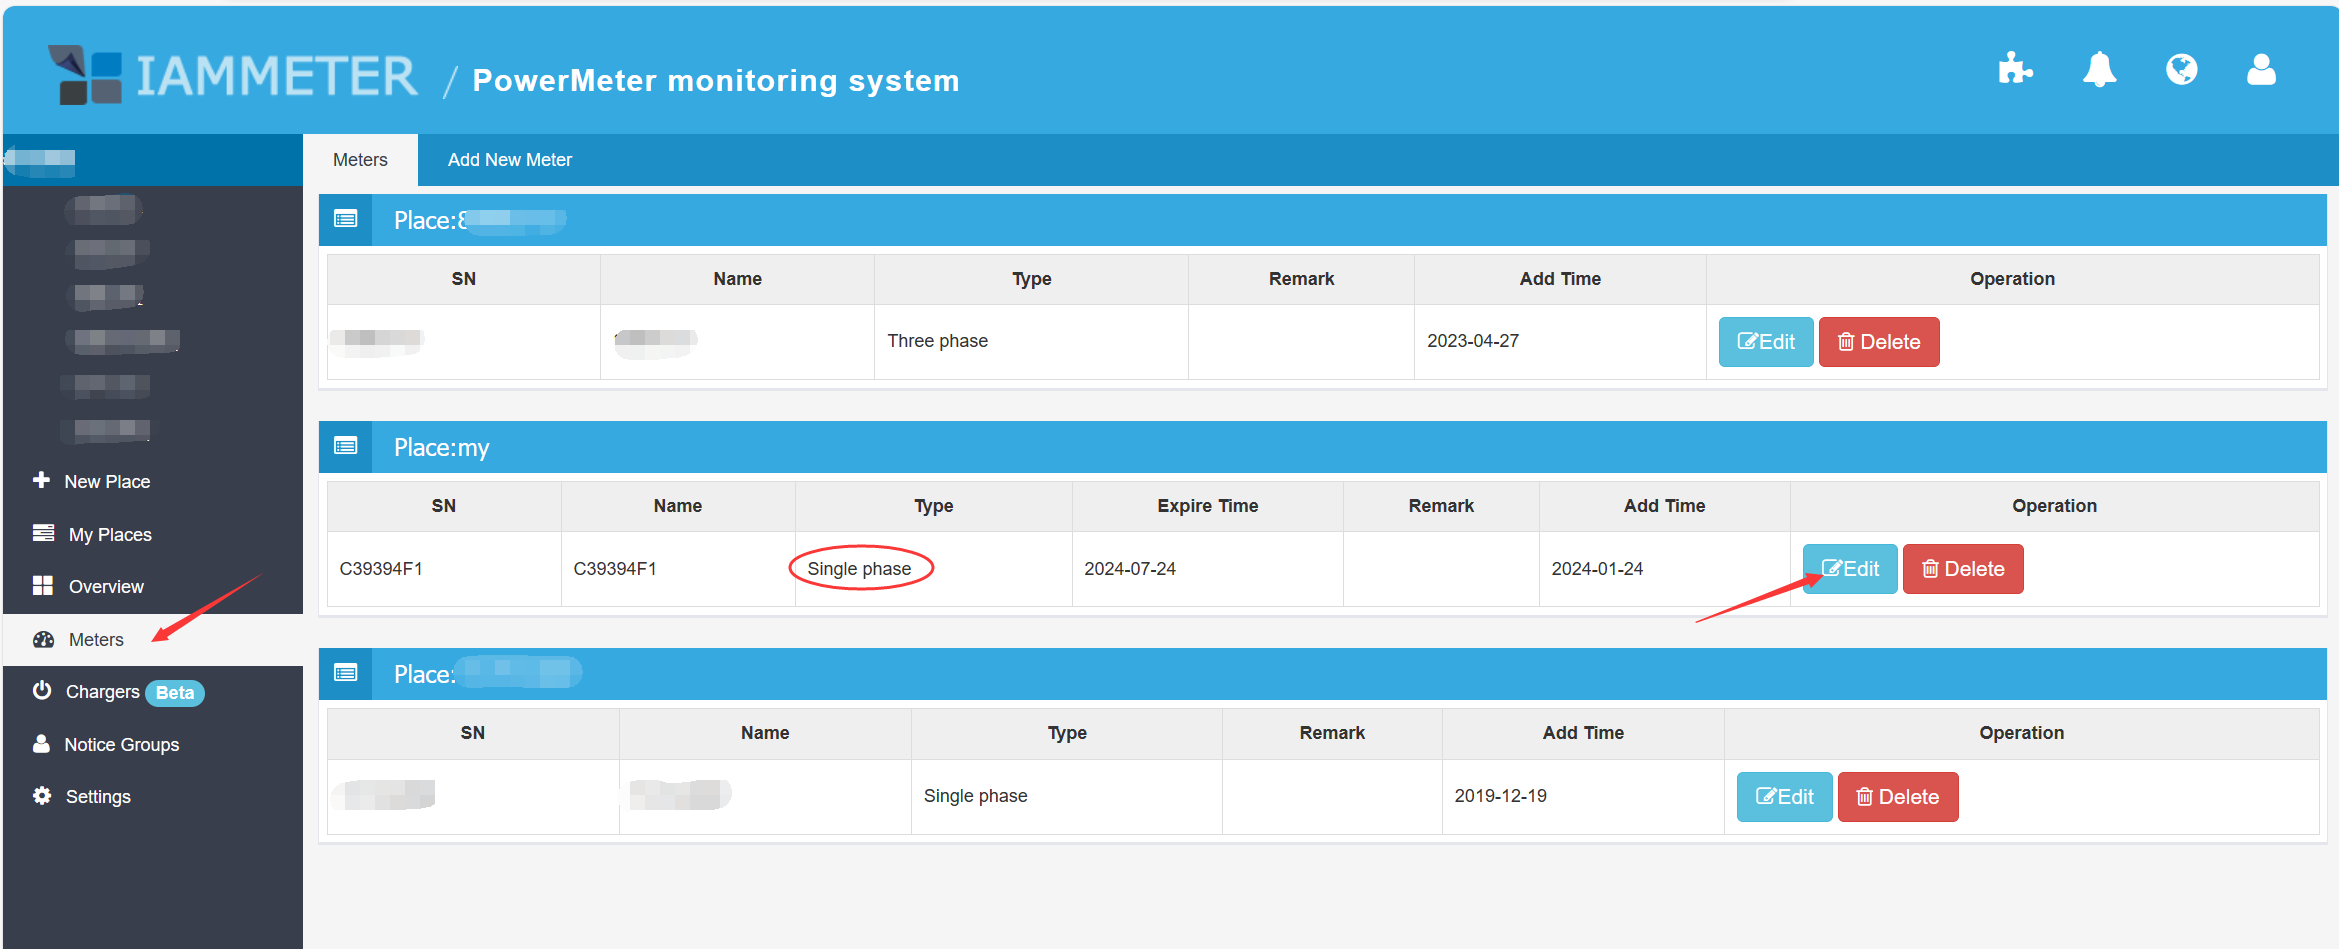 change the Type to "Three phase" , and save.
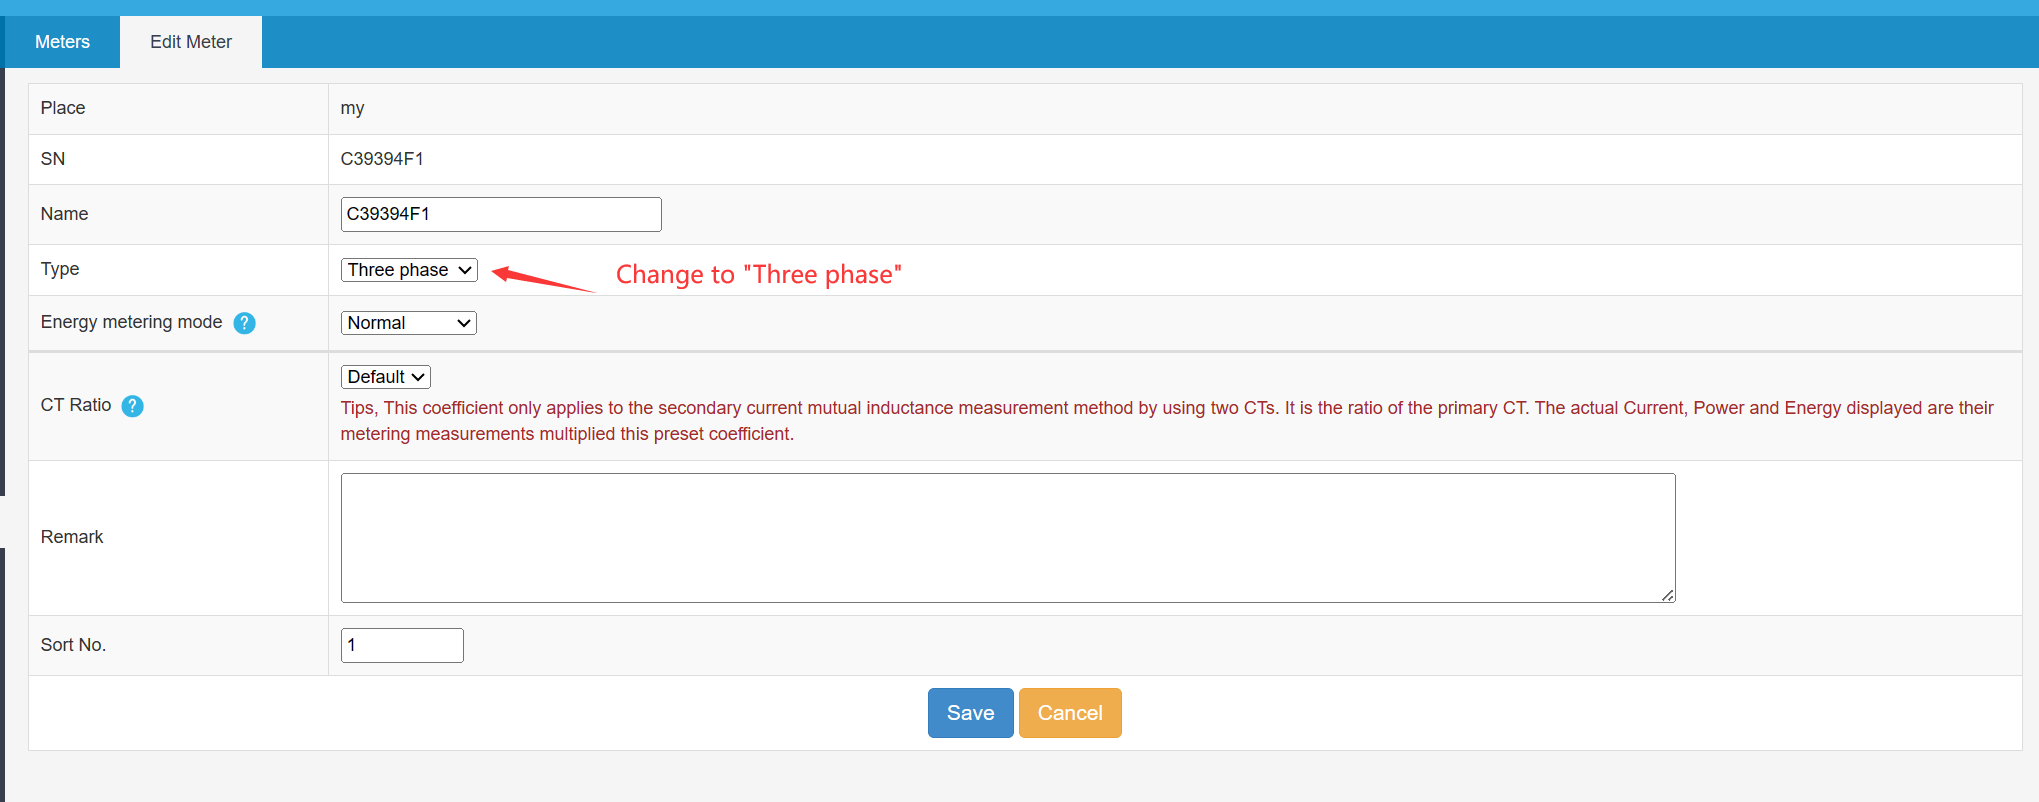
Configure the virtual meter
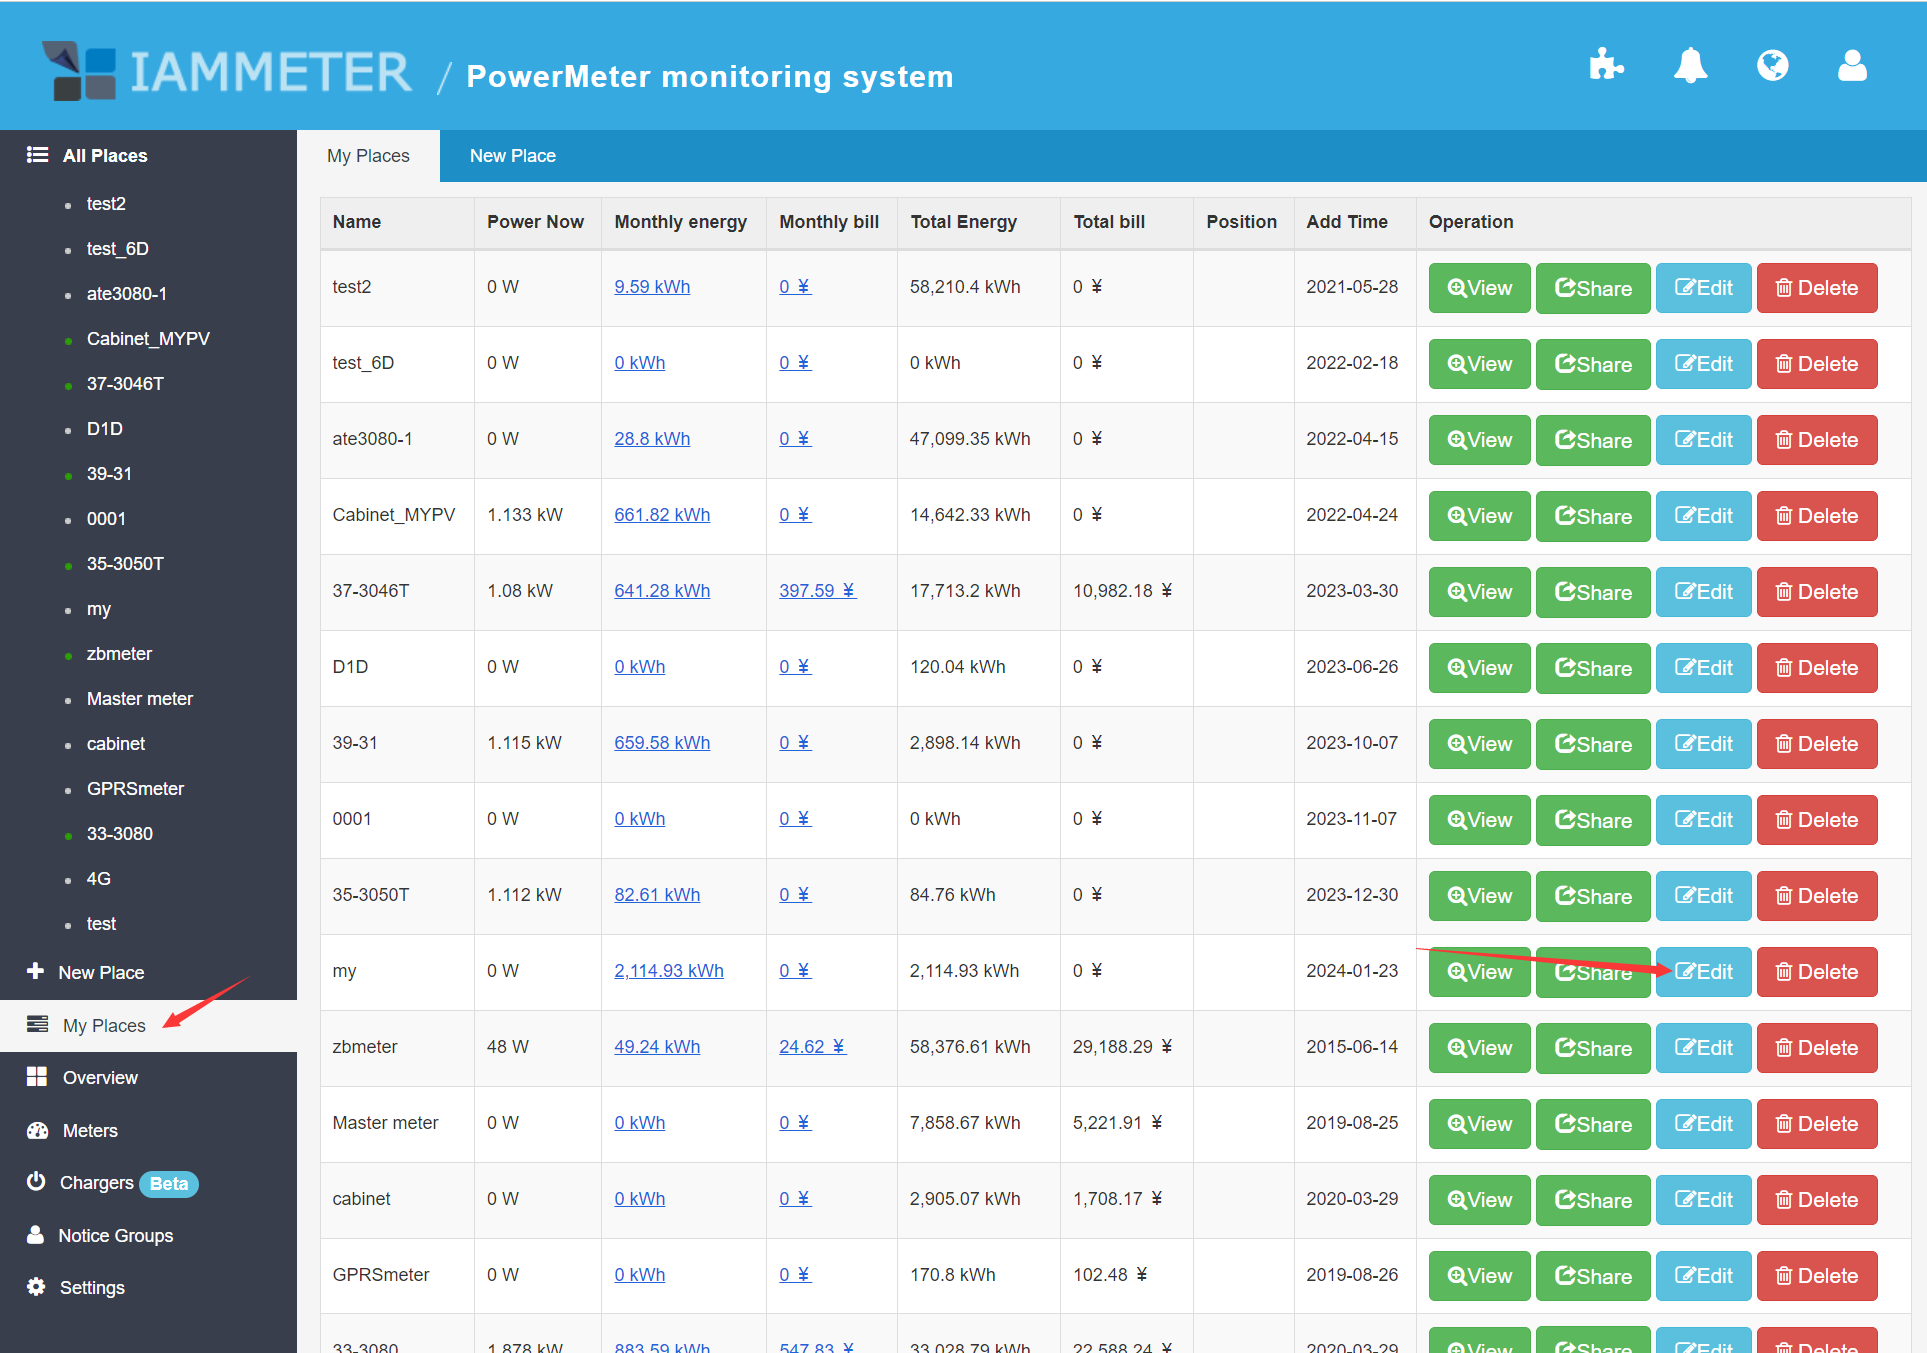
then click My Places -> my -> Edit
The virtual meter is a 3-phase meter, with each phase corresponding to Goodwe inverter's solar generation, grid meter, and battery storage, respectively.
Phase A: solar generation
Phase B: grid meter
Phase C: battery storage
Therefore, we need to configure the three-phase settings in the IAMMETER system as follows:
| SN | Type |
|---|---|
| SN_a | Inverter |
| SN_b | Grid |
| SN_c | AC Storage |
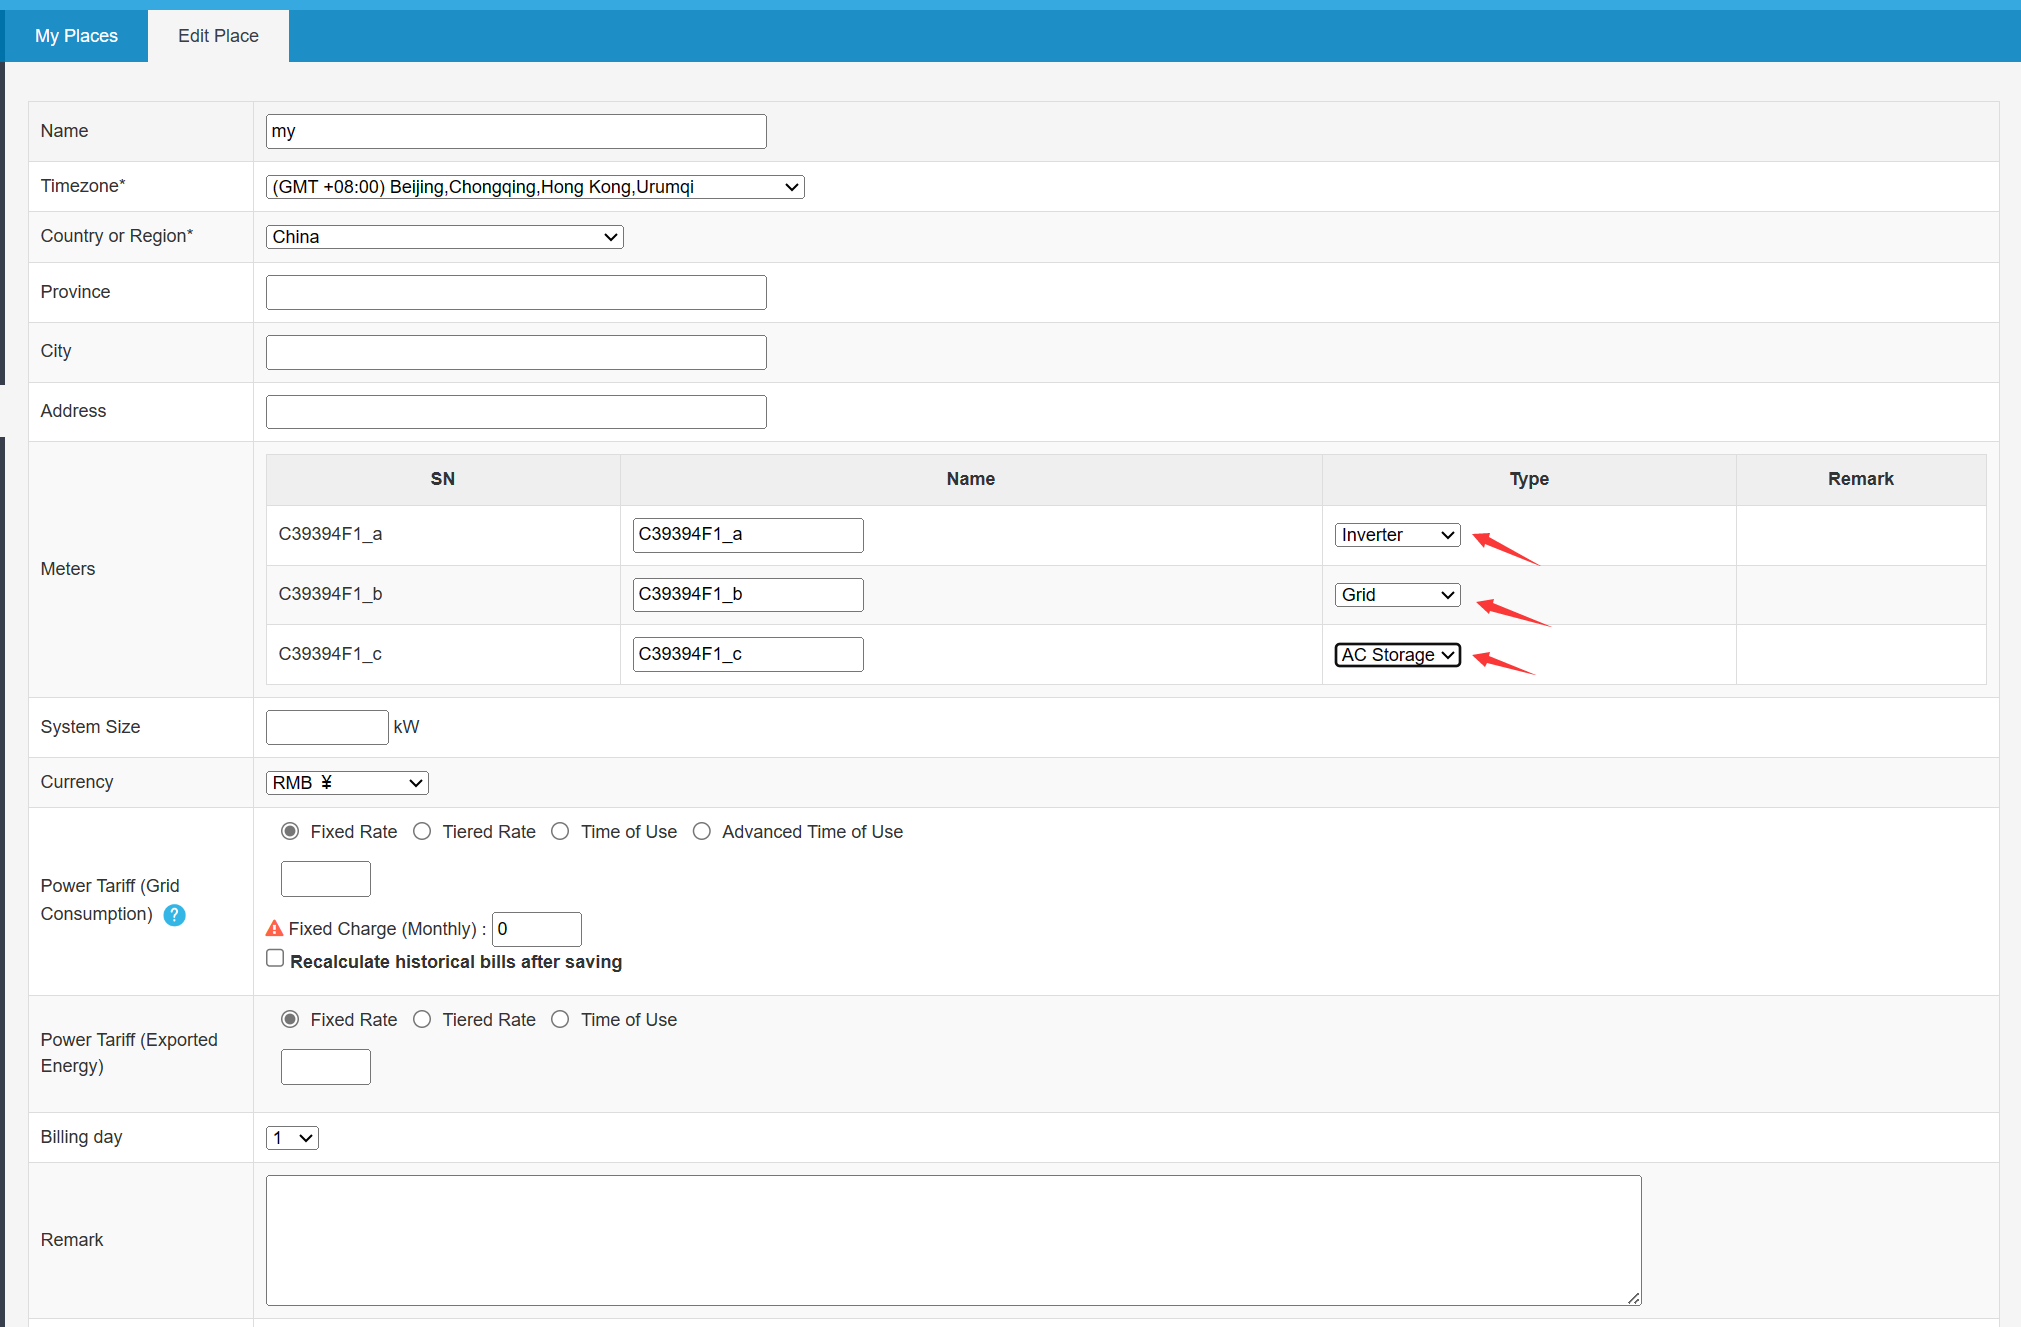 Click "save" to save this configuration.
Upload the data obtained in step 1 to the virtual meter in IAMMETER
After fetch 7-parameters from goodwe`s inverter, Home assistant use this API to upload the data of the virtual meter to IAMMETER.
To use this integration, add the following lines to your configuration.yaml file:
xxxxxxxxxx# Example configuration.yaml entryrest_command:# Three phase meter my_meter3: url: http://open.iammeter.com/api/V1/sensor/UploadSensor method: POST headers: # authorization: !secret rest_headers_secret accept: "application/json, text/html" user-agent: 'Mozilla/5.0 {{ useragent }}' content_type: 'application/json; charset=utf-8' # verify_ssl: true payload: > { "method": "uploadsn", "mac": "112233445566", "version": "1.02", "server": "em", "SN": "your_sn", "Datas": [ [ 220, 0, {{ states('sensor.pv_power') | float }}, {{ (states('sensor.e_total') | float }}, 0, 50, 1 ], [ 220, 0, {{ states('sensor.active_power') | float }}, {{ (states('sensor.meter_e_total_imp') | float }}, {{ (states('sensor.meter_e_total_exp') | float }}, 50, 1 ], [ 220, 0, {{ (states('sensor.pv_power') | float - (states('sensor.house_consumption') | float -(states('sensor.active_power') | float }}, {{ (states('sensor.e_bat_charge_total') | float }}, {{ (states('sensor.e_bat_discharge_total') | float }}, 50, 1 ] ] }automation: - id: '3666938222668' alias: "Post Sensor Data" description: '' trigger: platform: time_pattern seconds: 59 condition: [] action: - service: rest_command.my_meter mode: singleyour_sn: iammeter cloud creat the sn
sensor.xxx: Change to the actual name of your sensor
Reference
Monitor your solar PV system in Home Assistant
Four ways to integrate the Electricity Usage Monitor (IAMMETER) into the home assistant
