Use Smart socket (WSM-16/WSM-16P) directly in IAMMETER-cloud
Socket Relay Devices with Energy Monitoring WSM-16/WSM-16P
Video tutorial : https://youtu.be/8Shqf7ssGuI
About WSM-16/WSM-16P
If you have WSM-16/WSM-16P device, you will be able to control it from IAMMETER now. After you have control them from IAMMETER successfully, you can also trigger them from IAMMETER. Then you can accomplish such work easily, "when the (inverter or grid ) power is greater than xxx, turn on/off the switch".
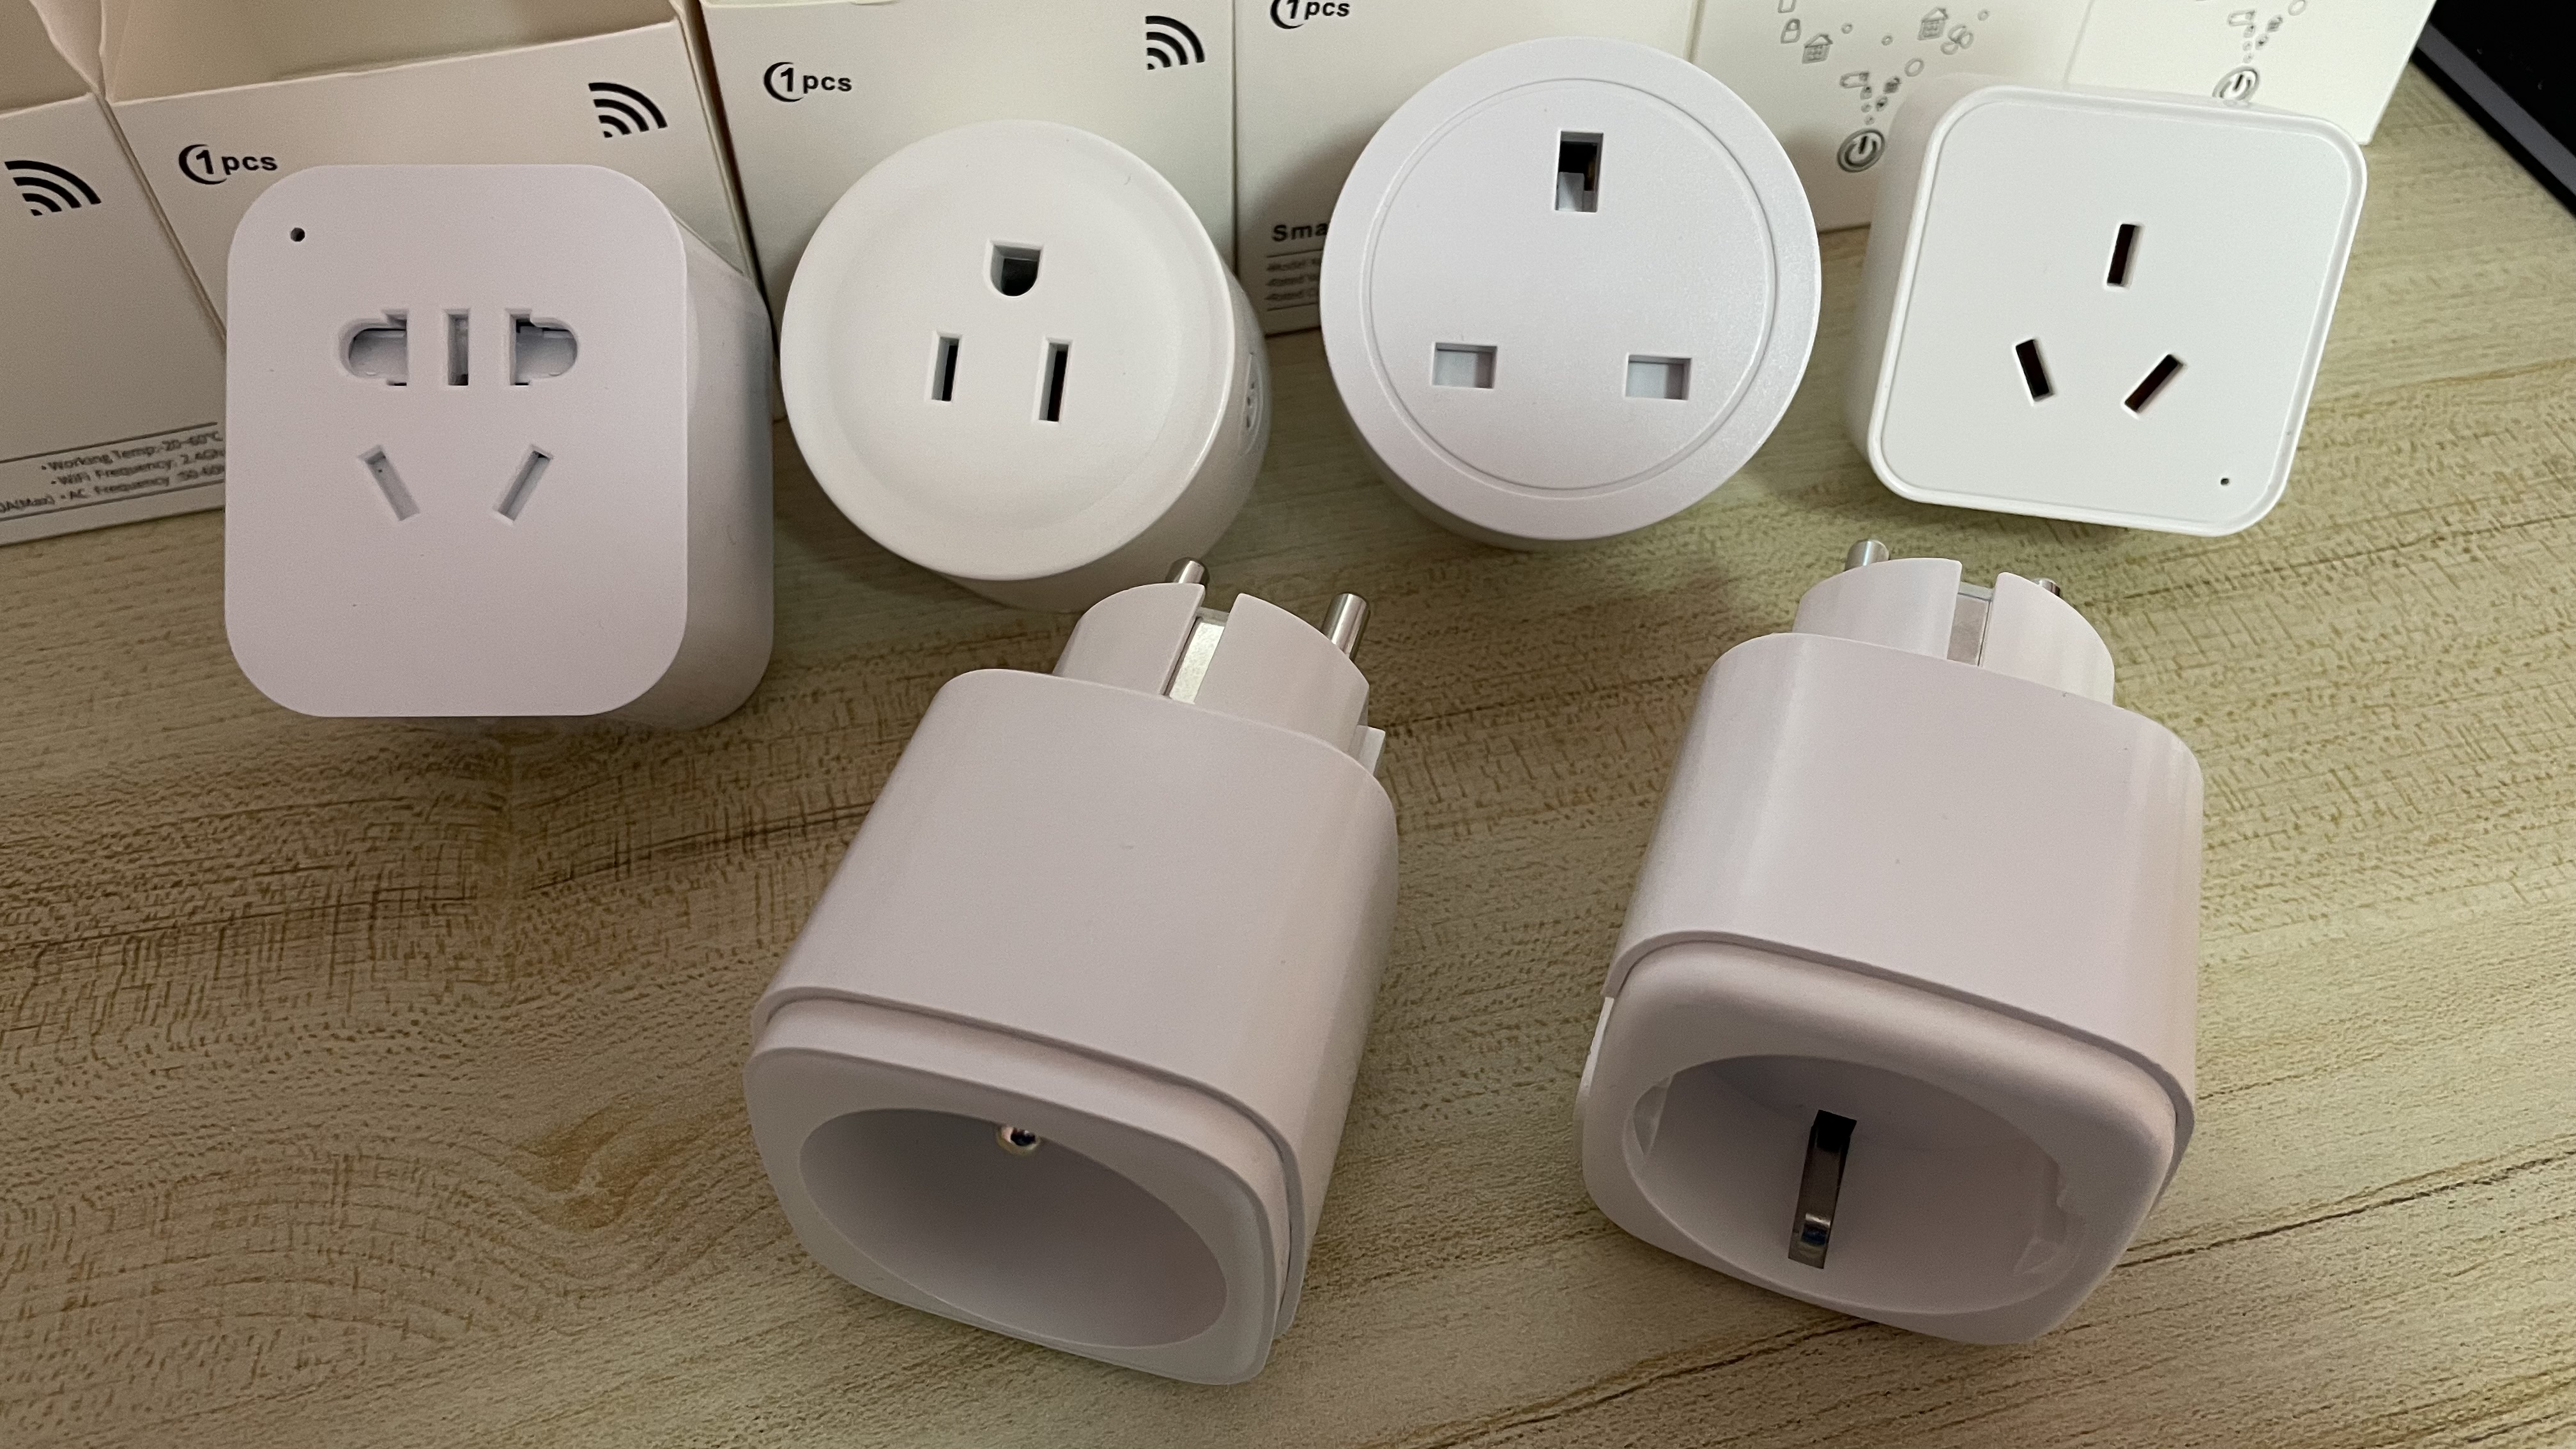
Trigger the WSM-16/WSM-16P from IAMMETER
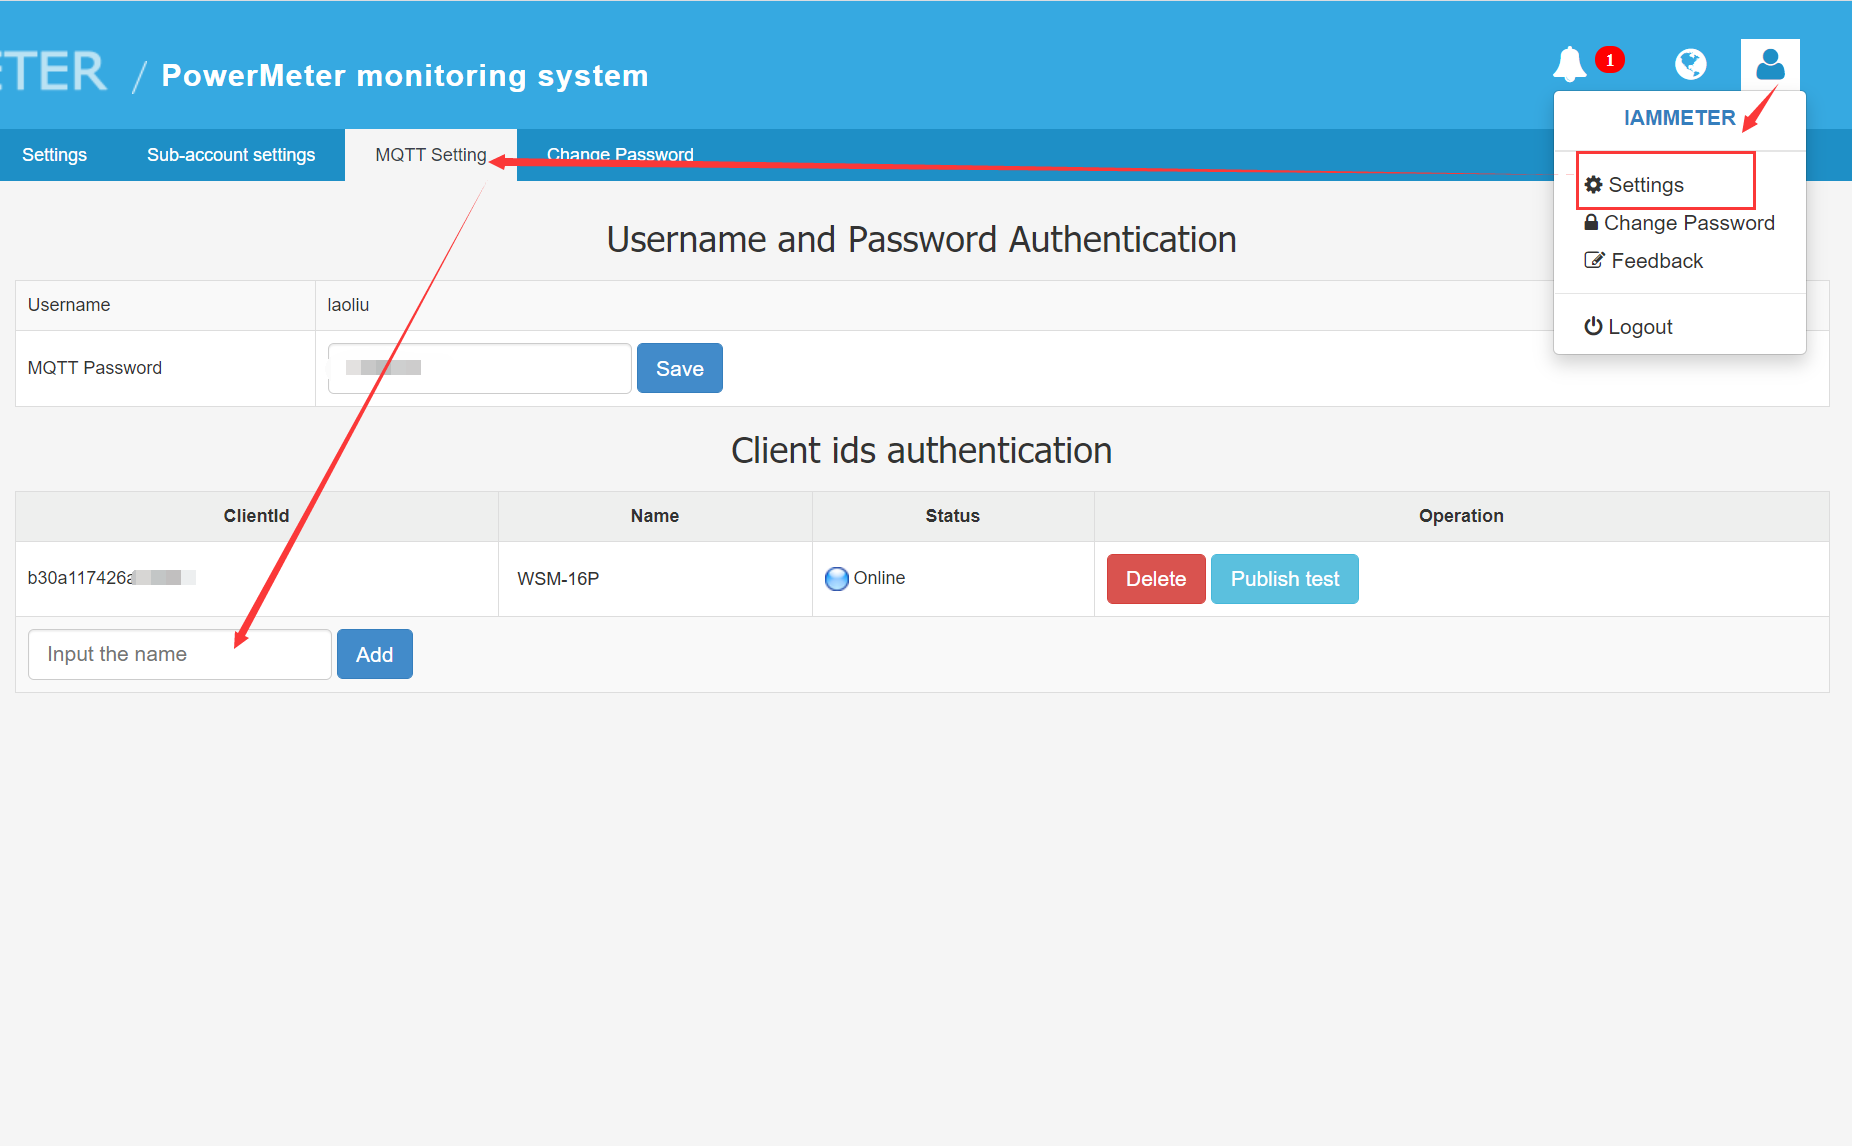
Add a mqtt device in IAMMETER and get the ClientID
input a name,click "click add" , then a "clientID" will be added in your account.
Please remember this "ClientID", it will be used in the configuration of the tasmota firmware.
configure the WSM-16/WSM-16P ( run Customized tasmota)
configure the Wi-Fi setting
Connect the ssid begin with "tasmota-XXXXXX" and visit 192.168.4.1 , enter WiFi SSID and password of the router and click save.
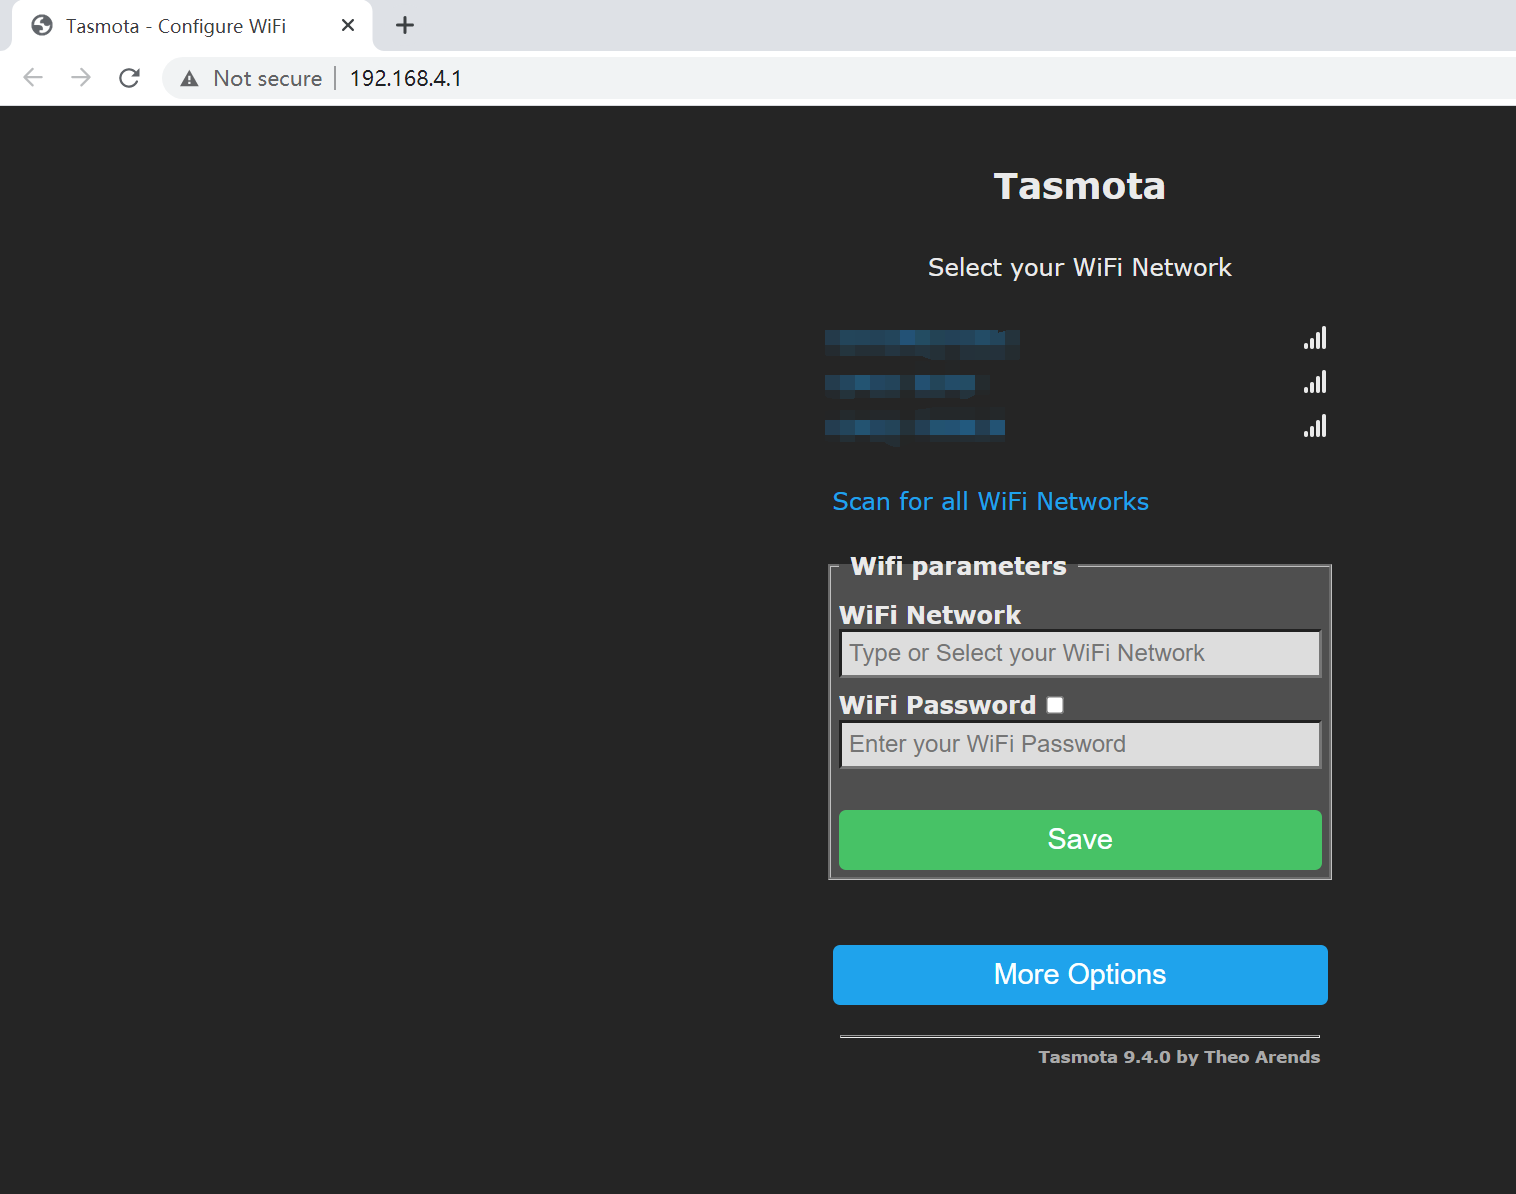
Please note ,the tasmota do not support ssdp or mDns yet, so you need to login the router to find the local ip of the device after it connected to router successfully.
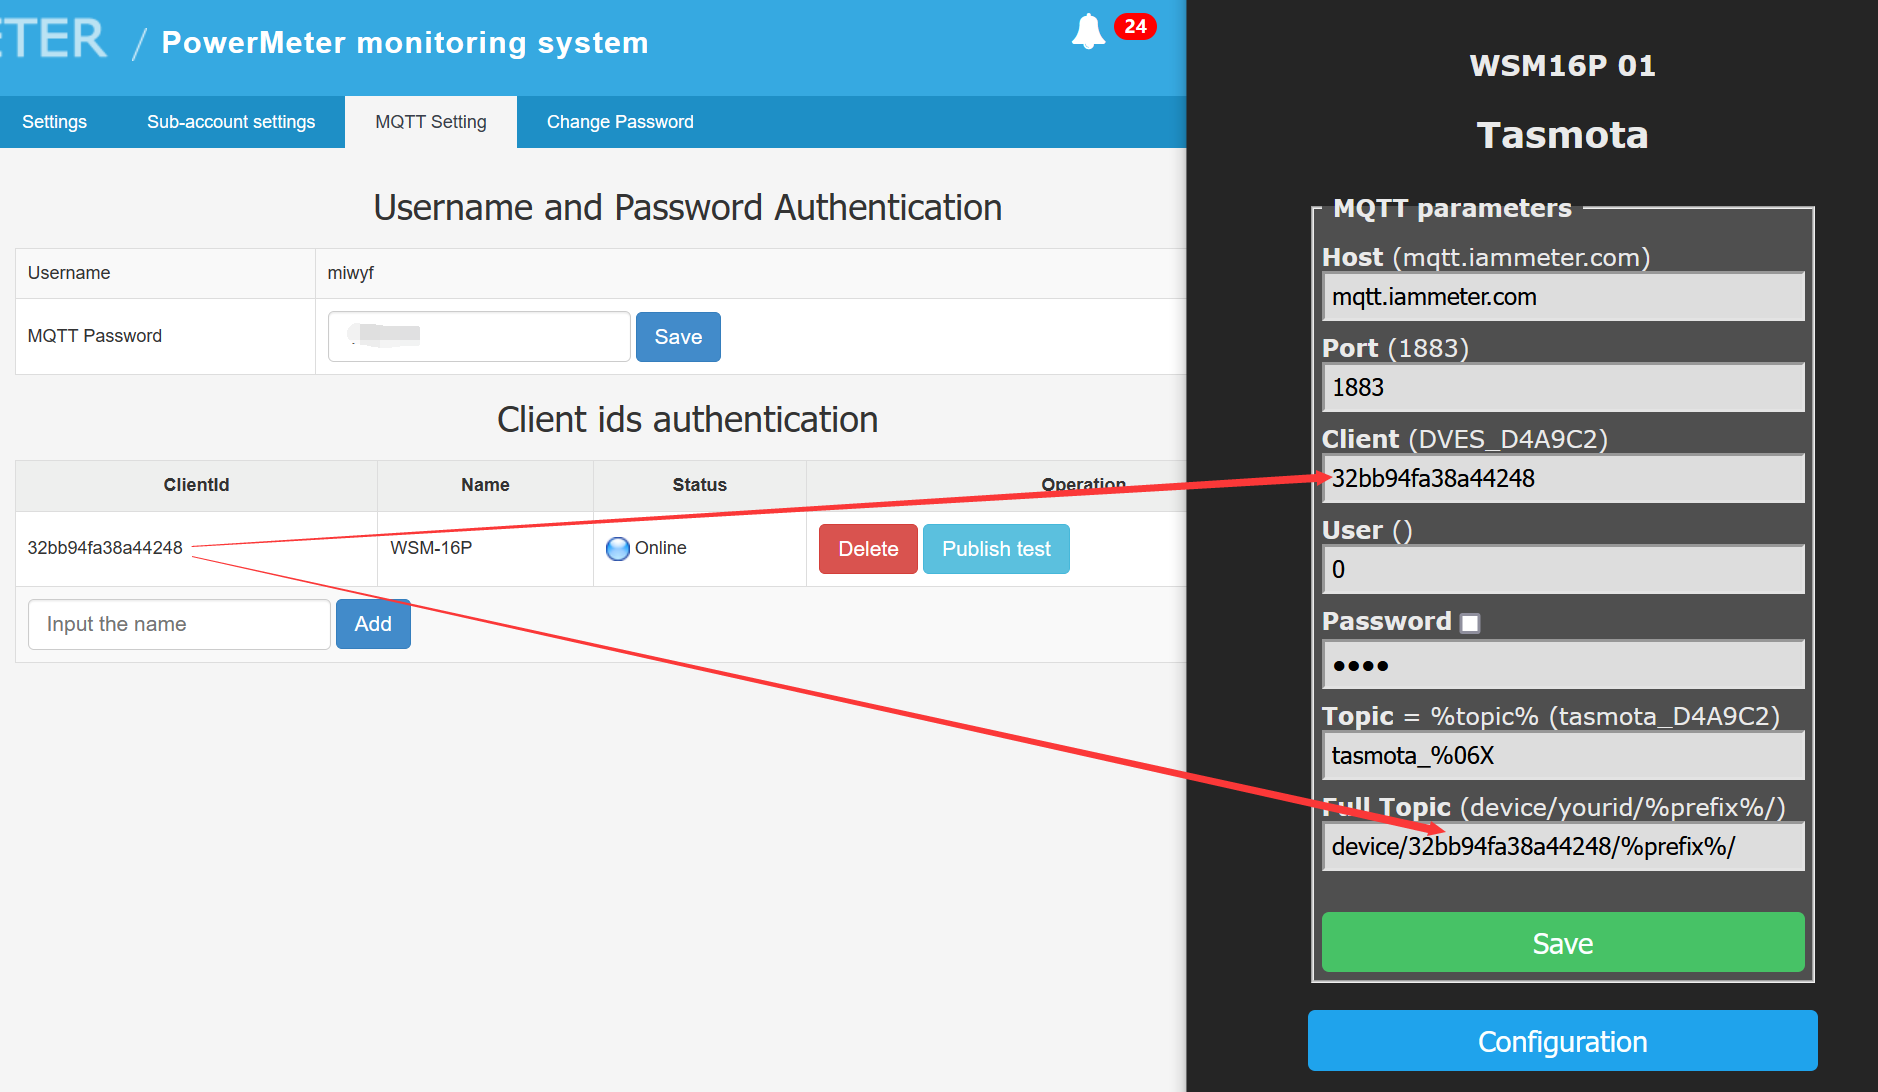
configure the MQTT
Host: mqtt.iammeter.com
Port: 1883
User: 0 (Note that it must be 0 here)
Client: the "ClientID" in MQTT Setting of IAMMETER
Full Topic: device/ClientID/%prefix%/
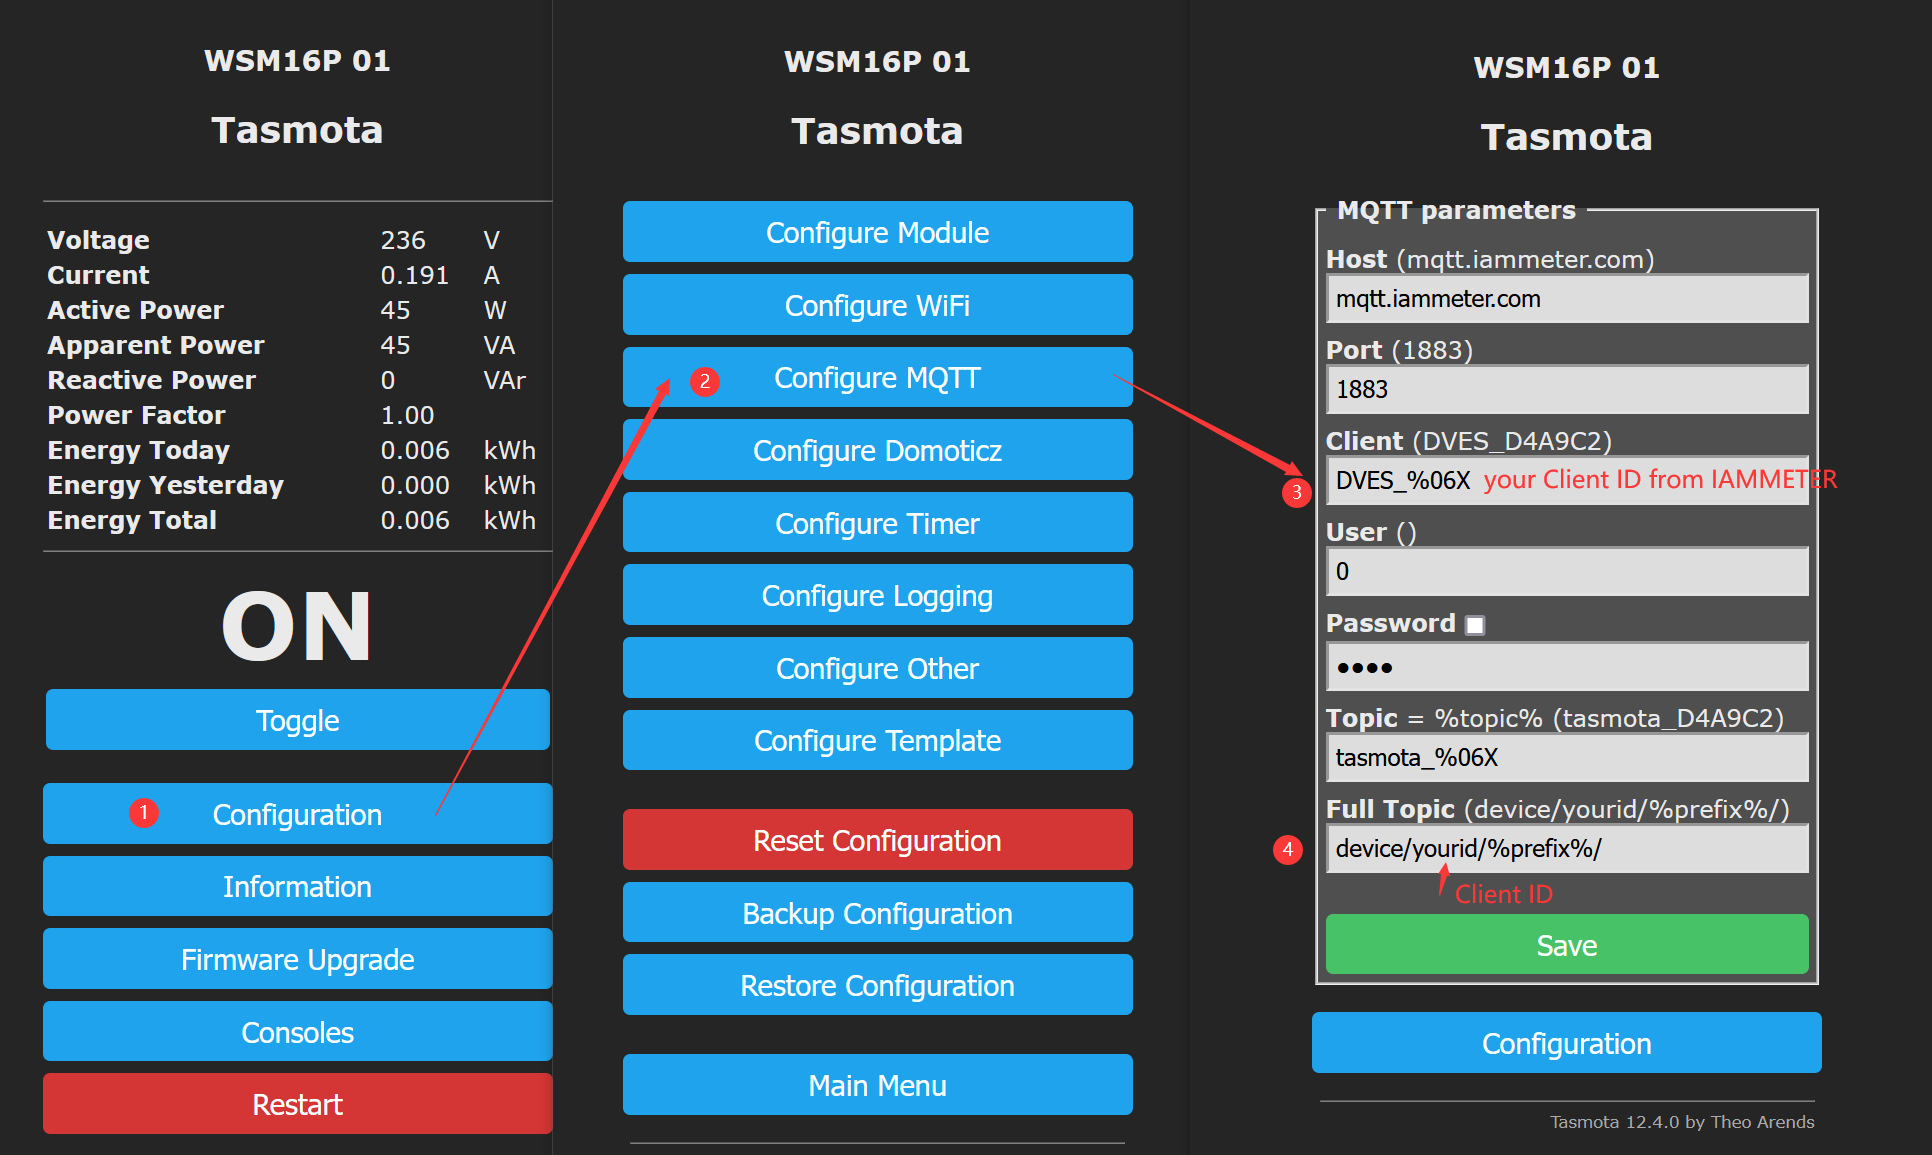
Appearance after setup
Test the Tasmota command in IAMMETER
If all the setting is OK, the status here will be "Online".
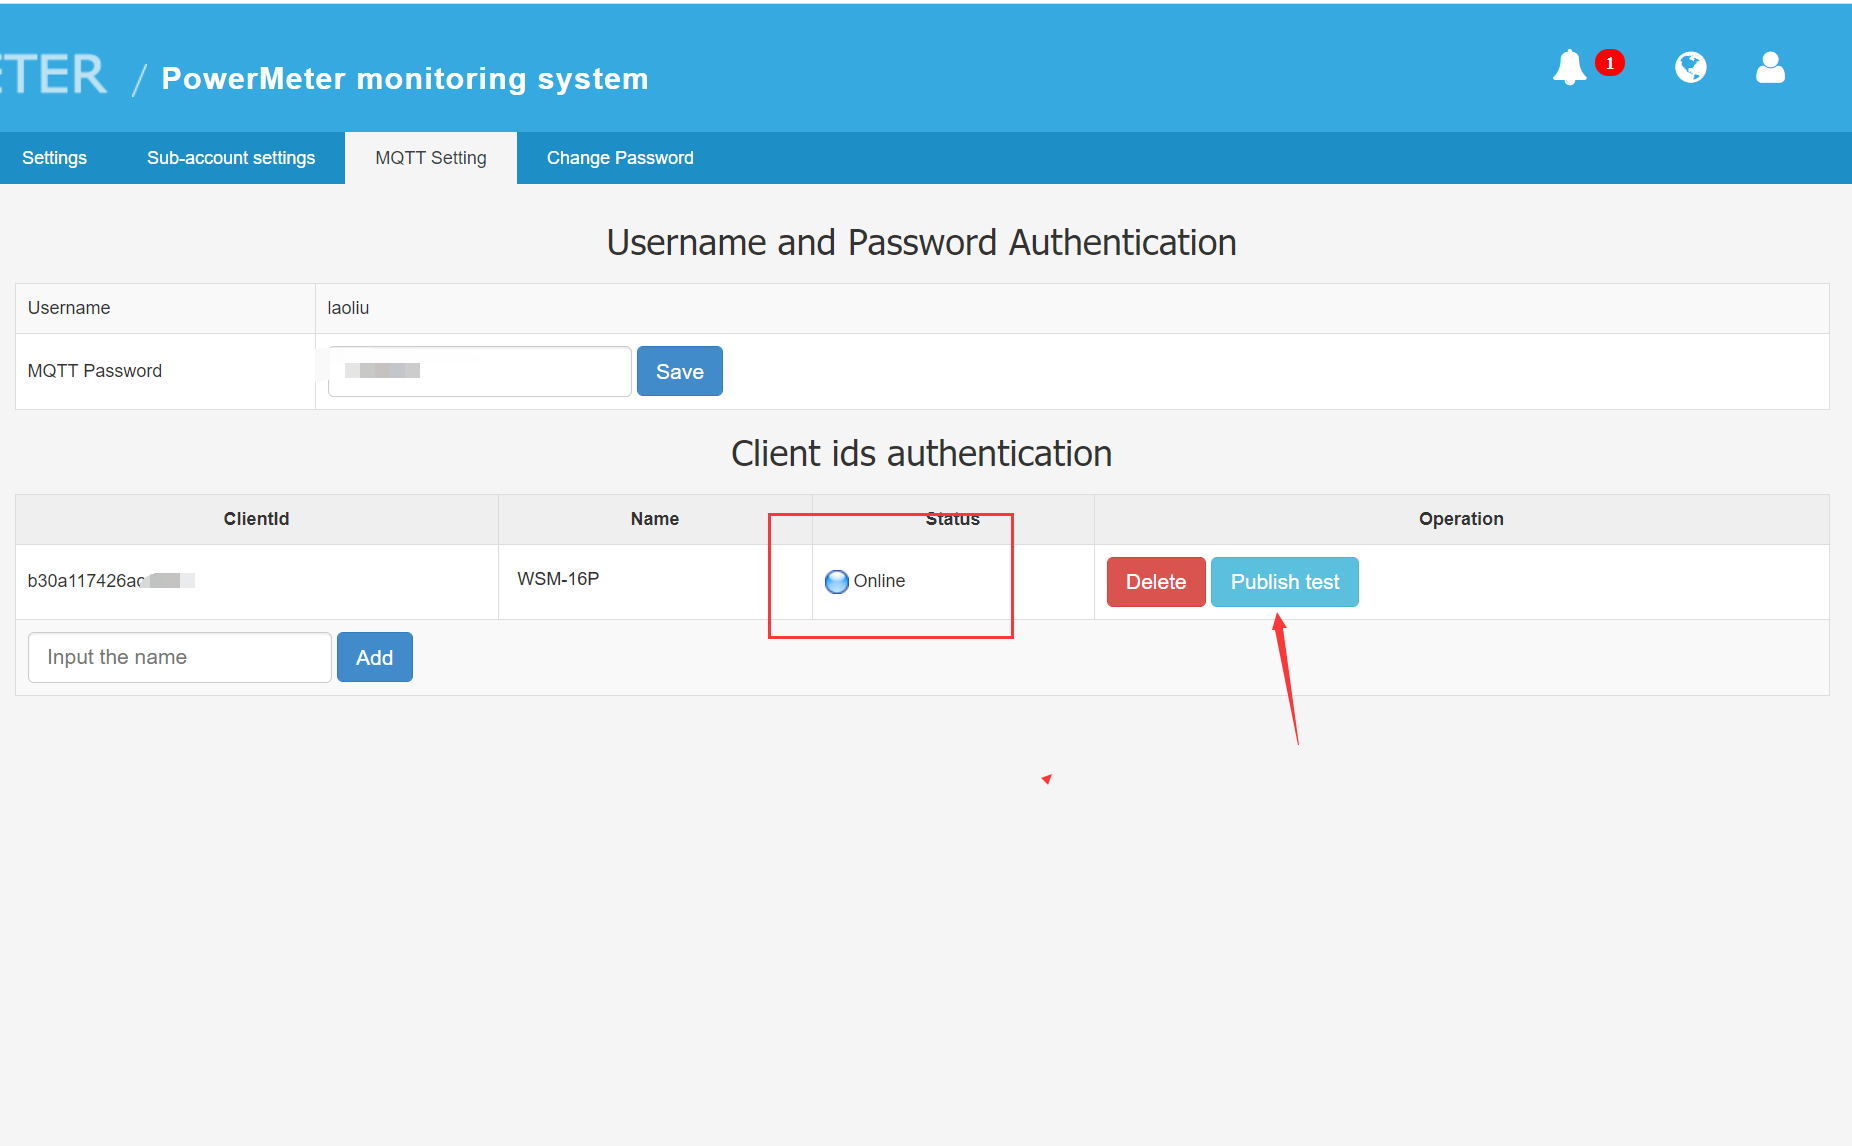
Please click "Publish test"
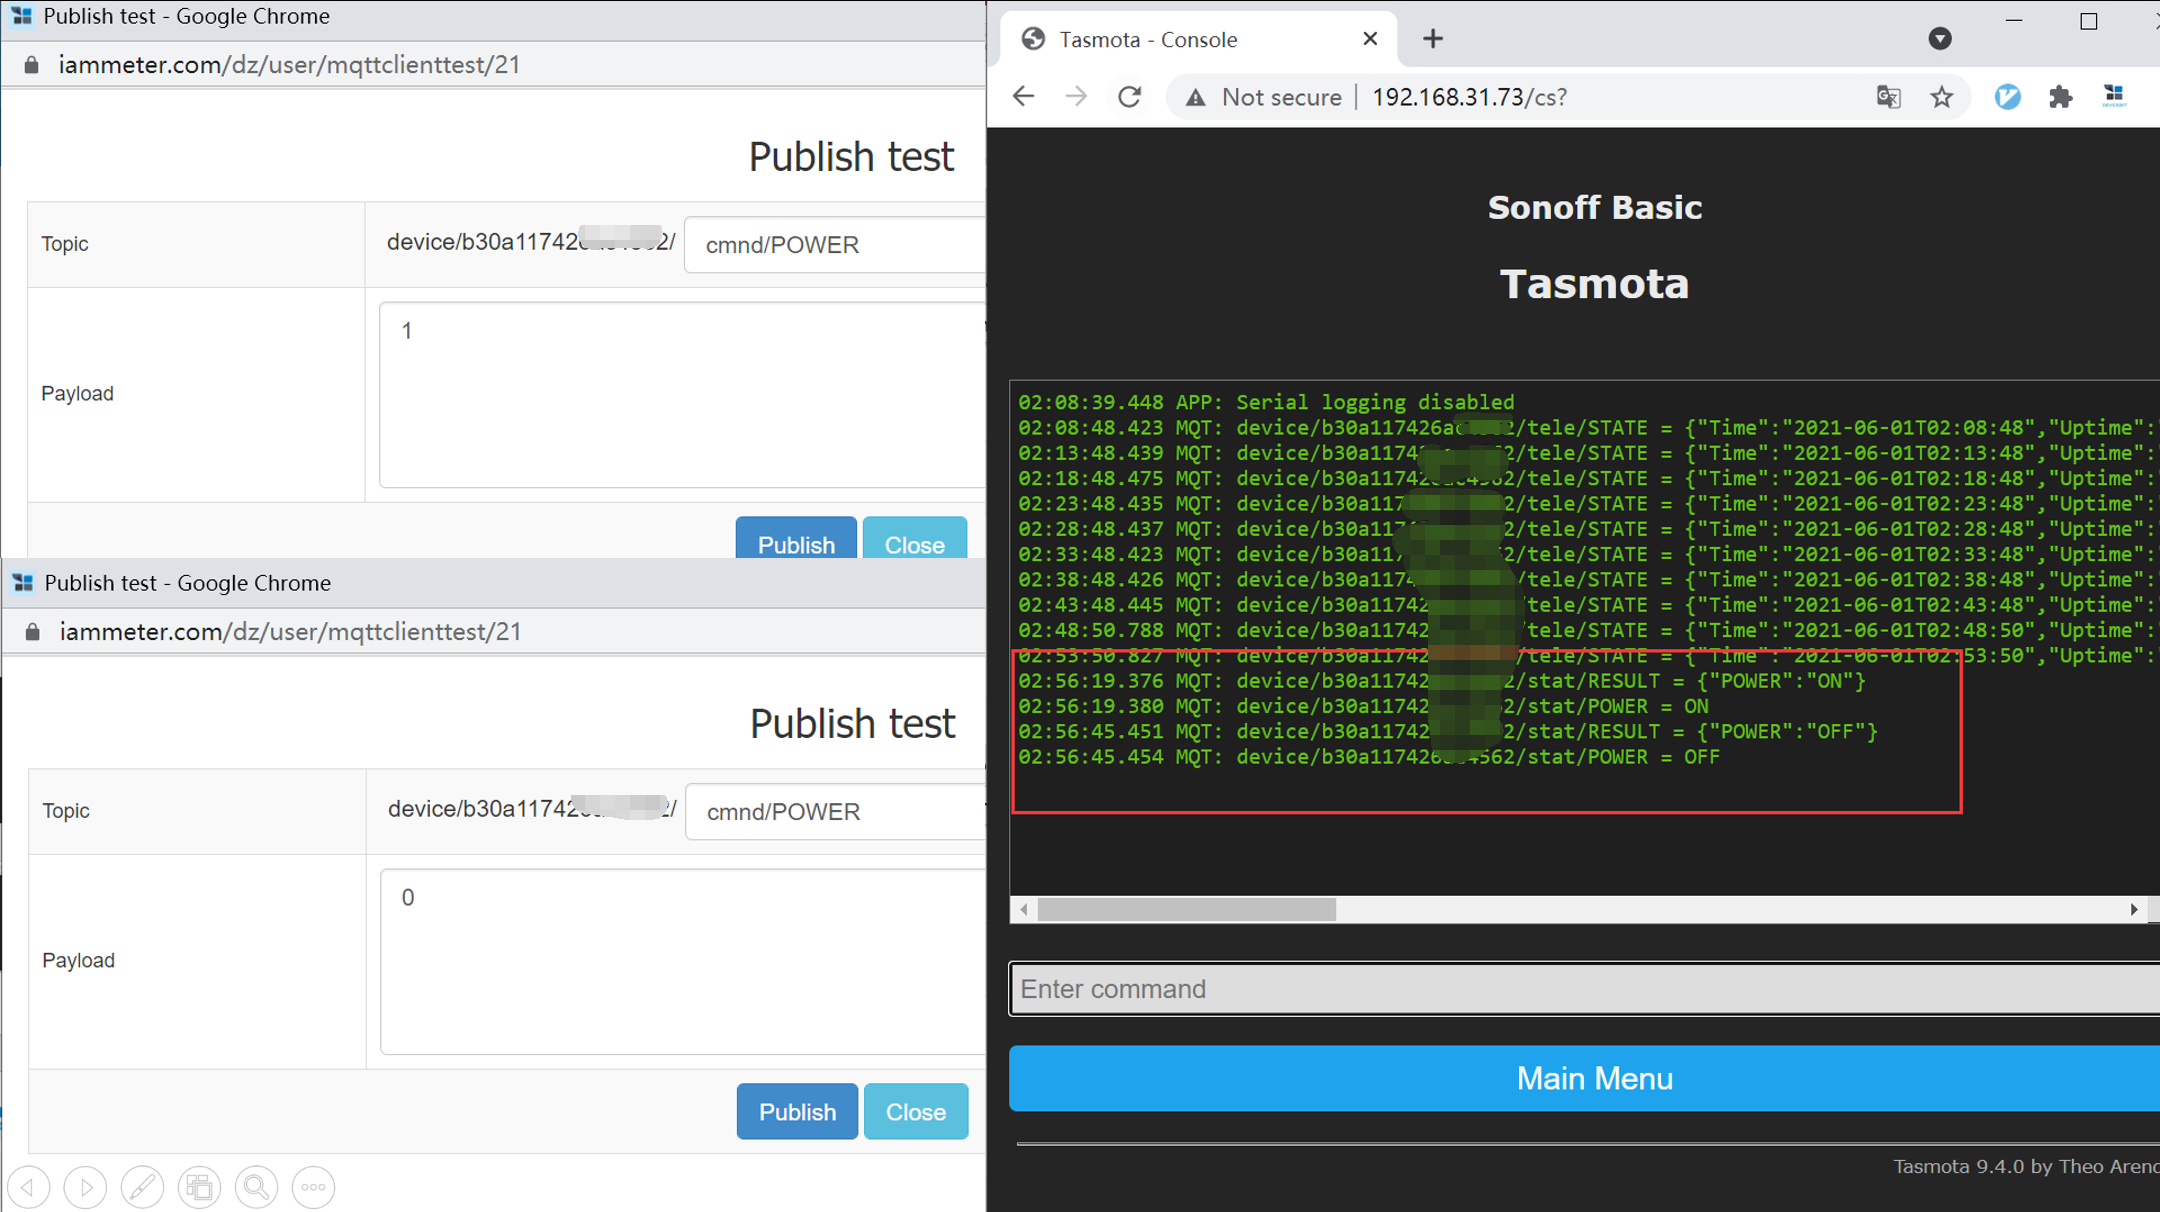
Enter “cmnd/POWER” in topic , this command format is defined by tasmota, command in tasmota
Enter "0" or "1" in payload , the switch would be turn on/off.
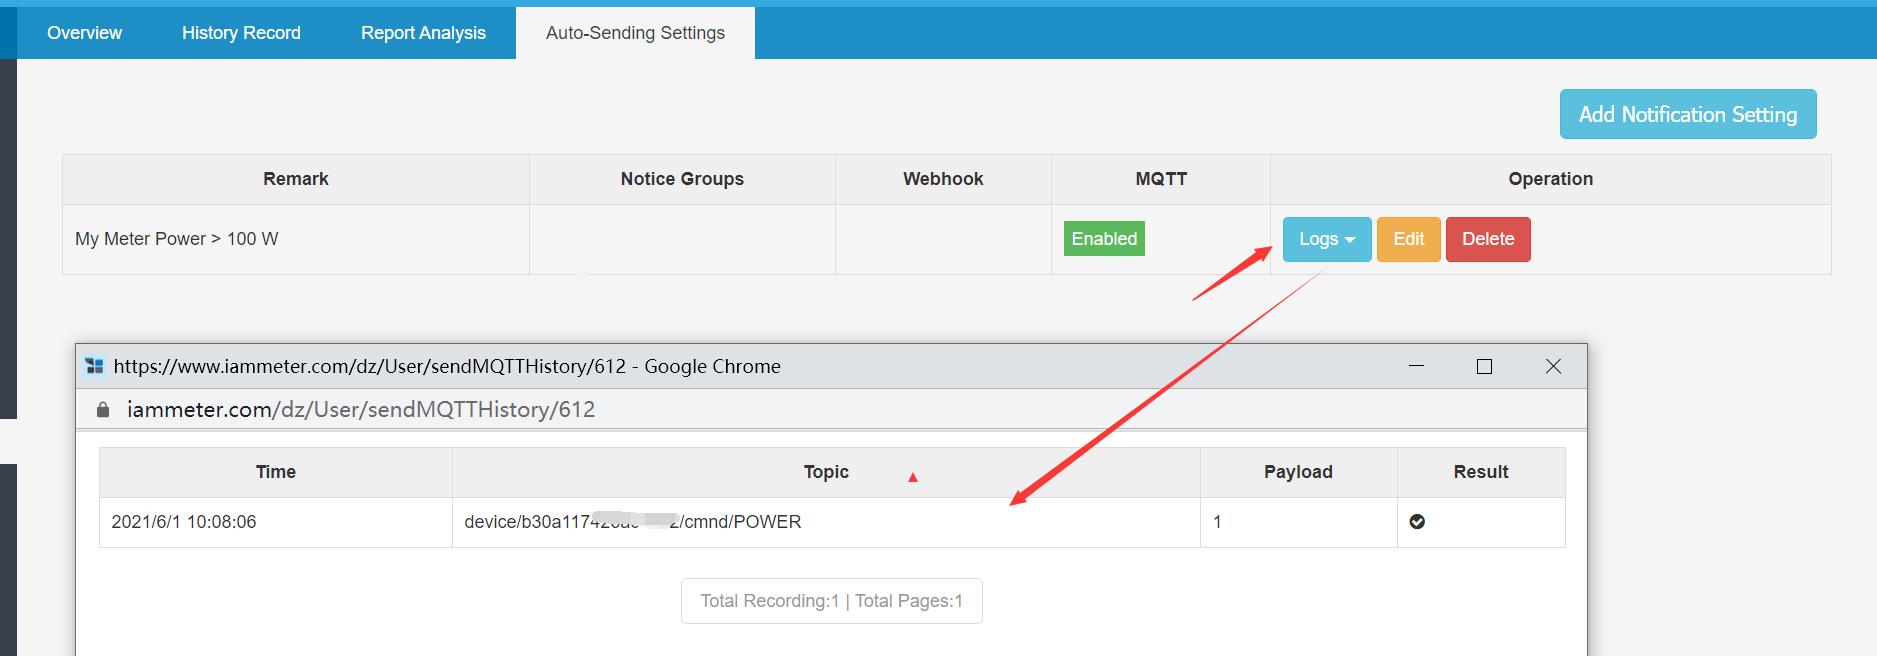
Trigger the switch on/off by IAMMETER
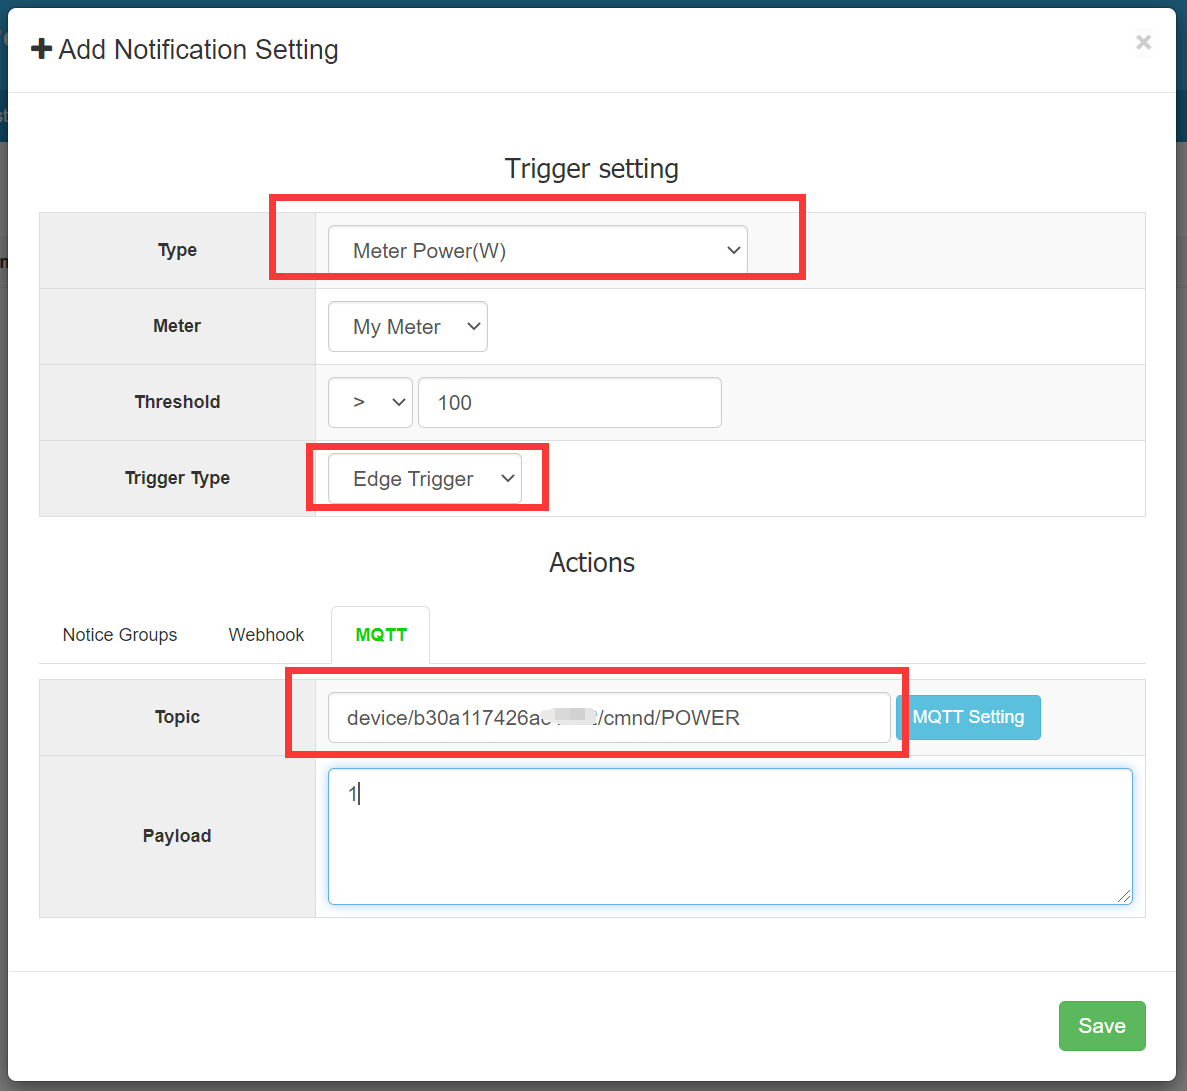
Use a simple example to show how to turn on a switch when the power is greater than 100W.

WSM-16/WSM-16P Other settings 1.Device Recovery 2.Commands 3.Please do not refresh the 1M version of tasmota.bin firmware, otherwise you will not be able to ota after flashing
